
Automations are workflows that fire on events inside Spott and run a chain of actions. They are configured by admins and apply to the whole workspace, so every teammate follows the same process automatically.

Enable and configure

  1. An admin toggles Automations on under Settings → Features.
  2. Automations are then created under Settings → Automations.
  3. Each automation is switched on or off on its own from that list, so you can pause one while you adjust it without deleting it and losing its configuration.
Automations are workspace-wide. They cannot be scoped to an individual user: once configured, an automation runs for everyone. Treat them as shared infrastructure, not personal shortcuts.
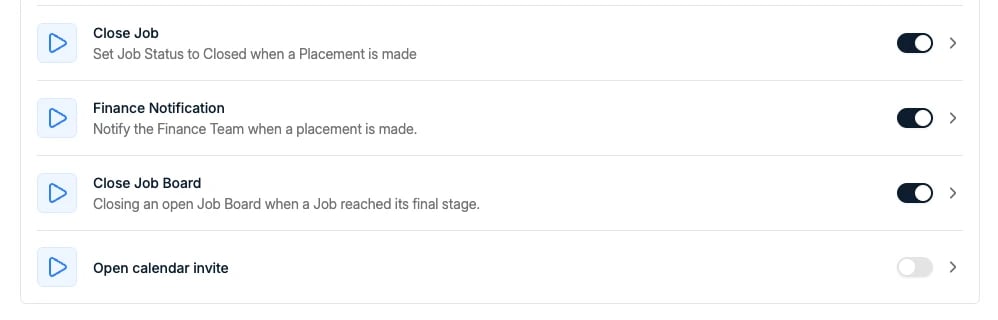
The Automations page with configured automations

How an automation is structured

Every automation has the same shape:
  • One trigger: the event that fires it. Time-based triggers let an automation run at a set moment rather than immediately.
  • One or more actions, chained in sequence.
  • Optional filters to narrow exactly when it runs, for example only for a specific placement form type.

The triggers

Add trigger groups the list into two kinds, and the grouping is the important part:
Interactive is only offered on two triggers. Only Job application moved and Speculative application moved can open a dialog. Every other trigger is background only, so if you want a prompt in front of a recruiter, it has to hang off an application moving stage.
Interactive, opens a dialog for the user: Background, runs silently: The last several are the reason automations are worth setting up at all. An expiring right-to-work document, a candidate quietly going inactive, a reference landing while you are in a meeting: none of these announce themselves, and nobody checks for them by hand. Mail the owner or open a task the moment they happen.

The actions

The action picker is filtered by the trigger you chose. An action needs a record to act on, so a contact-based trigger offers Update contact and no job actions, while a placement-based one offers Job update and Close job board postings. Pick the trigger first; the actions follow from it.
Offered on every trigger: Offered depending on the trigger’s record: Two things fall out of that, and both are easy to trip over:
  • A rejection carries a job. Candidate rejected offers Job update and Close job board postings, because a rejection happens on an application and an application belongs to a job. Candidate created does not, because at that point there is no job in play.
  • Note triggers cannot create notes. Candidate note updated offers four actions and Create note is not among them, which stops an automation from triggering itself.
Close job board postings is the one people miss. Setting a job to a closed status does not take its adverts down: the two are separate actions, so a filled role keeps collecting applicants unless you close the postings too. Chain both in the same automation and it stops being something anyone has to remember.
Placement triggers also carry the contact’s name, email and phone as variables, so a placement automation can address the client contact by name and hand your back office the number to call, without anyone opening the company record to look it up. The opportunity and client triggers put the commercial side of the desk on the same footing as the recruiting side: a new opportunity can open a qualification task, a deal moving to a late stage can mail the owner, and a new client company can be updated with the defaults your back office expects, without anyone remembering to do it.

Interactive automations

Interactive automations change what you see: they open a dialog or form at the right moment, keeping the user in the loop for actions that need judgment. Common patterns:
  • Open the placement dialog when an application moves to a Placed stage, so the fee and dates are recorded on the spot.
  • Open the email dialog when an application moves to a specific stage, for example “Mailed”.
  • Open the Task window at a point in the process where a follow-up should always be agreed, so the task is written while the context is fresh rather than later.
For rejection emails, use the native Mark rejected quick action instead of an automation. It has built-in template selection and records the rejection reasons.

Background automations

Building an automation: trigger, action, filters
Background automations run silently, with no dialog. Use them when the action is deterministic and should always happen. Common patterns:
  • Auto-send a consent email when a candidate reaches your GDPR check stage, from one of your configured domains.
  • Auto-close a job when a candidate is placed on it.
  • Auto-update a custom attribute when an application reaches a stage, keeping reporting fields accurate without manual upkeep.
Background automations can send emails to addresses outside Spott too, for example your invoicing department, and can use variables in their emails, including placement details such as fee splits, start and end dates, and contract value. In a send email action you can select one of your existing message templates instead of writing the message in the automation. The automation then follows the template, so a wording change lands everywhere the template is used and you do not maintain the same message twice. Two things decide whether a template is offered at all:
  • Templates only work on Send email from your configured domains. On the other email action the picker stays empty, which reads as a missing feature rather than the wrong action.
  • A template greys out when the trigger cannot fill its variables, with the message “contains variables that can’t be used here”. A template using a Job variable on a trigger that also covers speculative moves is the usual case, because a speculative presentation has no job. Switching the trigger to Job Application Moved gives the variables something to resolve against.
The sending address has its own requirement: it has to be registered in the Domains section of settings, not merely verified for sending. If no address is offered on a domain you know is verified, that registration is what is missing. To send as several different consultants, add several send actions inside one automation rather than building an automation per person.

Logs

Every time an automation runs, the run is logged. Each automation has its own Logs view listing the action that fired, when it executed, whether it completed, and a reason if it did not. It is the first place to look when someone asks why an email went out, or why one did not.
The log of runs for one automation
Emails sent by an automation are not logged on the candidate’s activity feed unless the recipient replies. The automation log is where you check what was sent.
One silent failure is worth knowing before you go hunting through the log: a placement-triggered automation does not fire when the placement has no start date. Where four placements set an email going and a fifth did not, the missing start date is the first thing to check.

Conditions, branching, and variables

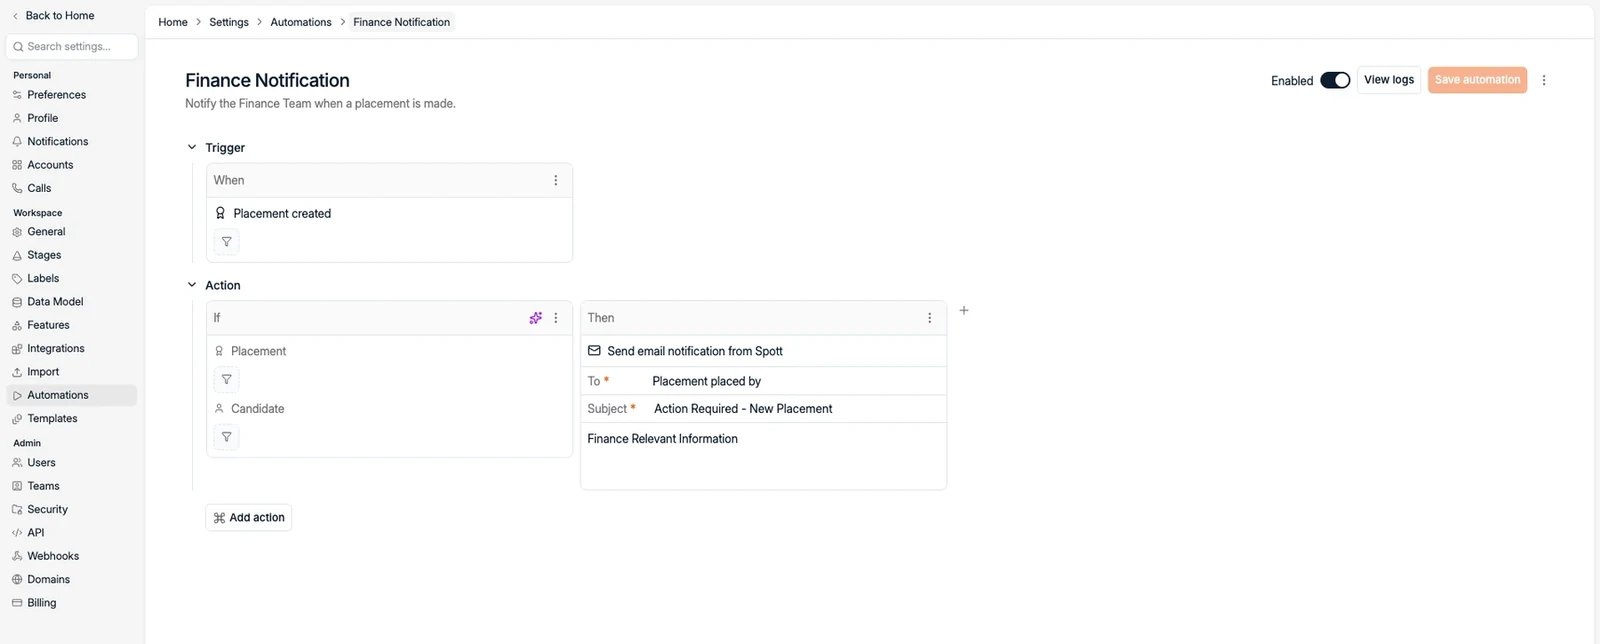
An action is not just “do this”. Each one sits in an If / Then pair, and an automation can hold several of those, so one trigger can fan out into different outcomes.

Filter the trigger

The trigger takes its own filter, which decides whether the automation runs at all. On an application-moved trigger, filtering To is Presentation means it fires only when something lands in that stage rather than on every move.

If, Then, and Else

Inside an action block, If narrows which records the action applies to, on any field of the records the trigger carries. Then is what happens. Adding an Else gives you the other branch, so one automation can do one thing when the condition holds and another when it does not. Because an automation can carry several action blocks, a common shape is one block per case. A placement admin automation might have one block for If Placement Form is Contracting and another for If Placement Form is Freelance, each sending a different email to a different back-office address.

Let AI decide

A condition does not have to be a field comparison. And let AI decide based on takes a plain sentence, such as “Candidate has at least 5 years of experience in React”, and judges each record against it, with a selectable strictness such as Balanced criteria.
An AI condition is a judgement, not a lookup, so it will not always agree with itself on borderline records. Use it where being roughly right is useful, such as routing for a human to review, and keep field comparisons for anything that must be exact.

Variables

Text fields in an action accept variables from the records in scope, written as { Candidate > First Name }. They work in an email body, and in a note’s title and body. A subject line takes plain text only, so an email announcing an interview cannot carry the company name in its subject:
Custom fields are available too, including the fields on a placement form, which is what makes it possible to mail a back office everything they need about a placement without anyone retyping it. Recipients can be dynamic as well. Rather than a fixed address, To, Cc and Bcc accept a person from the record, such as Placement placed by, so the recruiter who made the placement is copied automatically.

Relative dates on tasks

A Create task action sets its due date relative to a date on the record, not as a fixed day. Start date of the placement, 1 month before gives you a check-in that moves whenever the start date moves.

Examples

Four shapes that cover most of what automations get used for.
Trigger: Placement created. Then: Job update to a closed status, followed by Close job board postings. Walked through step by step below.
Trigger: Placement created. Then: Create task, assigned to Placement placed by, due 1 month before the start date of the placement, titled something like “Check in with candidate, due to start in 1 month”.The point is the relative date. Set a fixed date and it is wrong the moment a start date moves; set it relative and the reminder follows the placement.
Trigger: Placement created. Then one action block per placement form: If Placement Form is Contracting sends one email, If Placement Form is Freelance sends another, each to the right address with finance on Cc and Placement placed by on Bcc.The body is built from variables, including the custom fields on the placement form, so the back office receives name, contact details and address without anyone rekeying them.
Trigger: Candidate created. If the candidate’s source is one of a few known sources, Then Update candidate to set the fields that are always the same for that source: employment type, contract type, work mode, and any custom attributes.Useful when candidates arrive from a channel where you already know most of the answers.

Example: close a job when someone is placed

A worked example of the shape above. When a recruiter records a placement, the job it was filled from should stop being open: it keeps appearing in pipelines, dashboards and job board feeds until someone remembers to close it by hand, and nobody ever does it the same day.
1

Create the automation

Go to Settings → Automations and add a new automation. Give it a name your team will recognise in the list later, for example Close job on placement.
2

Pick the trigger

Choose the placement created trigger. It fires once the placement record exists, which means the fee details have already been filled in, so the job is genuinely finished rather than merely promised.
3

Add the Job update action

Add Job update and set the job’s status to your closed or filled status. The status names come from the ones configured under Settings → Stages.
4

Add Close job board postings

Chain Close job board postings after it. Without this the job reads as closed inside Spott while its adverts stay live and keep collecting applicants.
5

Narrow it with a filter, if you need to

If only some placement types should close the job, add a filter on the placement form type. A contingent hire usually closes the role; a staffing placement often does not, because the job may still be taking more contractors.
6

Switch it on and watch the first run

Enable the automation, then record a placement and open its Logs. The run should show the action firing and completing. If it did not, the log gives the reason.
Pair this with the interactive open the placement dialog automation described above. One prompts the recruiter to record the placement at the moment they move the candidate, the other closes the job once they have. Together the job closes itself the day it is filled, with no one chasing anybody.