

You can quickly navigate to the Contacts page with G then O. See all
keyboard shortcuts.
From the left-hand navigation bar, select Contacts to open your full contact list.
Any filtering and sorting you do here can be saved as a view, so you come back to the
same list tomorrow. See using views.
2. Search with keywords
Use the search bar at the top of the Contacts view to find contacts by text in their
profile fields, such as their name, company, or role.
The search bar supports full Boolean queries (AND, OR, NOT). Spott switches to
Boolean mode automatically when your query contains double quotes.
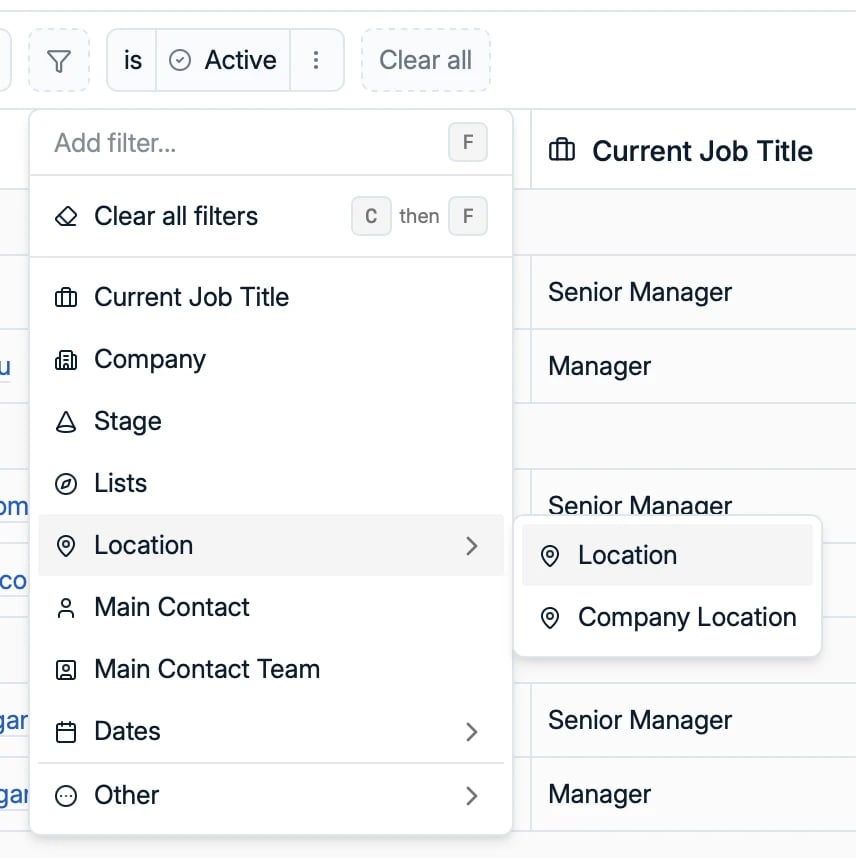
Open the Filters menu above the table. Filters include:
- Current Job Title, Company, and Stage
- Lists: contacts on a specific list
- Location: the contact’s or the company’s location, by named area, by a radius
around a point, or by ZIP or postal
code
- Main Contact and Main Contact Team: who owns the relationship
- Dates: last interaction, last activity, next task due, and created at. Date
filters take relative values such as
“last 30 days”, so a saved view keeps meaning the same thing tomorrow.
- Email and Phone number: filter for contacts that have one or that are missing
one, the same way you can on candidates. Filtering on an empty email is the quickest
way to find who needs enrichment before a
campaign goes out. Phone numbers also filter on area code, which is the practical
way to slice a list by where people actually are when the location field is thin.
- More fields under Other, such as first name, last name, last interaction with,
active, department, and LinkedIn URL
- Any custom fields your workspace has configured
Combine multiple filters to narrow your results to the exact set of contacts you need.
4. Sort your results
Arrange your contact list by the field of your choice. Sorting options include:
- First Name and Last Name
- Company Name
- Last Interaction Date and Last Activity Date
- Next Task Due
- Start Date and End Date
- Created At
Sorting can be applied together with filters to quickly focus on the most relevant
contacts.
Filters you apply appear as chips at the top of the list. Remove any filter by
clicking the “X” on its chip to broaden your results again.
You do not have to be on the Contacts table to act on contacts. Select rows on a
Companies, Jobs, or Opportunities table and the action bar at the bottom
reaches every contact linked to the records you selected.
Under Communication Actions you can then, for the whole selection at once:
- Send an email
- Send an SMS or a WhatsApp Business message, on a connected
number
- Present a candidate to them
- Enroll them in a campaign
Send an email reaches each contact on their work address first, then their personal
one, taking the address marked primary where there is more than one, so a contact whose
address sits only in the personal field is still reached. See
which address a recipient is reached on
for the full order. A campaign lets you narrow that with Deliver to; a bulk email does
not.
This is the fast path for the things that used to mean opening records one at a time:
mailing the hiring managers on twelve open jobs, or enrolling every contact at an
account into a campaign.
Check what the selection actually covers before you send. Selecting three jobs at one
company can resolve to the same contact more than once, and a contact linked to
several selected records should only hear from you once.