

Why domain verification matters
Email providers use authentication protocols to confirm that a sender is legitimate. In short: verified domains reach inboxes, unverified ones risk being flagged as spam.Verify your domain
- Go to Settings → Domains.
- Click Add Domain.
- Enter your domain name.
- Spott generates three DNS records with your own values: a TXT record (SPF), a DKIM record, and a CNAME record. Copy those values and paste them into your domain registrar’s DNS settings, or send them to the partner who manages your domain.
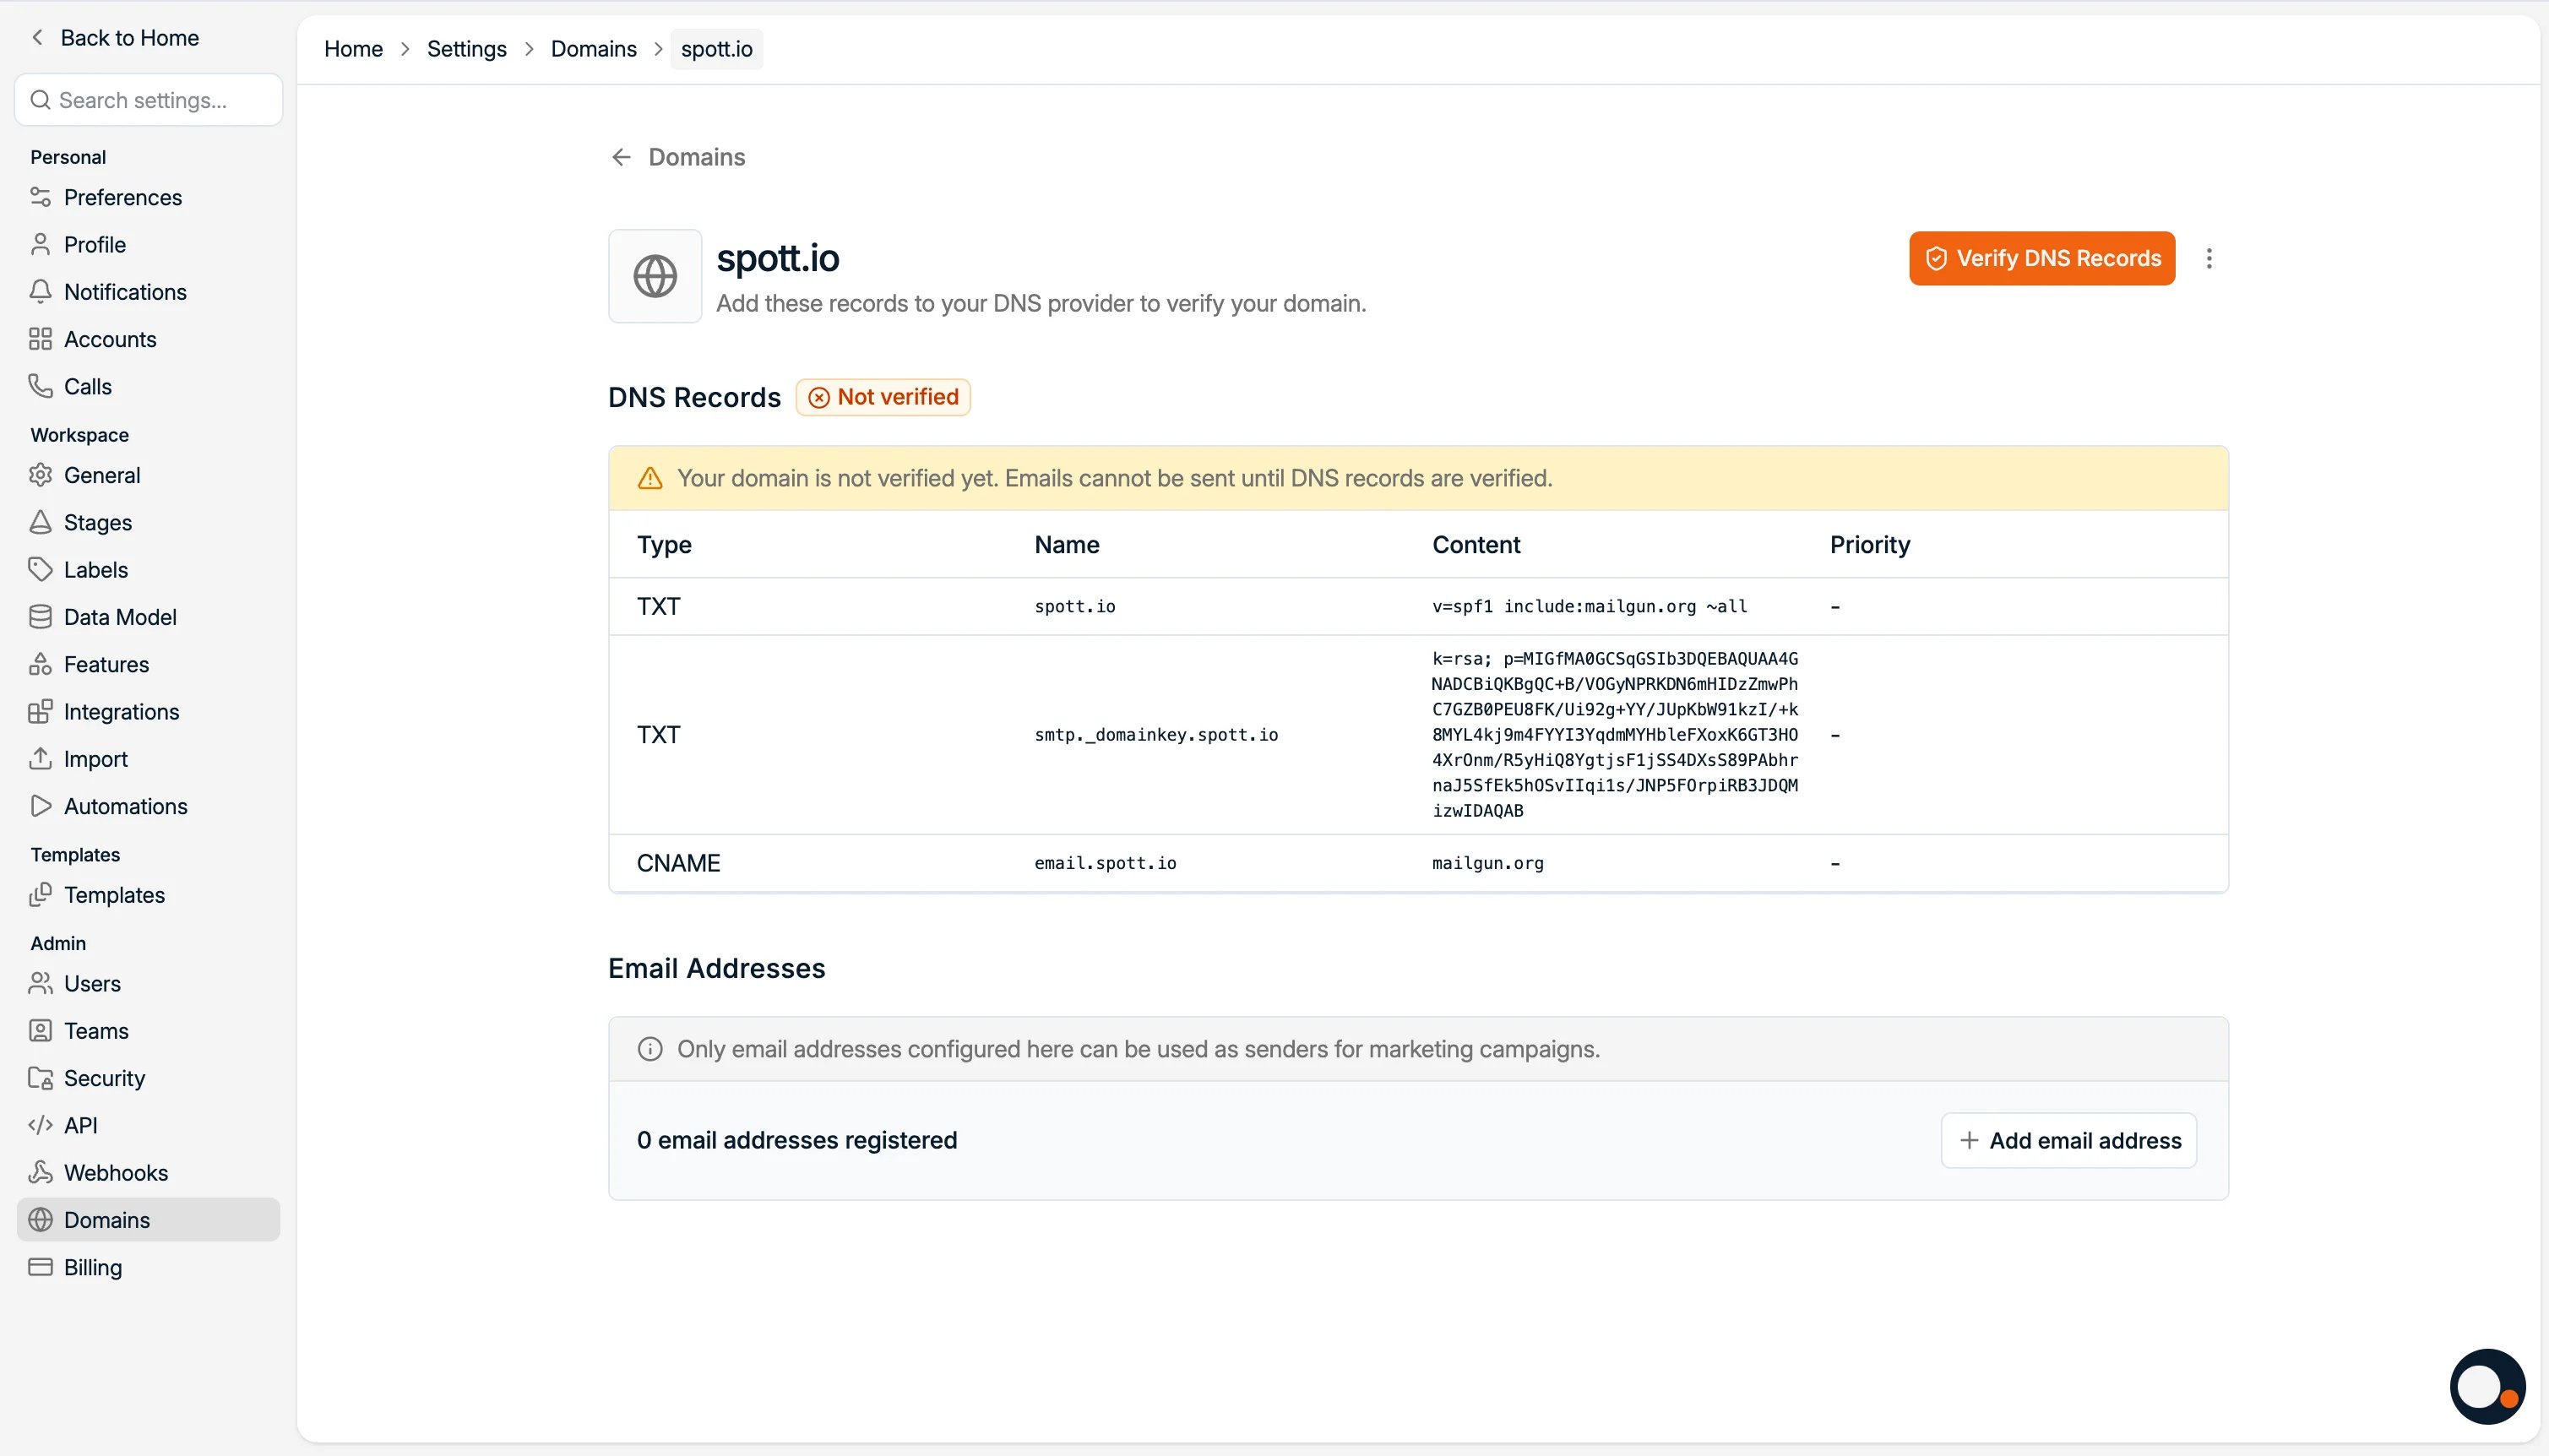
- Wait for the records to go live. DNS changes are not instant; they can take anywhere from a few minutes up to 24 hours to propagate. If you click Verify DNS Records too soon, it may fail simply because the records have not spread yet, not because anything is wrong. You can confirm they are live with a free lookup tool such as DNS Checker: enter the host you added, choose the matching record type, and check that the value returned matches what Spott gave you.
- Back in Spott, click Verify DNS Records.
- Register email addresses under the domain. Only email addresses configured here can be used as senders for marketing campaigns. Note that they are shared across your workspace.
We also recommend publishing a DMARC record for the domain. Major inbox
providers like Gmail and Yahoo now require it from high-volume senders, and it
protects your domain from spoofing while improving deliverability.
Troubleshooting: common DNS questions
What do I put in the Host/Name field?
Most DNS providers automatically append your domain to whatever you type in the Name/Host field, because every record in that zone already belongs to your domain. So you only enter the part in front of your domain, not the full address:- For a record on
email.yourcompany.com, enter justemail - For a record on
abc._domainkey.yourcompany.com, enter justabc._domainkey - For a record on your root domain (
yourcompany.com), enter@; some providers want the field left blank instead
email.yourcompany.com instead, many providers turn it into
email.yourcompany.com.yourcompany.com, and the record will not verify.
Will this affect our normal, day-to-day email?
Almost never. The records you are adding only govern the domain or subdomain you are verifying for marketing sending. Your everyday mailbox uses its own separate records and is not touched. The one exception is the SPF record; see below.We already have an SPF record. Can we add a second one?
No. A domain can only have one SPF record (onev=spf1… entry). If your domain
already has SPF for your existing provider (Microsoft 365, Google Workspace, and so
on), do not add a second one. Instead, merge the new value into the existing
record, for example: