

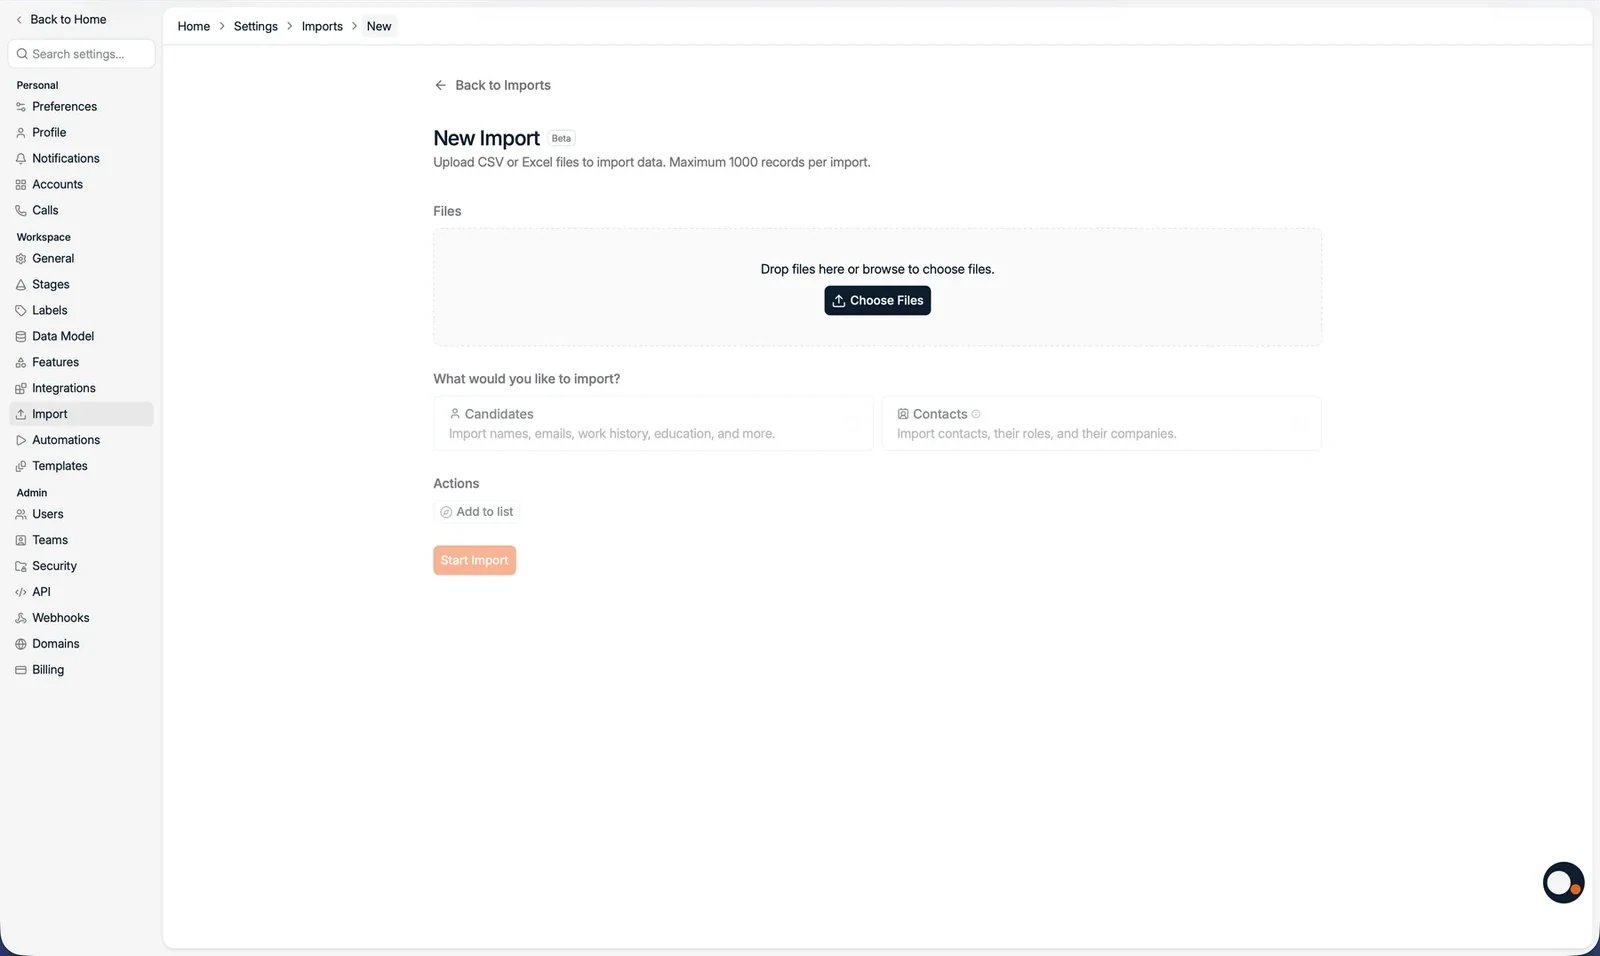
Start an import
1
Open the Candidates page
Navigate to Candidates from the main sidebar.
2
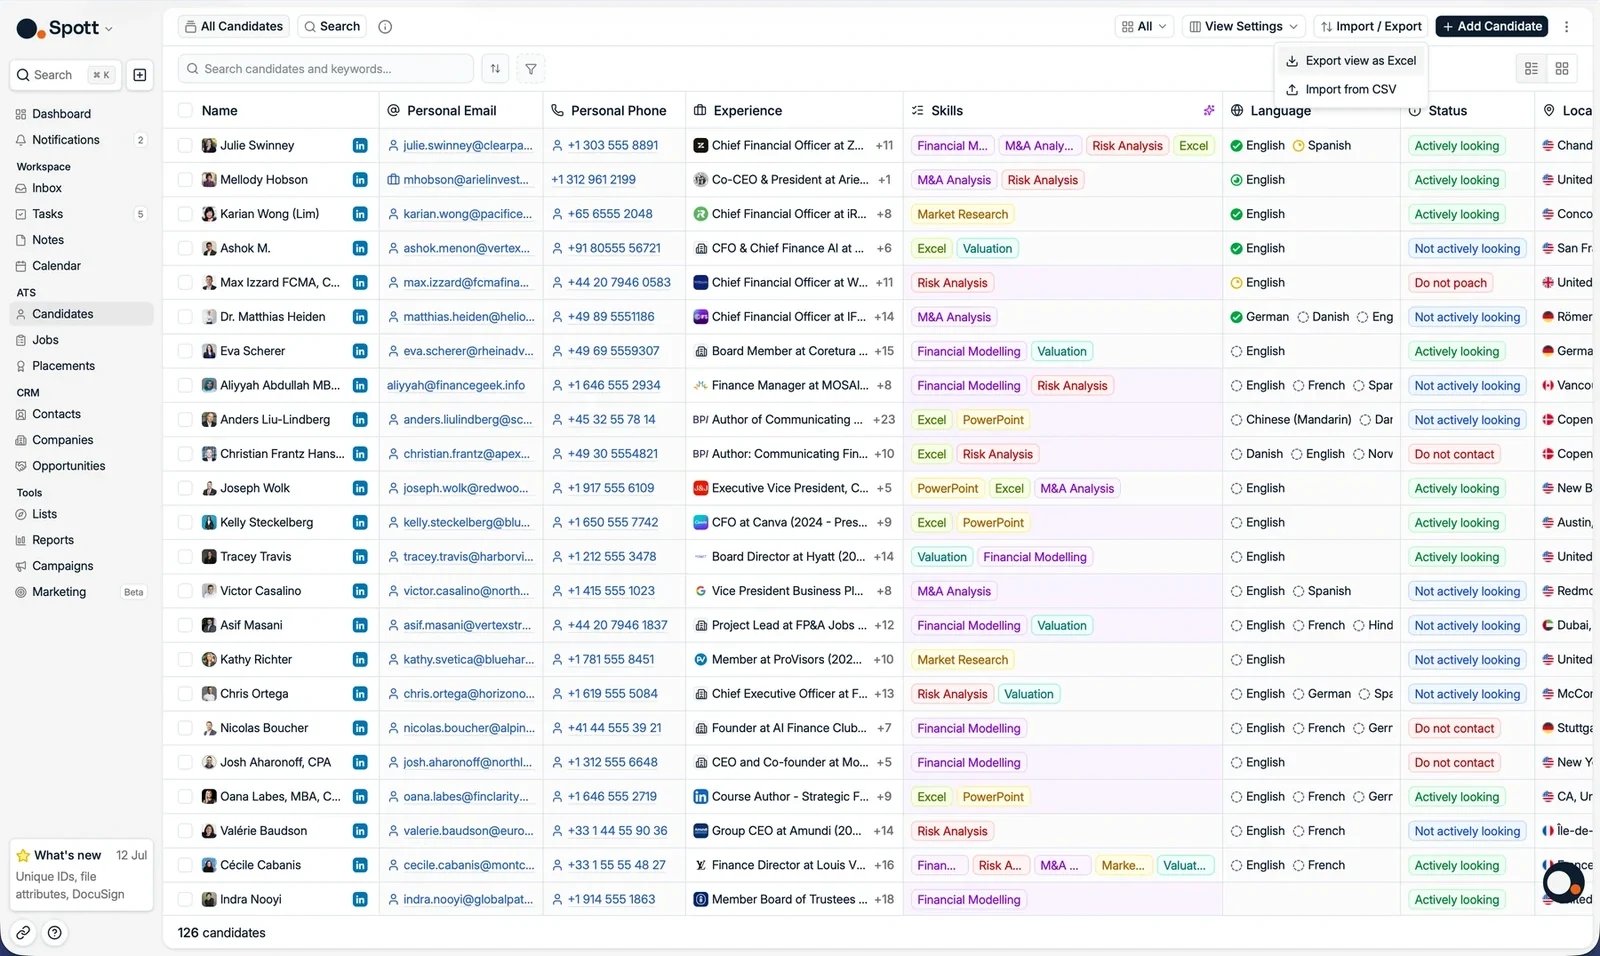
Open Import / Export
In the top right corner, click Import / Export, then select Import from CSV.
This opens the import wizard. Admins can also reach it from Settings.
3
Upload your file
Select the CSV or Excel file from your computer. Spott analyzes the file and
prepares it for import.
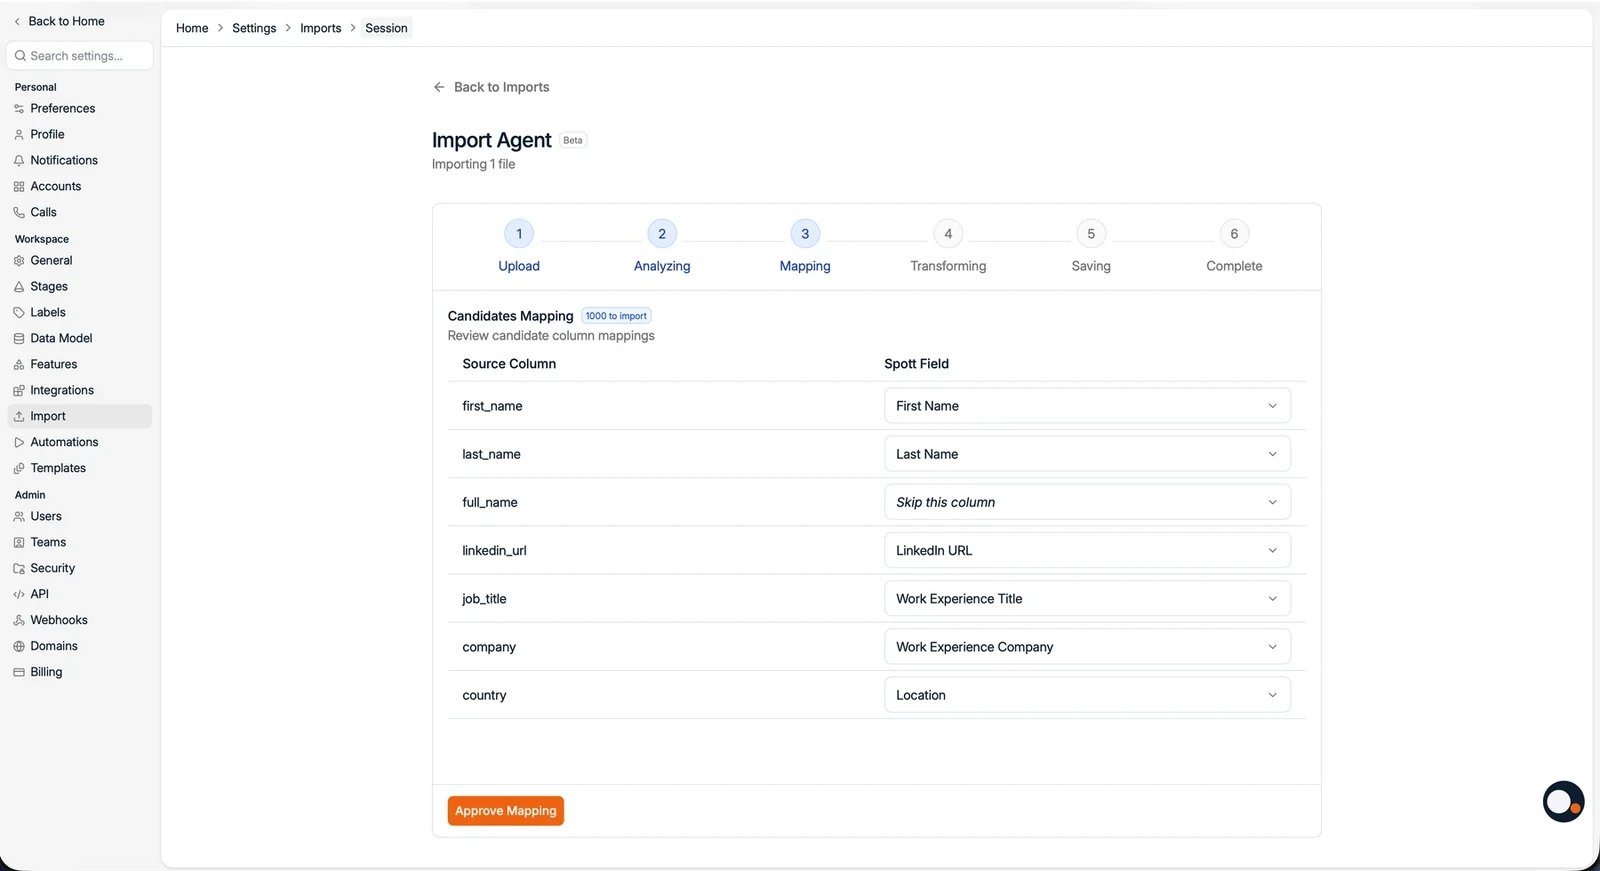
Map columns to candidate attributes
Spott reads your column names and sample data and suggests a mapping for each column automatically. Review the suggestions and adjust where needed. For each column you can:- Accept the suggested Spott field
- Pick a different Spott field, including custom fields your workspace has configured
- Set a fixed value for all imported records
- Skip the column so it is not imported
Complete the import
Before you start, choose whether the rows are Candidates or Contacts, and optionally add them all to a List or a Job in the same step. Then confirm to start the import. Spott creates a candidate record for every row. After the import completes, your candidates appear on the Candidates page and can be searched, filtered, exported, and added to Lists.Tips for successful imports
- Include at least one unique identifier per candidate. Email or LinkedIn URL is recommended, so Spott can deduplicate against existing records.
- Map first name and last name for clean candidate records.
- Remove empty rows before uploading.
- Use UTF-8 encoding for CSV files for best compatibility.
- Double check email and phone mappings to avoid data landing in the wrong field.
- Importing a CSV into a job adds the candidates as applications, but cannot set their application status or add comments. Set those in the pipeline after the import.
A LinkedIn URL column imports the link to the candidate’s profile, not the profile
content itself. To pull in full LinkedIn profile data, use the
Chrome extension
or enrichment after the import.