

Overview
RingCentral is a VoIP provider. Connecting it to Spott lets you call any Candidate or Contact with Click-to-Dial, so you can launch calls without switching tools. All call data is synced back to Spott automatically.How it works
Once RingCentral is connected:- Click the phone icon on any Candidate or Contact record to start a call.
- The call is initiated through RingCentral with the phone number prefilled automatically.
- Call notes and recordings are synced back to Spott automatically, once recording is enabled in RingCentral (see Enable call recording below; it is off by default in RingCentral).
Enable RingCentral for your workspace
Go to Settings → Integrations → RingCentral and create a JWT credential.- Click Create JWT Credential to open the RingCentral Developer Console. The link automatically scopes the credential to Spott’s application.
- Under Who is permitted to use this credential?, select Only specific apps of my choice and make sure Spott’s Client ID is filled in.
- Copy the generated JWT credential, paste it into the field on this page, then click Connect.
Only administrators can configure the RingCentral integration. If you don’t see this option, contact your workspace admin.
Select your RingCentral number
Navigate to Settings → Calls and find the RingCentral section.- Choose your RingCentral number from the available list.
- This number is essential for receiving incoming calls and linking call notes to the correct caller.
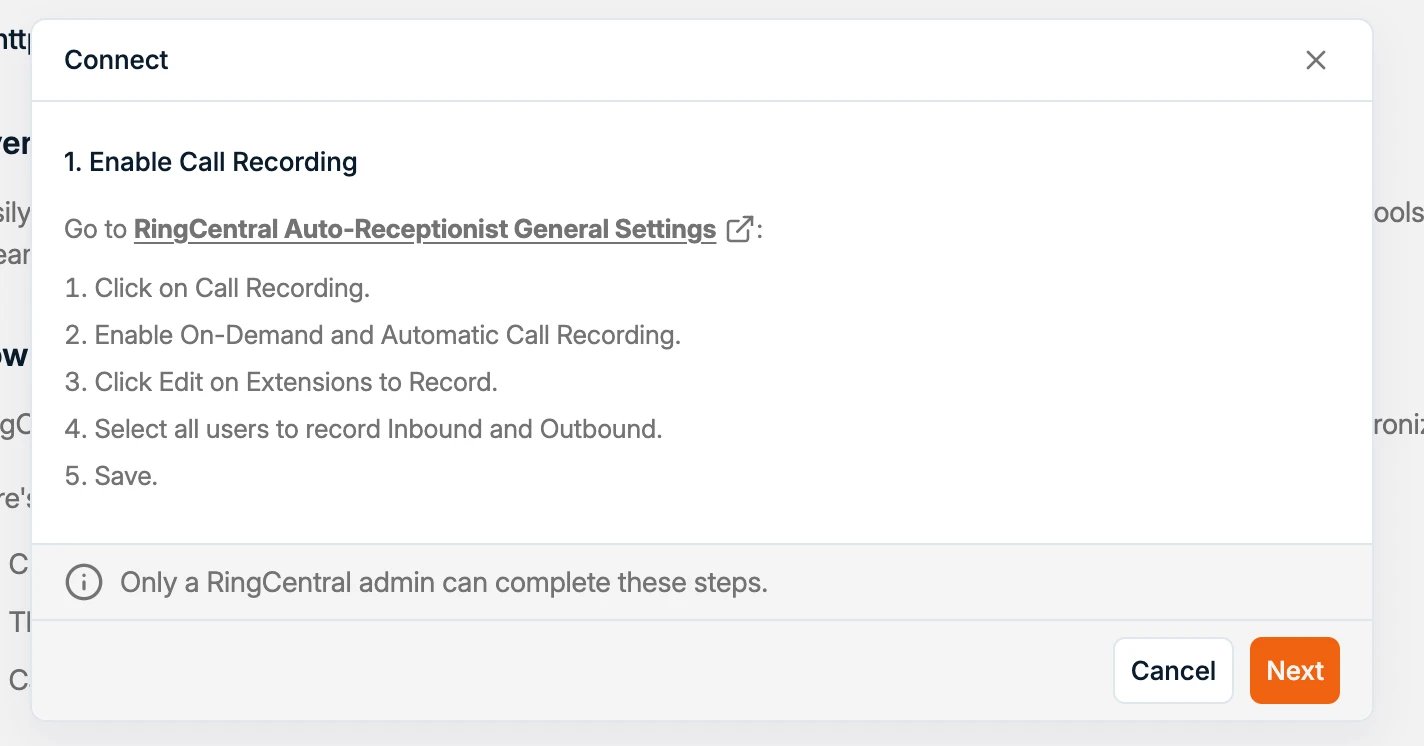
Enable call recording (optional)
To have call recordings synced to Spott, enable recording in the RingCentral Admin Portal. There are two options:- On-demand recording: users can record calls manually at any time with a button press. A notification plays when recording starts and stops. Recordings are saved for 90 days.
- Automatic recording: recording starts at the beginning of each call and stops when the call ends. It is turned off by default.
- Sign in to the RingCentral Admin Portal.
- Go to Phone System → Auto-Receptionist → General Settings → Call Recording.
- Toggle on On-demand or Automatic call recording.
- Click Save.
Automatic recording and recording sync require a RingCentral plan that includes them
(the Ultra plan at the time of writing); check RingCentral’s current plan comparison.