

1. Sign in to your account
Visit app.gospott.com and sign in using your credentials.2. Configure your personal settings
Click the Spott logo in the top left corner to open Settings. From Settings, start with your personal settings.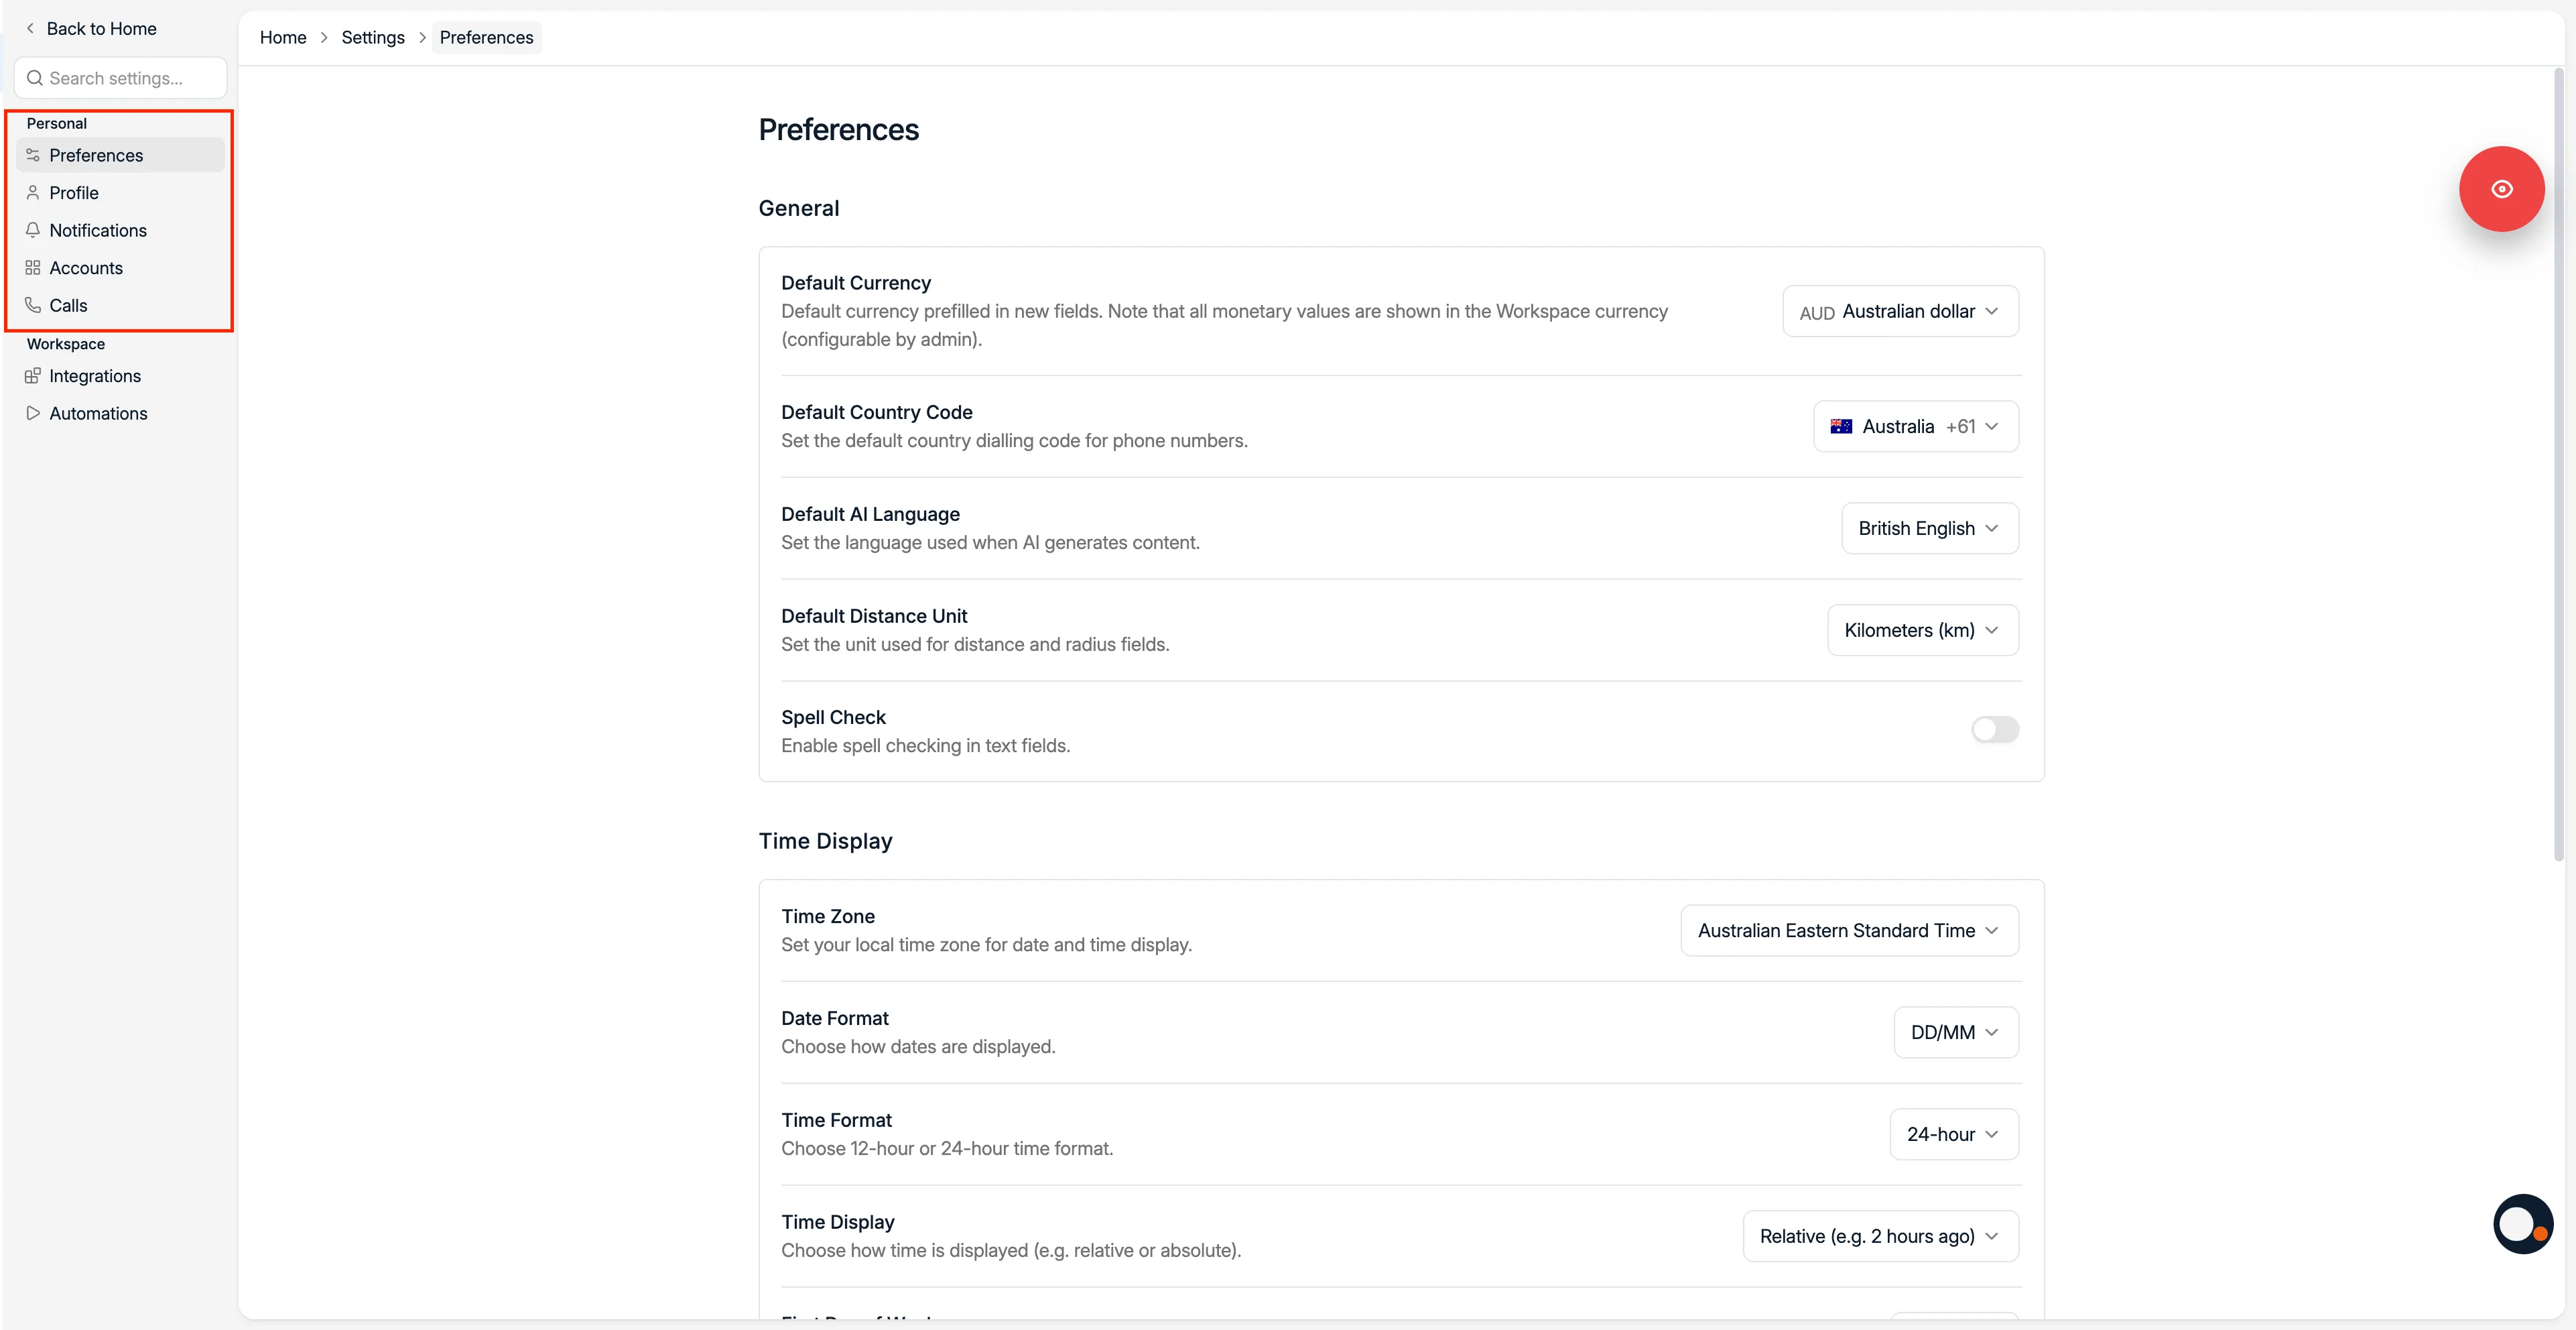
2.1 Preferences tab
Set your personal defaults.Defaults and formats
Defaults and formats
- Default currency, prefilled when adding new currency fields
- Default country code, the default dialing code when adding new phone numbers
- Default AI language, the language used for generated AI content
- Default distance unit, used for location radius filters
- Spell check, toggle on to enable the browser spell check for outgoing messages
Time and dates
Time and dates
- Time zone, used for calendar events and timestamps
- Date format, controls how dates are displayed
- Time format, 12-hour or 24-hour display
- Time display, whether timestamps show as relative or absolute
- First day of the week, for calendars
Appearance
Appearance
- Display language, the language of your workspace
- Interface theme, light or dark mode
- Default candidate, contact, and company tab, the tab you land on when opening a record
Every preference field, explained
The full reference for personal preferences.
2.2 Profile tab
Update how you appear in Spott, and your security settings.- Profile picture: upload your own picture
- Username: your display name in Spott
- Initials: shown as your avatar badge when no profile picture is set
- Change your password
- Multi-factor authentication: protect your account with an authenticator app. After setup you are asked for a 6-digit code in addition to your password when signing in.
Profile and security reference
Password, MFA, and how SSO changes the login flow.
2.3 Notifications tab
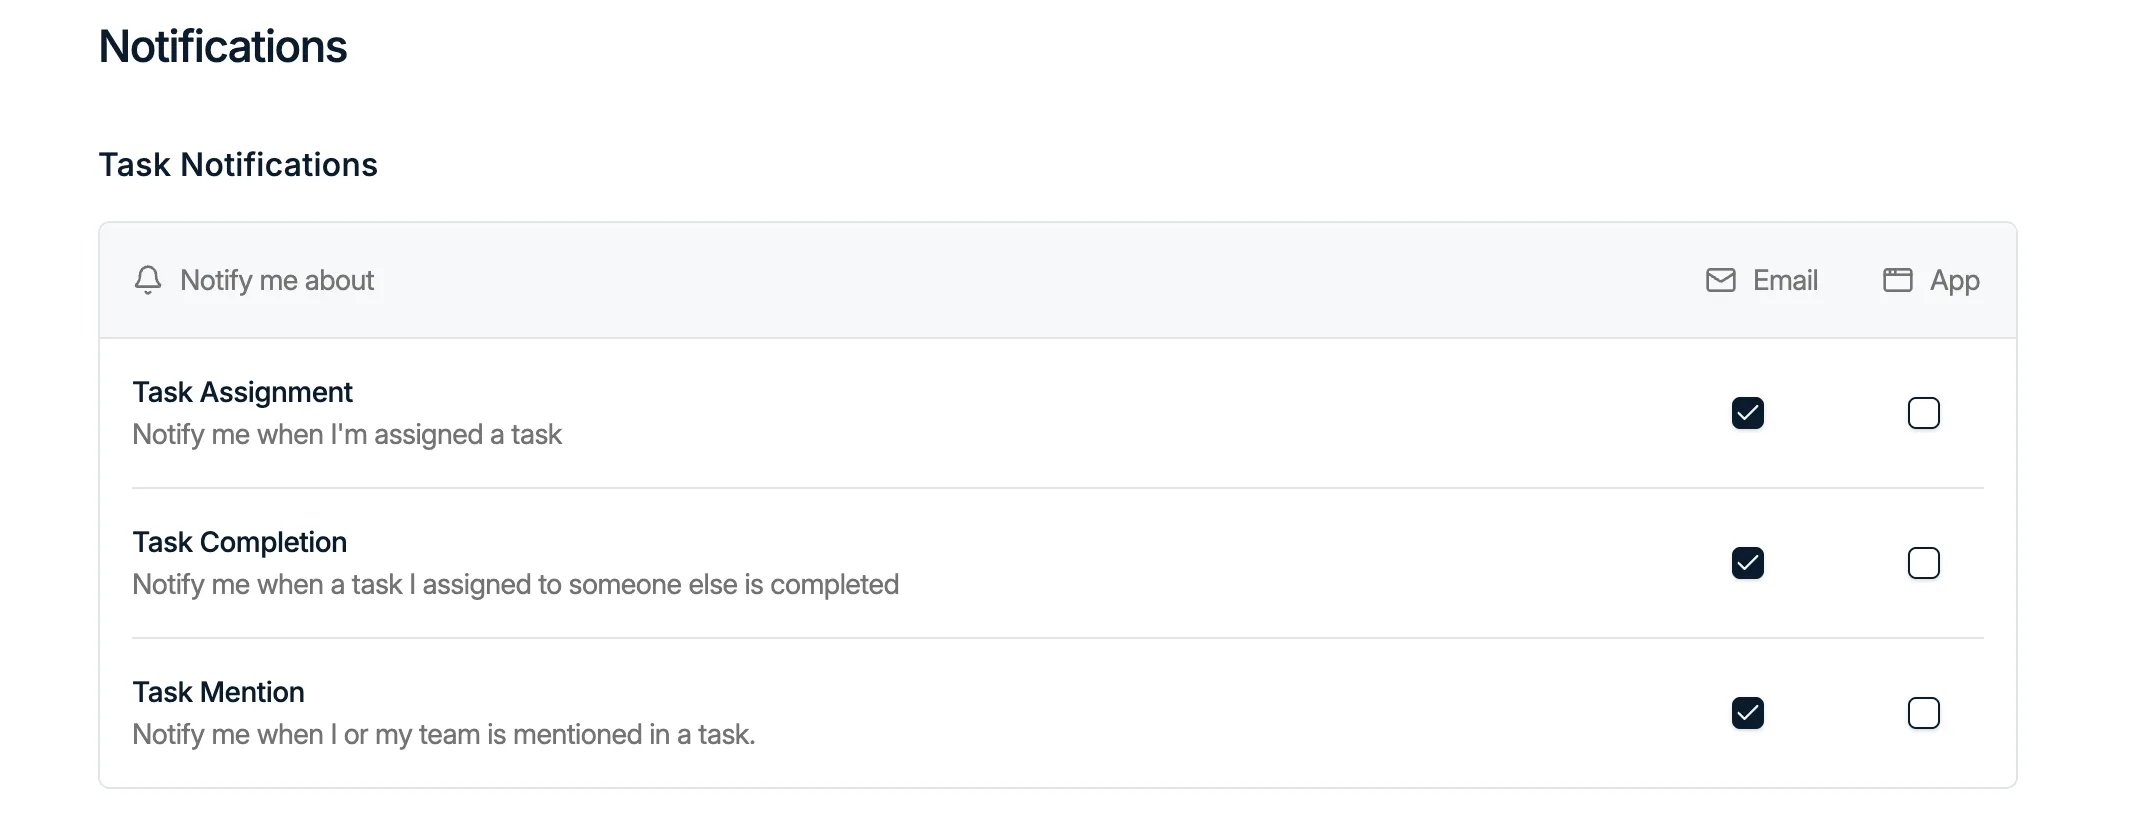
- Task notifications: task assignments, completions, and mentions
- Note notifications: when someone pings you on a note
- Job notifications: applications, comments, status changes, and new jobs
- Candidate notifications: when candidate information is updated
Notification settings reference
Every event type and channel.
2.4 Accounts tab
(a) Sync your email and calendar
Connect your Google or Outlook account so your mail and meetings flow into Spott.Up to two addresses per user. You can connect two email addresses to your account,
using Connect a second Microsoft account or Connect a second Google account on
the Accounts page. The same address cannot be connected twice, and it cannot be
connected through both Google and Microsoft at the same time.
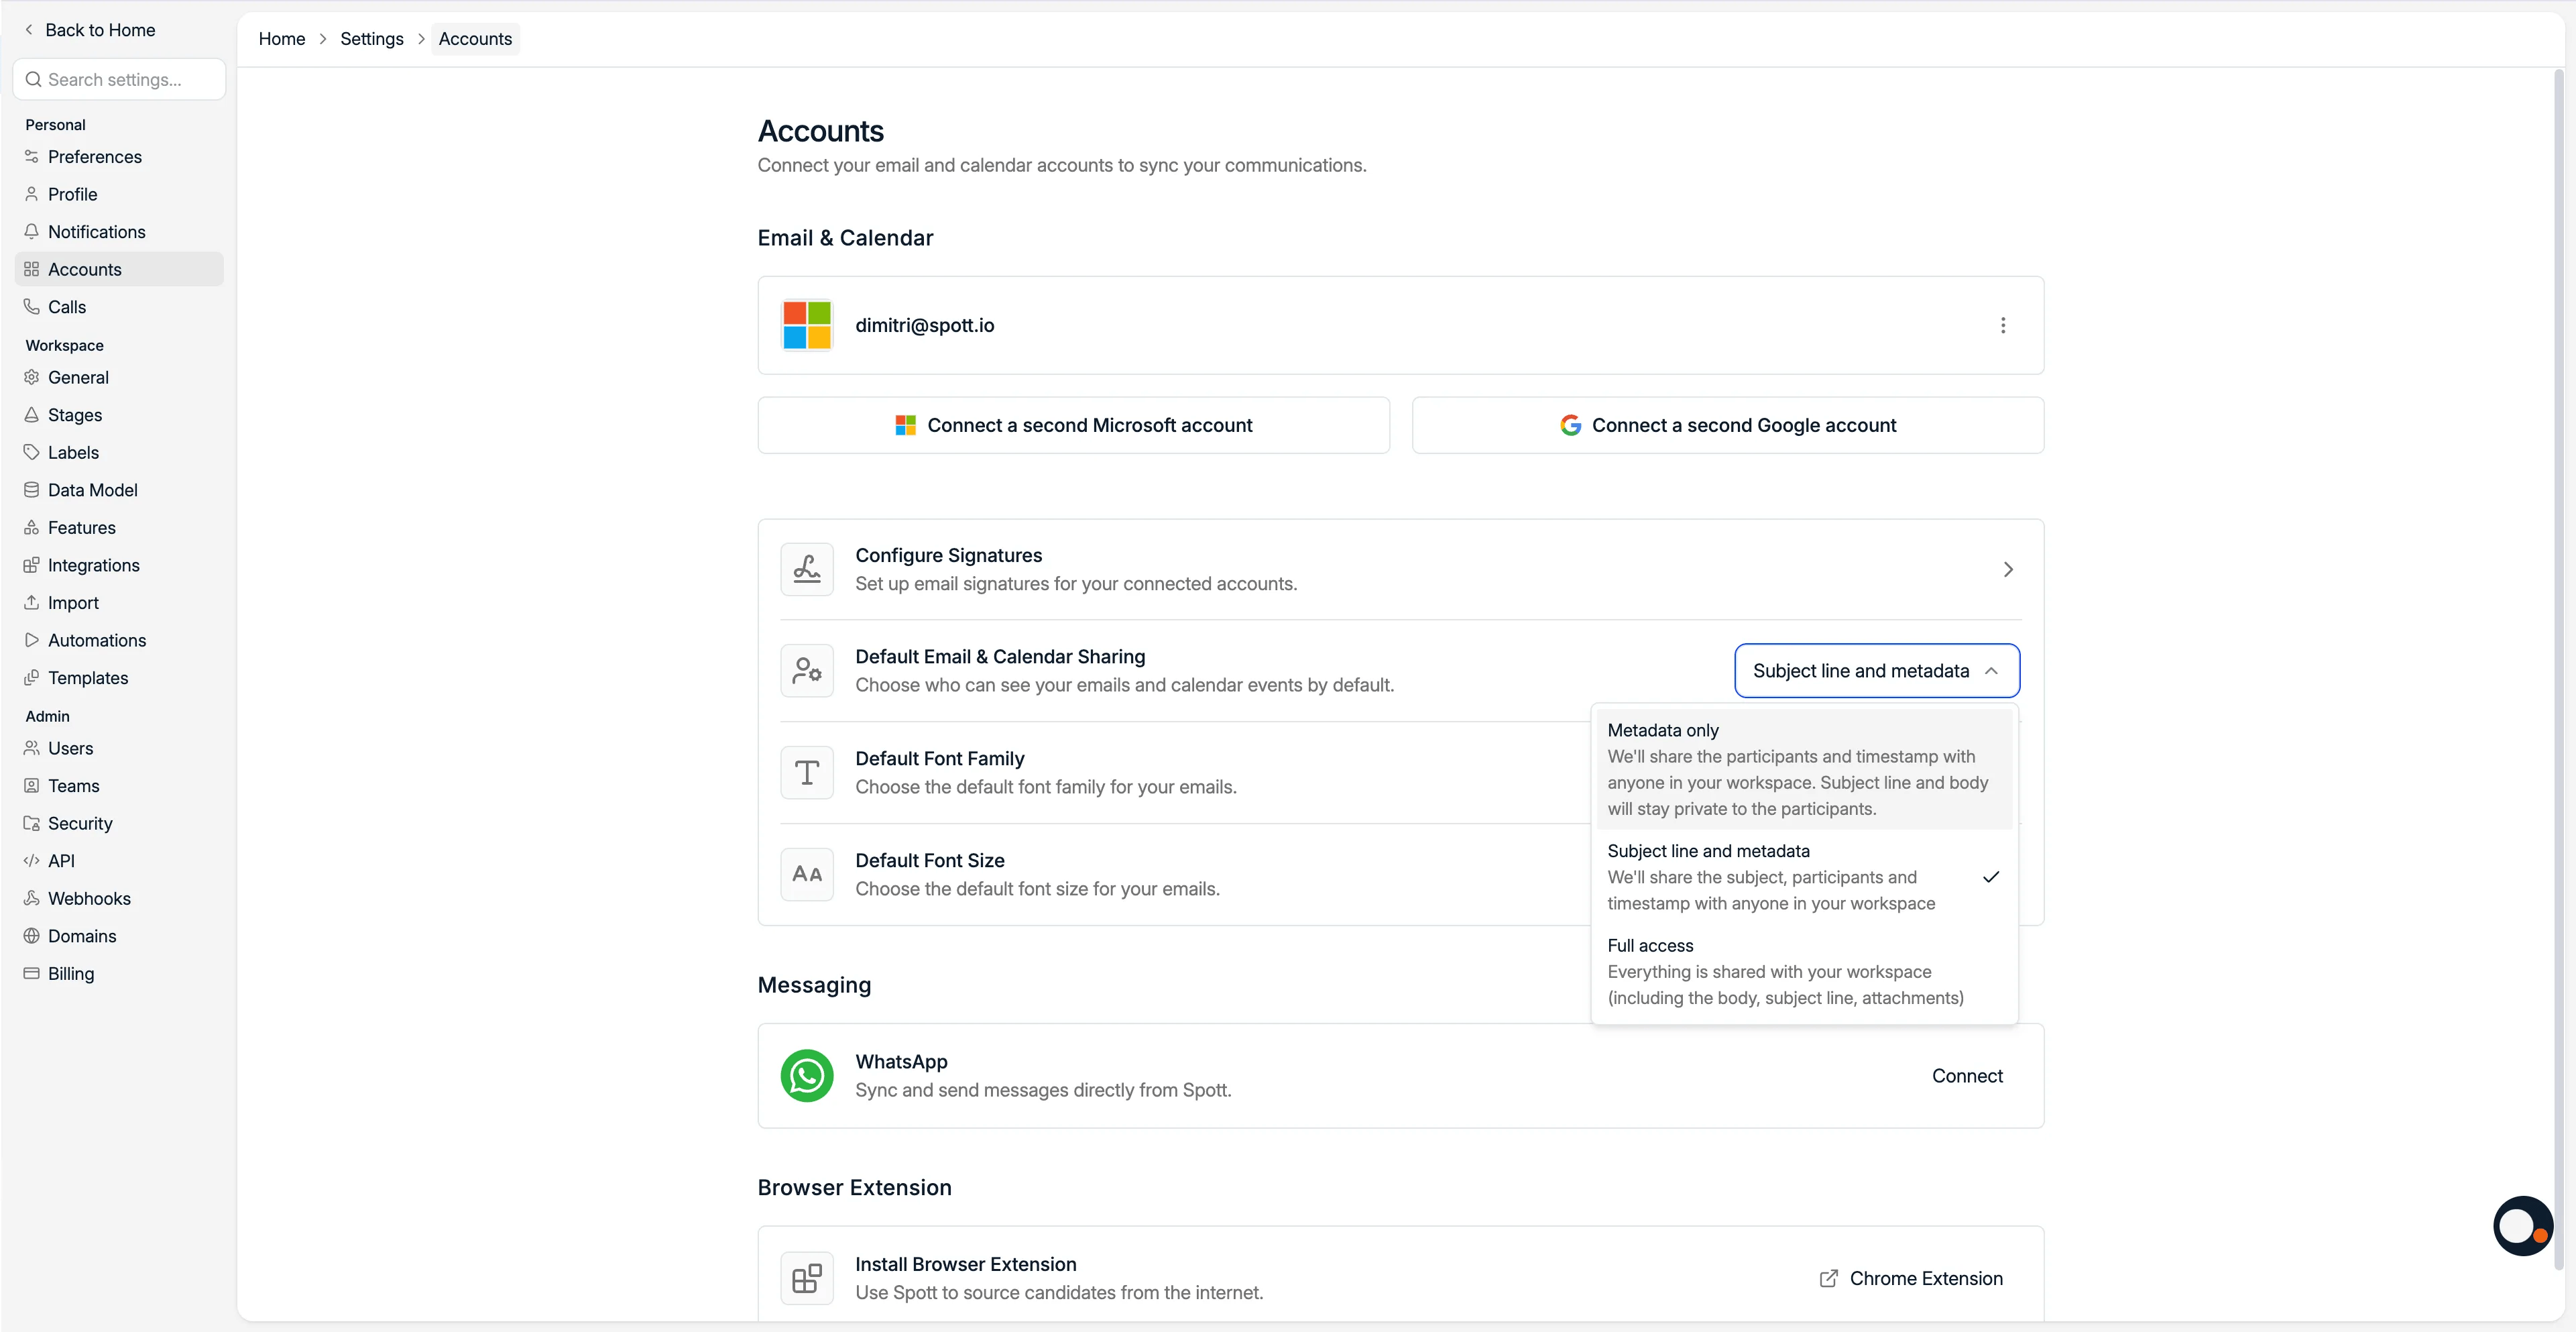
Default email and calendar sharingEach user chooses the level of access colleagues have to their email:
- Metadata only: colleagues see who sent the email and when. Everything else stays private.
- Subject line and metadata: subject, participants, and timestamp are shared. The body stays private.
- Full access: everything is shared with your workspace, including body and attachments.
- Sync your signature in one click: add one or more signatures by sending a blank email to signatures@spott.io. It appears here within two minutes. Tick the checkbox to pick the default.
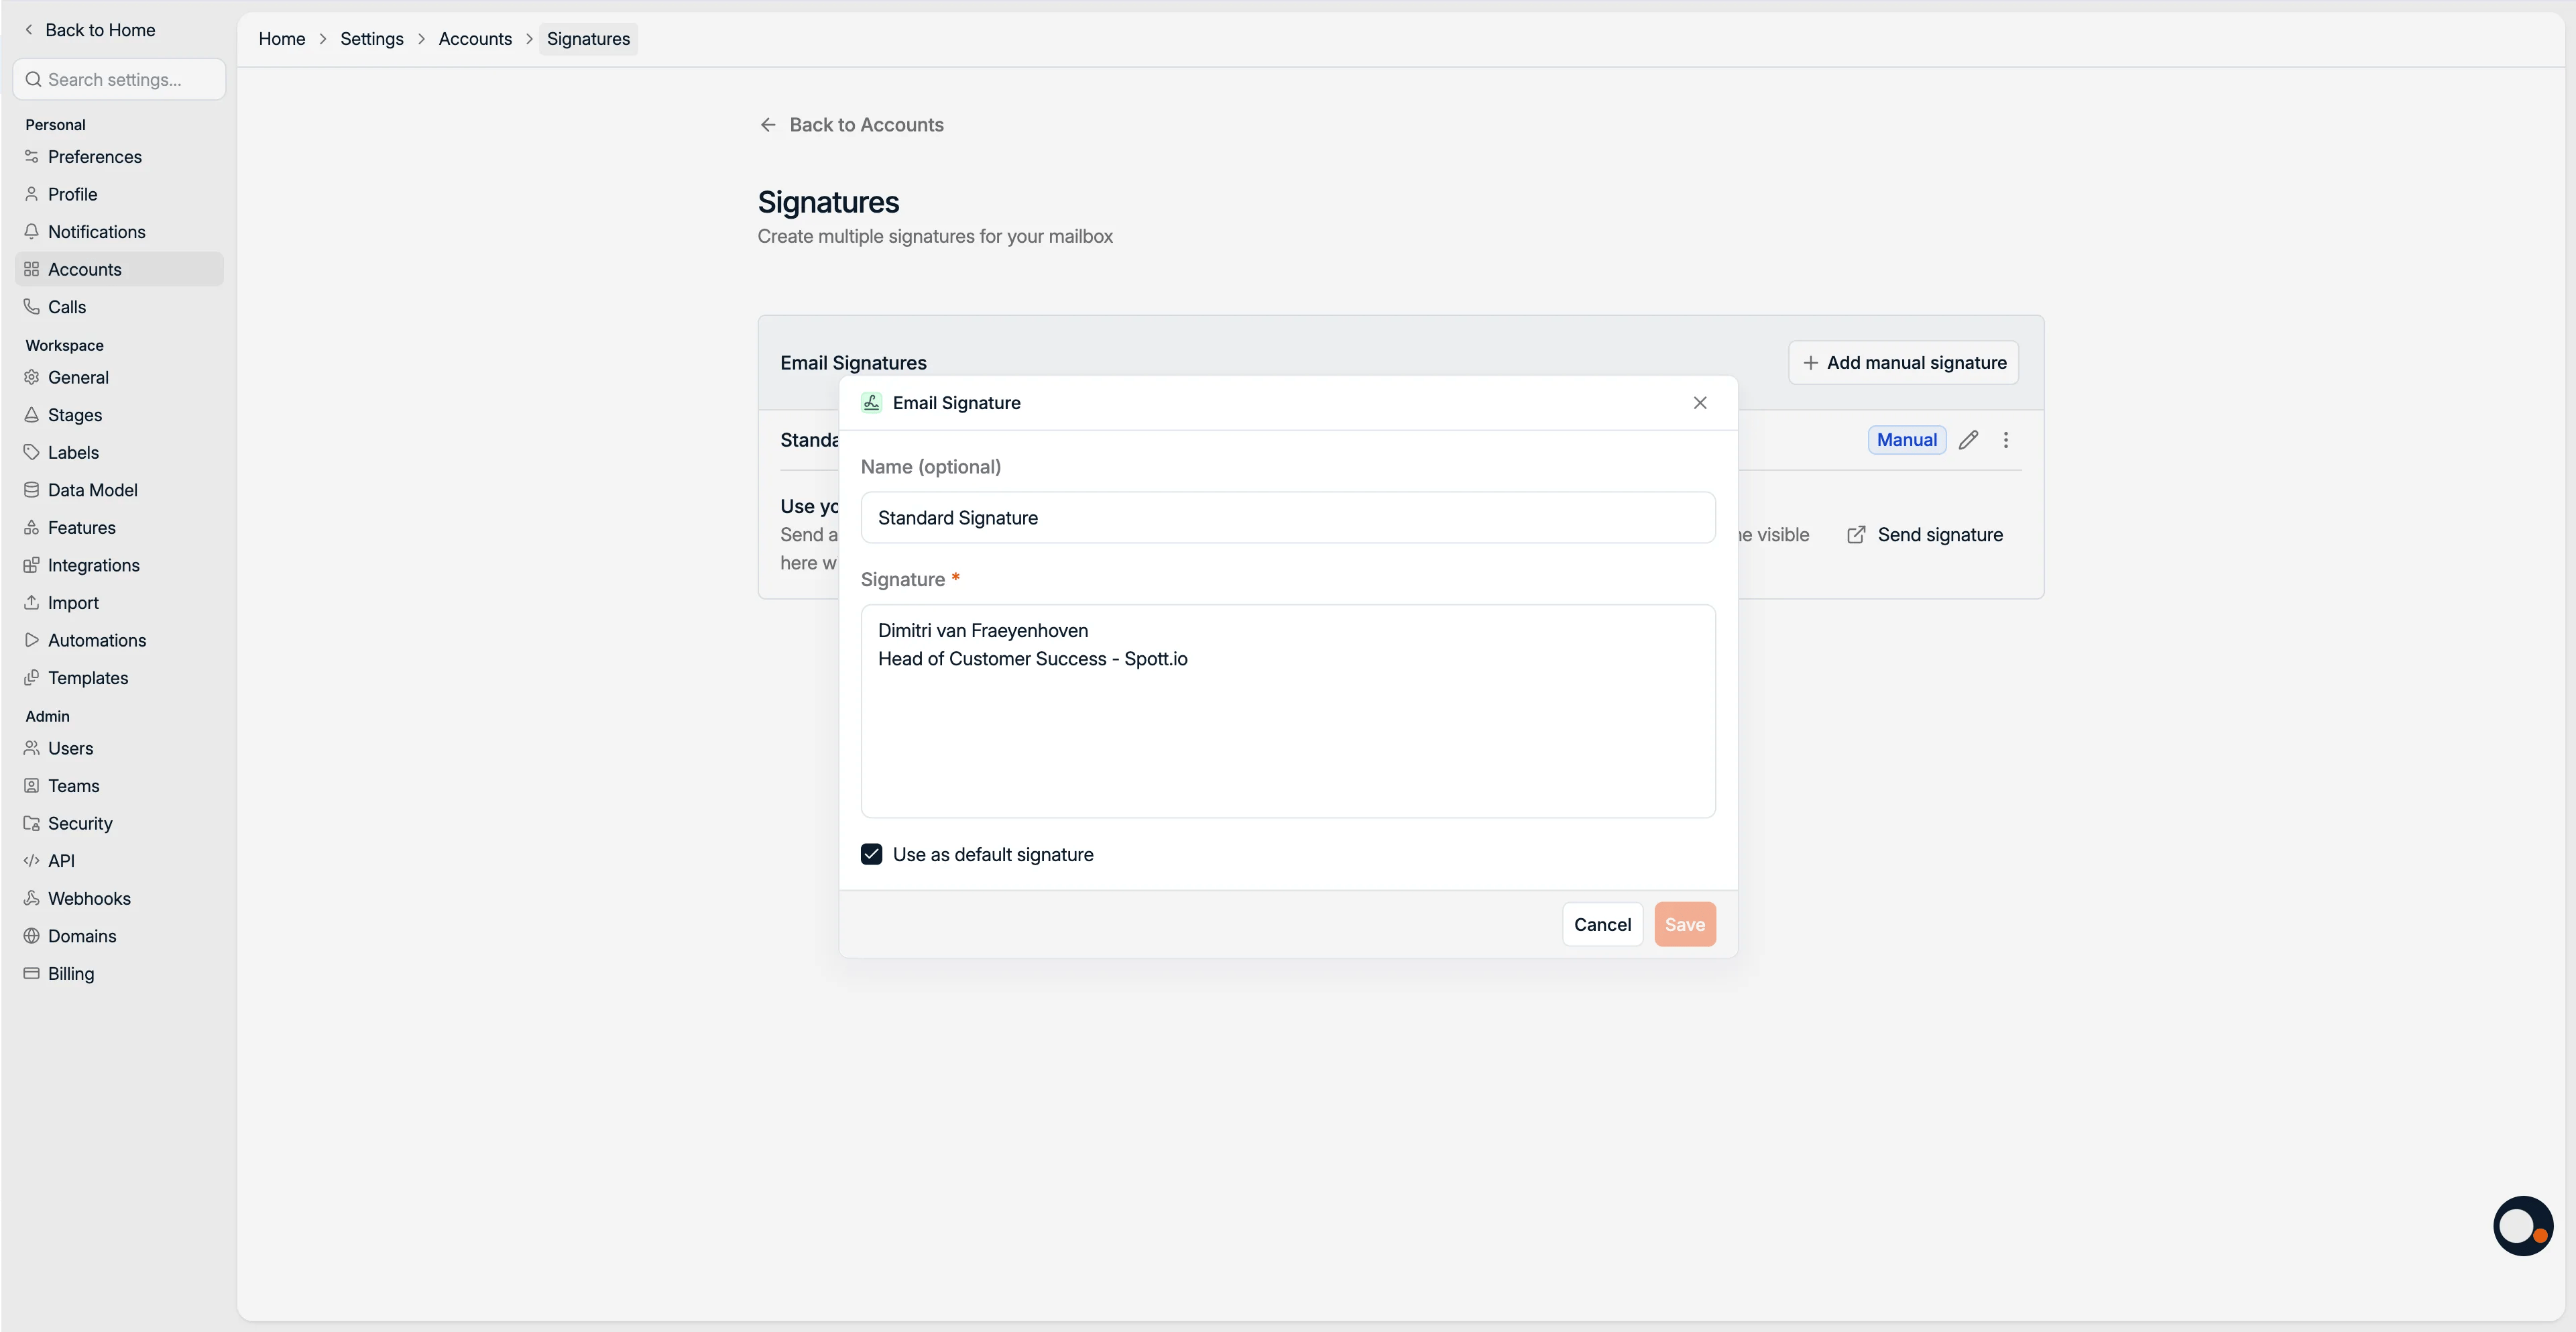
- Pick a default font family and size for your email communications.
(b) Sync WhatsApp
Connect WhatsApp for a two-way sync of your messages between Spott and your mobile.
Data sharing for messages
- WhatsApp: only you see your messages with contacts and candidates, and you do not see those sent by your colleagues.
- Email: you choose full or restricted access for colleagues. Restricted means they see only the subject line and metadata.
(c) Install the browser extension
Install the extension to import candidates, contacts, and companies from LinkedIn, Sales Navigator, or Recruiter.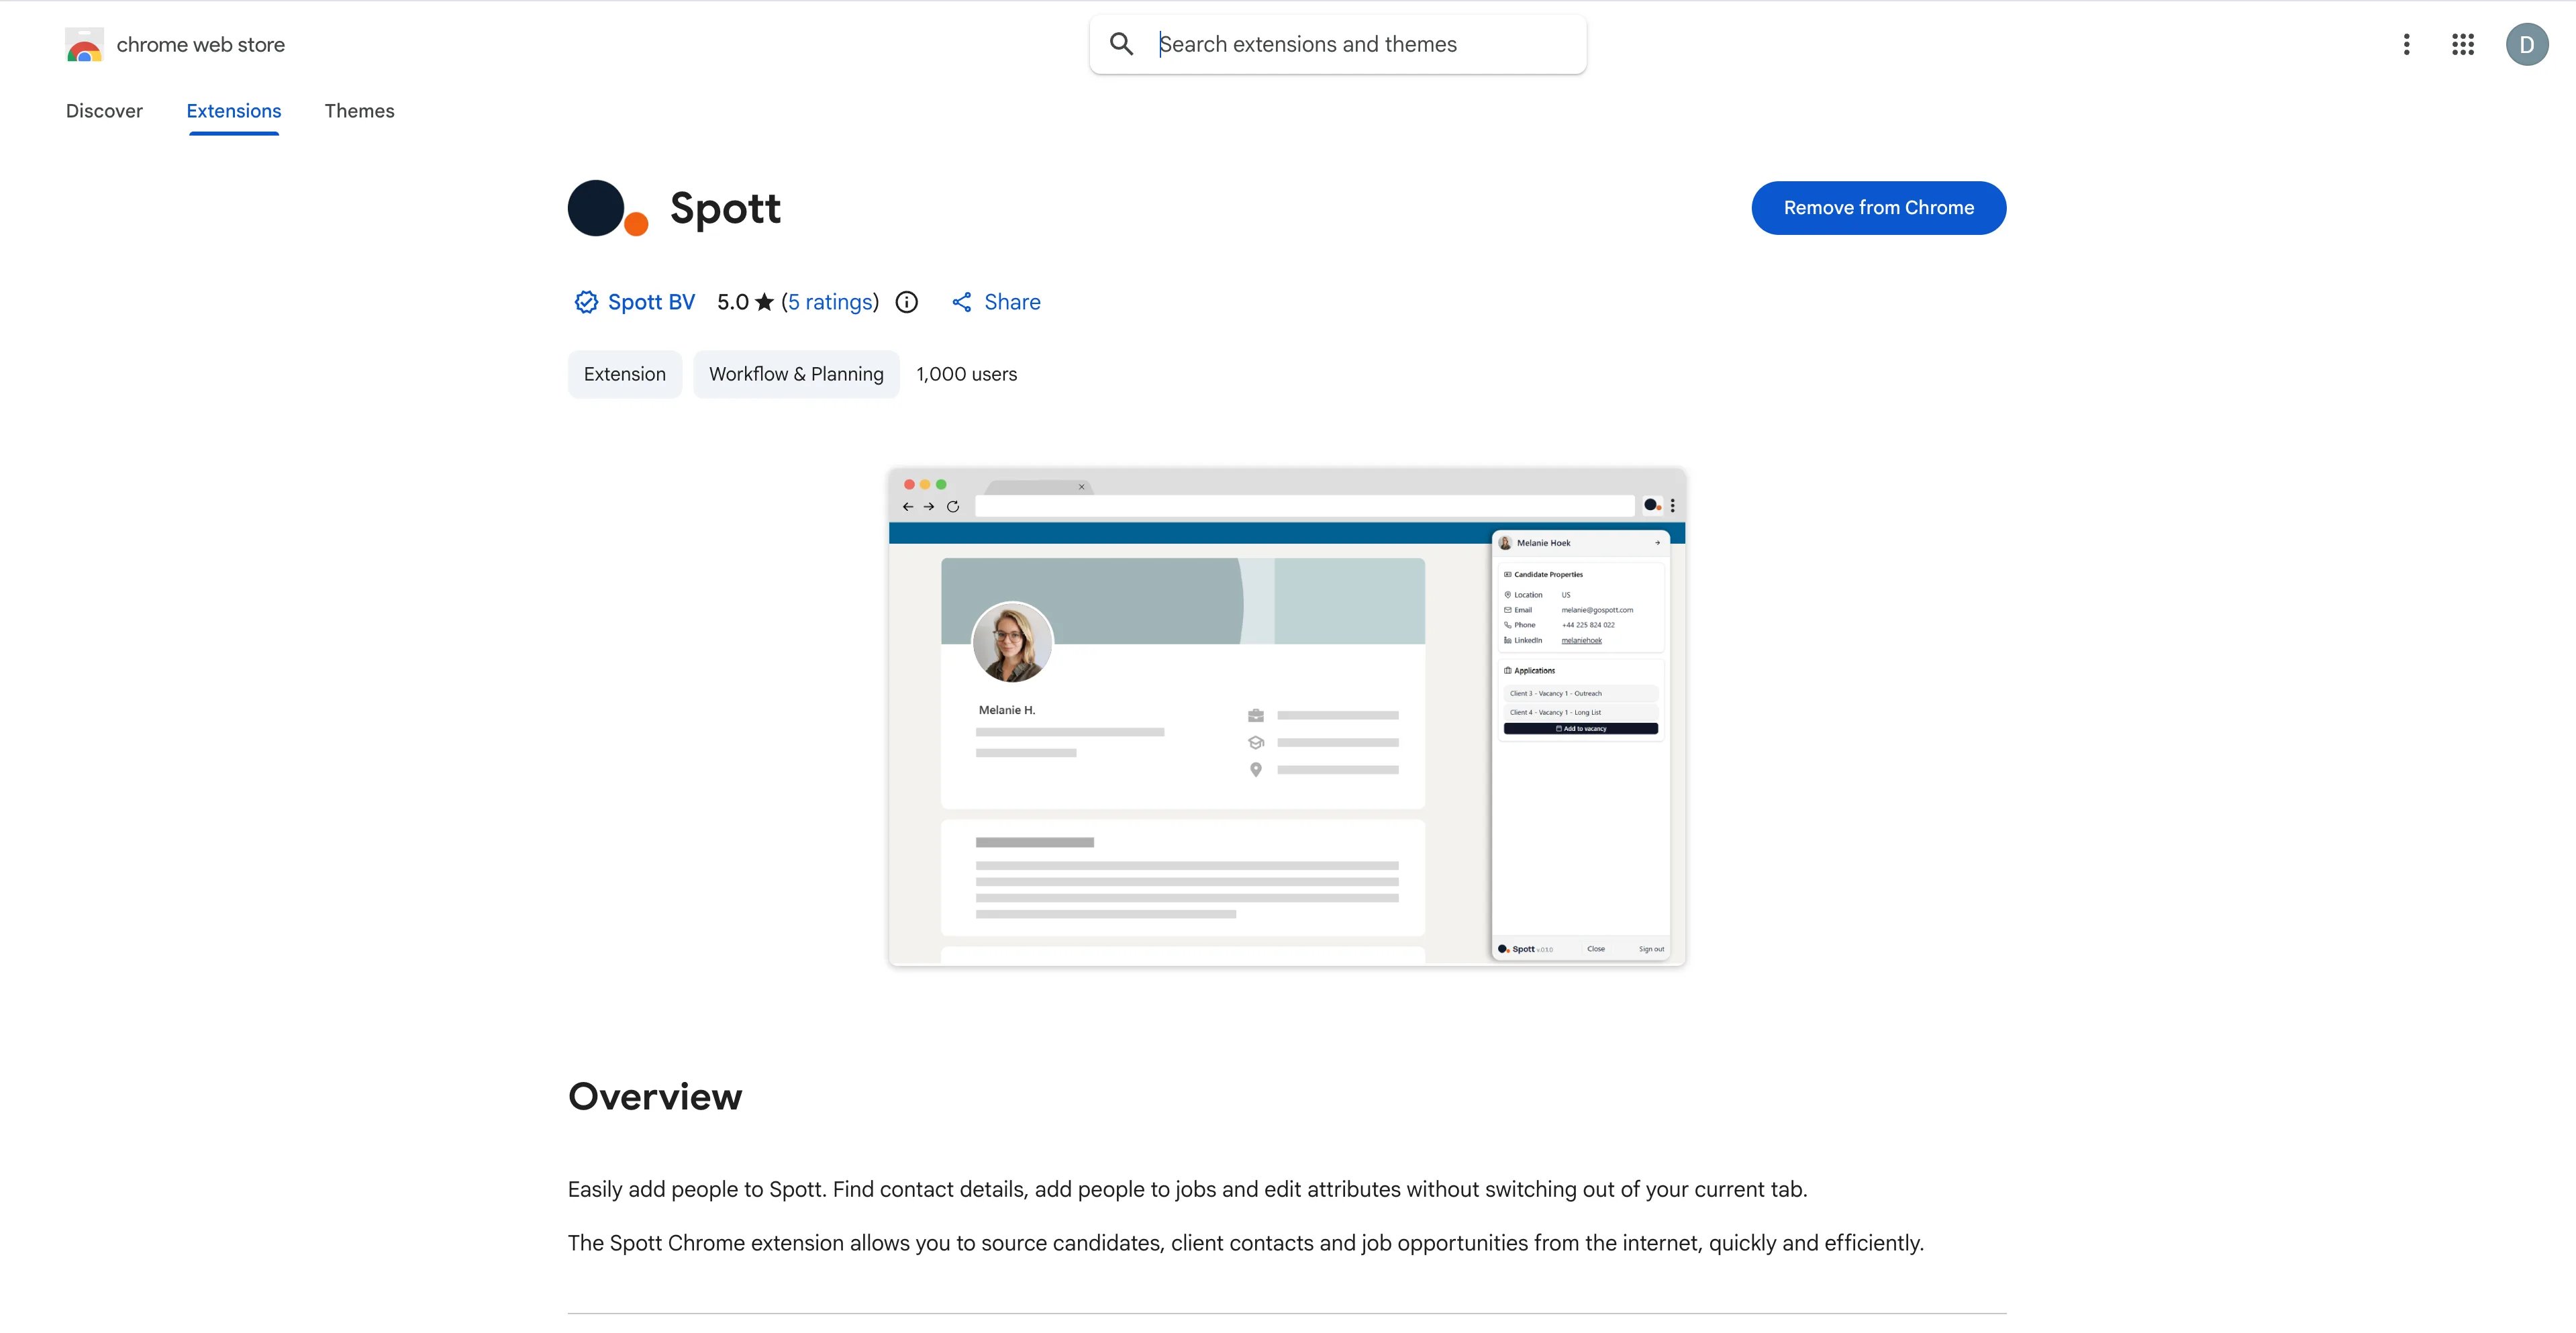
Browser extension setup
Install, connect, and troubleshoot the extension.
2.5 Calls tab
Manage how Spott supports meetings, notes, and scheduling.(a) Note Taker
By default the Note Taker automatically joins the lobby of all online meetings from your connected calendar, to record and transcribe the conversation. If you switch this to Do not join by default, the bot has to be scheduled meeting by meeting from the calendar:- Fallback language for transcription: used when Spott has low confidence in the detected language.
- Video recording: when disabled, meeting videos are not stored. Recordings can also be deleted per meeting.
- Note Taker appearance: change the name and background image. These changes apply for everyone in your organization.
Note Taker reference
How it joins, what it produces, and how to remove it from a meeting.
(b) Mobile app (iOS and Android)
- Access candidate and contact information
- Record in-person meetings and manage notes
(c) Calendar scheduler
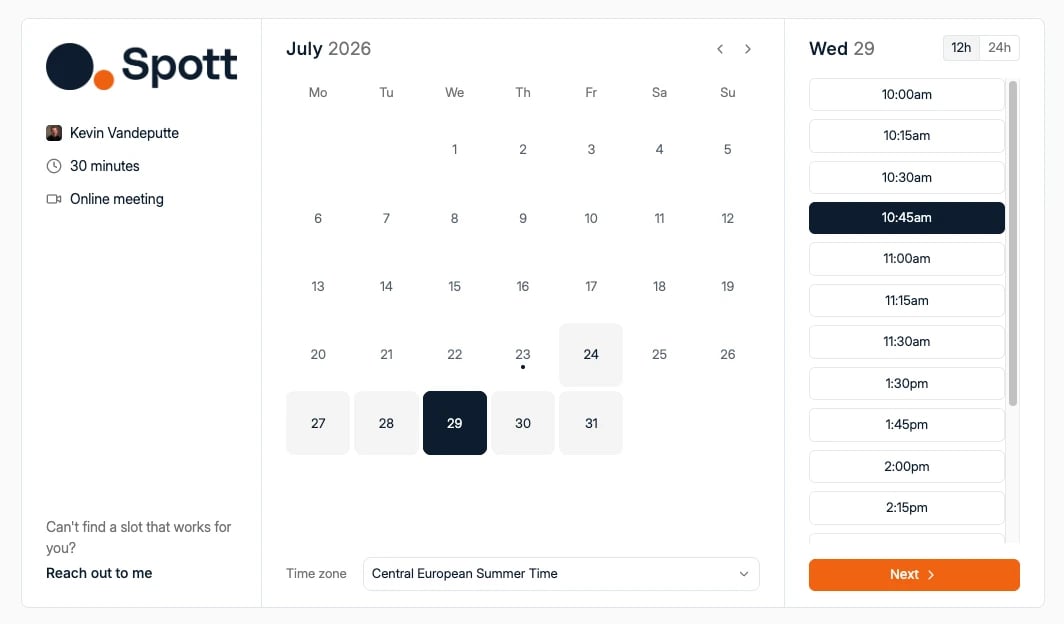
Create scheduling links so candidates and contacts can book meetings directly in your calendar.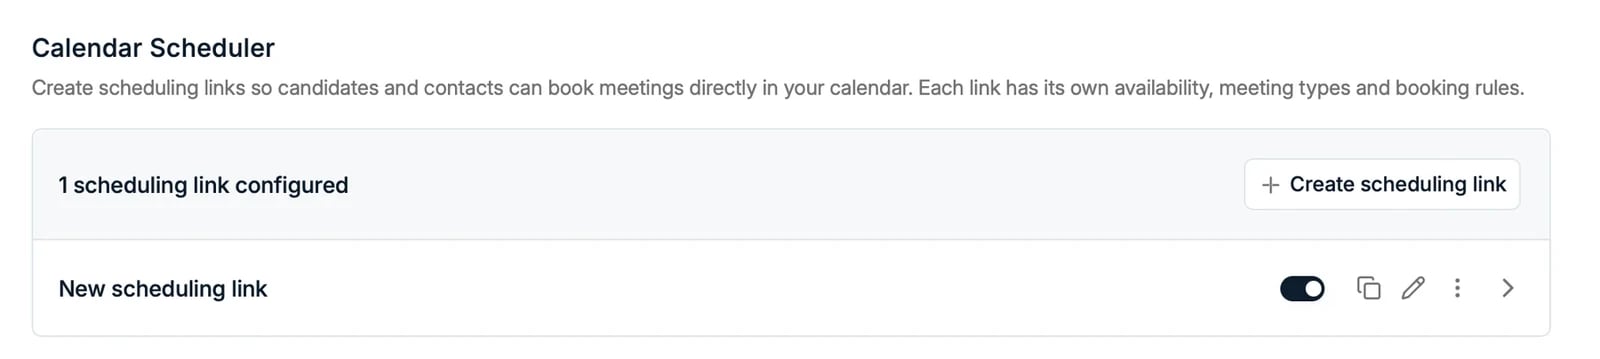
This is what contacts see when you share a scheduling link. The page is branded with your
logo and colours.
Scheduler reference
Availability, meeting types, and sharing links from an email.
Now your turn
- Sign in and set your preferences
- Complete your profile and turn on MFA
- Tune your notifications
- Connect your email and calendar, and pick a sharing level
- Sync your signature
- Install the browser extension
- Set your Note Taker preference and create a scheduling link
Next: set up the workspace
Admin only: the settings that apply to everyone in your organization.