

In this section you learn which route suits the data you are holding, then how to bring in
your candidates, your clients, and your jobs, what only a managed migration can move, and
how to check that everything landed.
1. Choose how your data gets in
There are two routes, and most firms use both. Do it yourself when your data is a spreadsheet or a folder of CVs. Everything in sections 2 to 4 is self-serve, and you can run it today. Let our team run it when you are moving a full ATS across, with jobs, applications, notes, placements, and history attached to each record. Your data is first migrated into a separate validation environment, where you review it together with our team to confirm everything came across correctly. Only once you are happy with the result do we complete the migration to production.That validation step matters: it means you check and sign off on the imported data
before your team starts working in it.
Data migration
How a managed migration works, and how to prepare your export.
2. Bring in your candidates
You have five self-serve routes into the candidate database. Pick whichever matches the shape of the data you are holding.2.1 Import a CSV or Excel file
The import wizard bulk adds records to Spott, for example when migrating from another system or uploading a sourcing list. Each row becomes one record. You can import up to 1,000 records per import, from CSV or Excel (.xlsx) files.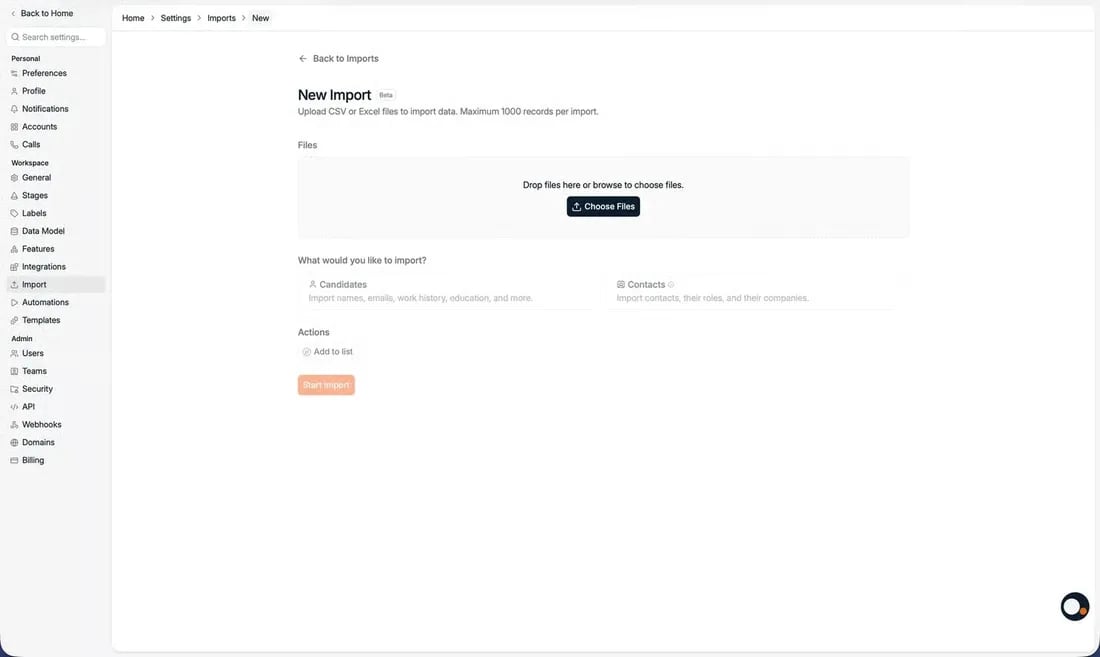
The wizard then guides you through mapping your columns onto Spott fields, and runs the
import. Under Actions you can also Add to list or Add to job, which applies to
every record in the import.
A LinkedIn URL column imports the link to the person’s profile, not the profile itself.
To pull in the profile content, use the browser extension.
Full CSV import reference
Column by column: what each field expects, and how matching works.
2.2 Upload CVs in batches of 1,000
If your data lives as CV files rather than a spreadsheet, upload them and let Spott parse each one into a candidate record. You can upload up to 1,000 CVs at once. Above 20 CVs there is no preview step, so the records are created directly. Duplicate records are flagged in red and you decide whether to create them anyway or skip them.The attachment does not have to be a PDF. Word documents (.docx) are parsed too.
2.3 Forward CVs by email
Forward a CV to cv@spott.io and Spott parses it into a candidate record, with the CV attached to the profile.2.4 Import from LinkedIn with the extension
Use the browser extension to import candidates from LinkedIn, Sales Navigator, or Recruiter, one profile at a time or from a search result list. This is the route that brings the profile content across, not just the link.2.5 Push candidates in from other tools
Connected sourcing tools such as Juicebox push candidates straight into Spott, and the API inserts them programmatically.Adding candidates
Every route into the database, including maildrop and the extension.
Browser extension
Install, connect, and import from LinkedIn.
Sourcing integrations
Push candidates in from connected tools.
Updating a profile
Refresh a record from a new CV, a self-service link, or LinkedIn.
3. Bring in your clients
Companies and contacts use the same wizard as candidates, with one useful shortcut.3.1 Import your contacts, and get companies for free
Run the import wizard and pick Contacts, or Any if your file mixes people and organisations. Companies need no file of their own: whenever a row has a company on it, Spott matches it to an existing company or creates a new company record, and links the person to it.3.2 Add clients from LinkedIn or by hand
Use the extension to create a company or contact straight from a LinkedIn page, or add either manually from the Companies and Contacts views when you only have a handful.Adding a company
From the Companies view, a company preview, LinkedIn, or an import.
Adding and managing contacts
Add a contact, link them to a company, and find your way around the profile.
Company hierarchy
Link parent companies, subsidiaries, and divisions after the import.
Lists
Import straight into a list to keep a batch together.
4. Bring in your jobs
Jobs work differently from people: there is no CSV route for jobs. You have four ways in.- Import from URL. In the Add New Job dialog, paste a public job-posting link and Spott fills the job fields from the posting. Review or edit before saving.
- Import from File. In the same dialog, upload a job description as a PDF, DOC or DOCX of up to 10 MB, and Spott fills the job fields from it.
- The browser extension. Import the posting from the vacancy page you are looking at.
- Manually. Click Add Job and enter the title, company, and status, plus any details you have.
A larger back catalogue of jobs, with their applications and history attached, comes
across through the managed migration rather than by hand.
Adding and managing jobs
Create a job manually, from a URL, or by import, and link it to a client.
5. Bring in the rest
Some things cannot be self-imported, and it is worth knowing that before you plan your first week:- Applications, the link between a candidate and a job, with its stage and history
- Notes and files attached to existing records
- Placements and historical revenue
- Activity history from your old system: emails, calls, and meetings
Data migration
What our team moves, the validation step, and how to prepare your export.
6. Check what landed
Before your team starts working in the data, spot-check it.- Duplicates. Spott deduplicates on email address, phone number, and LinkedIn URL, so re-adding someone enriches the existing profile rather than creating a copy. Anything that slipped through can be merged.
- Custom fields. Open a record you know had custom data in the source file and confirm what is empty, since custom fields do not come through a CSV import.
- Company links. Check that imported contacts are attached to the right company, and merge any near-duplicate companies the import created.
- Job and list membership. If you imported into a job, set the application stages in the pipeline.
Merging duplicate people
How Spott spots duplicates and how to merge them.
Merging companies
Consolidate duplicate companies and jobs into one record.
Contact enrichment
Fill in the email addresses and phone numbers your file was missing.
Searching candidates
Check what landed by searching and filtering the imported set.
Now your turn
- Import one test CSV of five rows, and check what mapped
- Bulk-upload five CVs and review the records they created
- Forward one CV to cv@spott.io from your work address
- Import one contact file and confirm the companies were created and linked
- Add one job by pasting a public posting URL
- Open one imported record and note which custom fields are still empty
Next: billing and credits
Seats, credits, and topping up.