> ## Documentation Index
> Fetch the complete documentation index at: https://docs.spott.io/llms.txt
> Use this file to discover all available pages before exploring further.
# Timesheets
> Track the hours and days worked on a contract placement, with rate cards for charge and pay, approval, and invoicing.
On a contract placement, revenue comes from the time actually worked, not from a fee agreed
up front. Timesheets give you one place to see what has been worked, what has been approved,
and what has been invoiced, on the placement itself.
The flow is the same every time: set up a **rate card** once per placement, log a
**timesheet** for each period, have it **approved**, and **invoice** it. None of this needs
Xero. Connect [Xero](/docs/integrations/xero) and the invoices go to Xero as drafts; without
it, Spott creates the invoice itself.
## 1. Set up a rate card
A rate card sets what you charge the client and pay the contractor for the days and times
worked, and which pay code applies. **New timesheet stays disabled until the placement has a
rate card**, so this comes first.
1. Open the contract placement and choose **Create rate card** from the **⋮** menu.
2. Pick a **Template** if your admin has created one, or fill in the fields yourself:
* **Name**, for example "Standard rates".
* **Pay code**, the code the time is invoiced under. With Xero connected, these are
[synced from your Xero items](/docs/integrations/xero#sync-pay-codes-from-xero).
* **Unit**, **Day** or **Hour**. If you only bill daily, use Day.
* **Currency**, **Base charge rate** (billed to the client) and **Base pay rate** (paid to
the contractor).
3. Click **Next** to add rules for rates that differ from the base, such as overtime. For each
rule, set:
* **Rule name**, for example "Overtime".
* **Applies to**, the whole day or part of the day. Part of the day takes a start and end
time and is only available on hourly rate cards.
* **Days**, for example Saturday and Sunday.
* **Pay code**, **Billable**, **Charge rate** and **Pay rate**.
4. Add more rules with **+ Add rule**, then click **Create**.
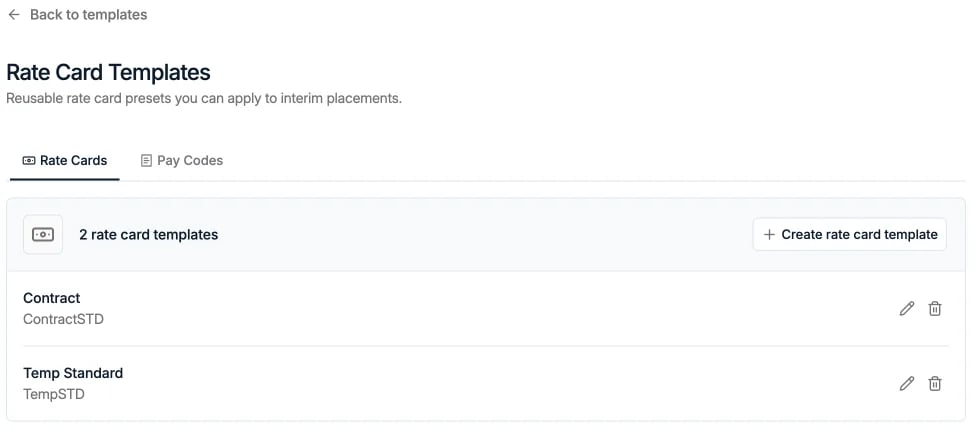
Admins can save reusable rate cards under **Settings → Templates → Rate Card Templates →
Rate Cards**. If a template leaves the charge and pay rates blank, Spott uses the rates from
the placement.
 ## 2. Log a timesheet
1. On the placement, choose **New timesheet** from the **⋮** menu. The **Timesheets** tab
only appears once the placement has its first timesheet, and from then on it carries its
own button for the next one.
2. **Period:** choose **This week**, **Last week**, **Last 2 weeks**, **This month** or
**Custom**. A timesheet must fall within the placement dates and cannot overlap an existing
one.
3. Leave **Prefill the week from the working schedule** ticked to start from the placement's
normal working days and hours.
4. **Days / Hours:** adjust what was worked.
* **Daily rate cards:** toggle each day worked. Only full days are supported.
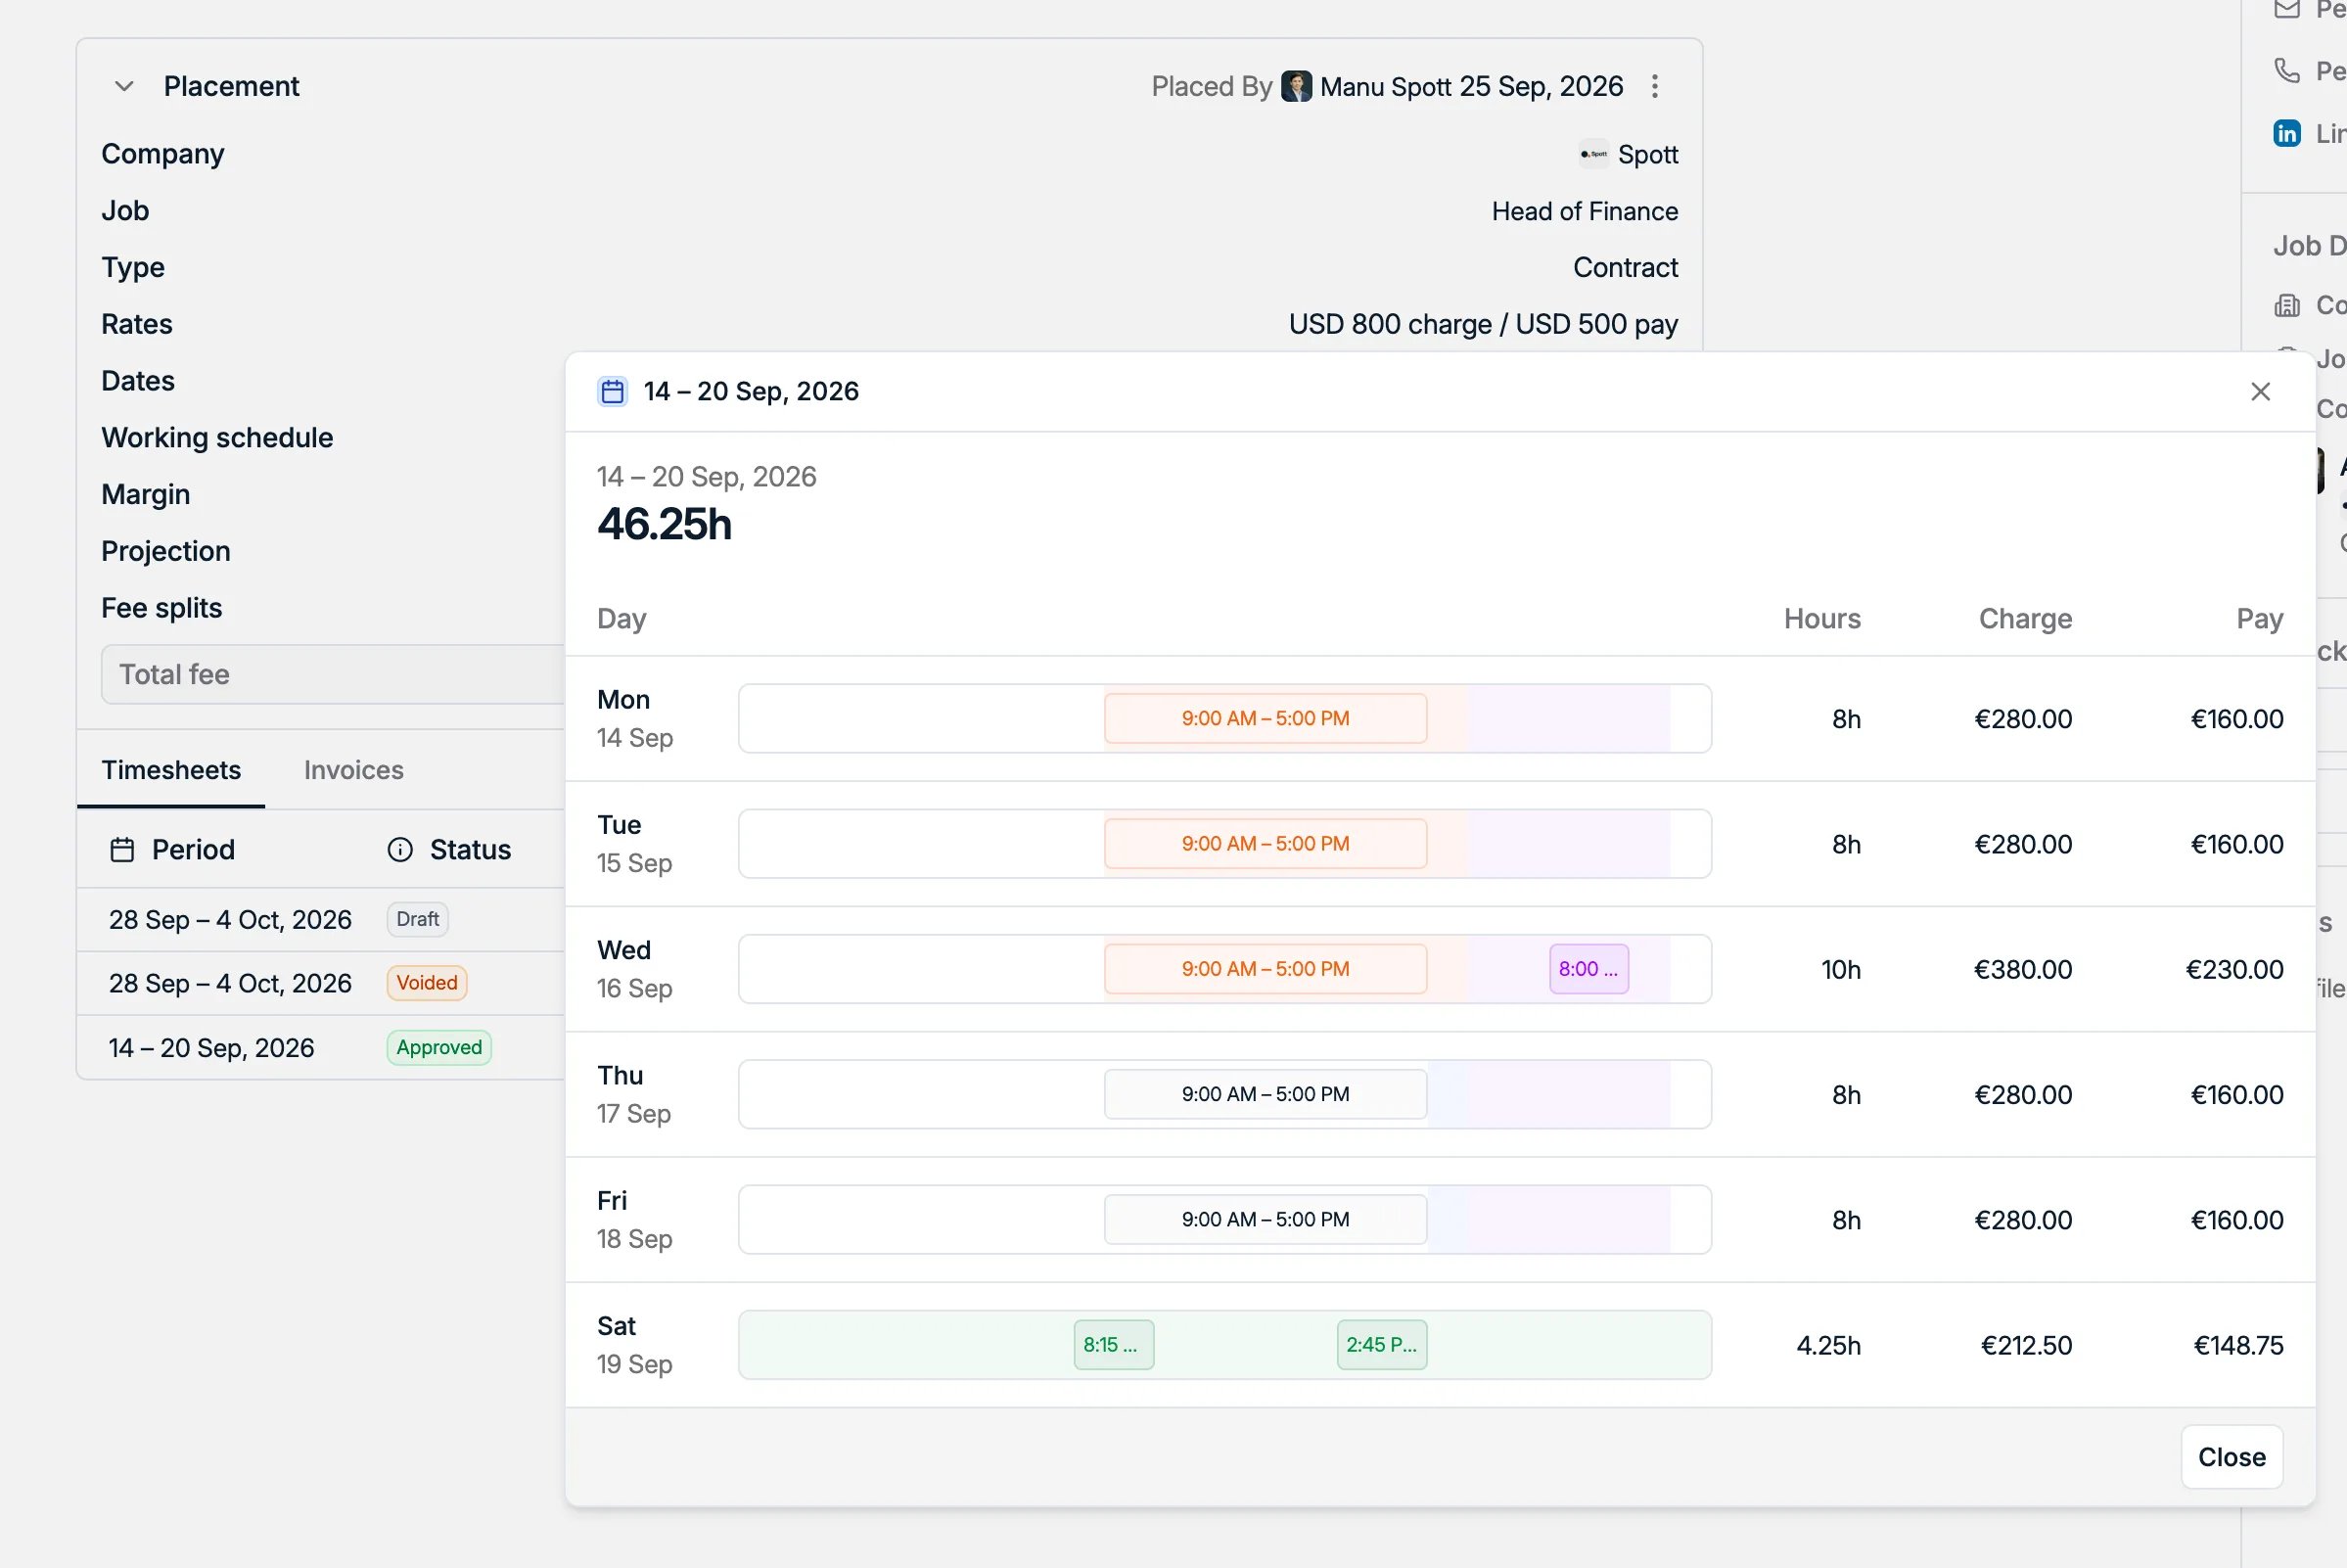
* **Hourly rate cards:** set start and end times per day. Double-click the bar to add
another block, for example evening overtime. Each color is a different rate card rule.
5. **Check:** review the total time, charge and pay per day, then click **Next** and **Save**.
## 3. Review, submit and approve
The **Timesheets** tab on the placement lists every period with its status. Open one to see
the breakdown: the hours or days worked on each day, which rule applied, and the charge and
pay that adds up to.
## 2. Log a timesheet
1. On the placement, choose **New timesheet** from the **⋮** menu. The **Timesheets** tab
only appears once the placement has its first timesheet, and from then on it carries its
own button for the next one.
2. **Period:** choose **This week**, **Last week**, **Last 2 weeks**, **This month** or
**Custom**. A timesheet must fall within the placement dates and cannot overlap an existing
one.
3. Leave **Prefill the week from the working schedule** ticked to start from the placement's
normal working days and hours.
4. **Days / Hours:** adjust what was worked.
* **Daily rate cards:** toggle each day worked. Only full days are supported.
* **Hourly rate cards:** set start and end times per day. Double-click the bar to add
another block, for example evening overtime. Each color is a different rate card rule.
5. **Check:** review the total time, charge and pay per day, then click **Next** and **Save**.
## 3. Review, submit and approve
The **Timesheets** tab on the placement lists every period with its status. Open one to see
the breakdown: the hours or days worked on each day, which rule applied, and the charge and
pay that adds up to.
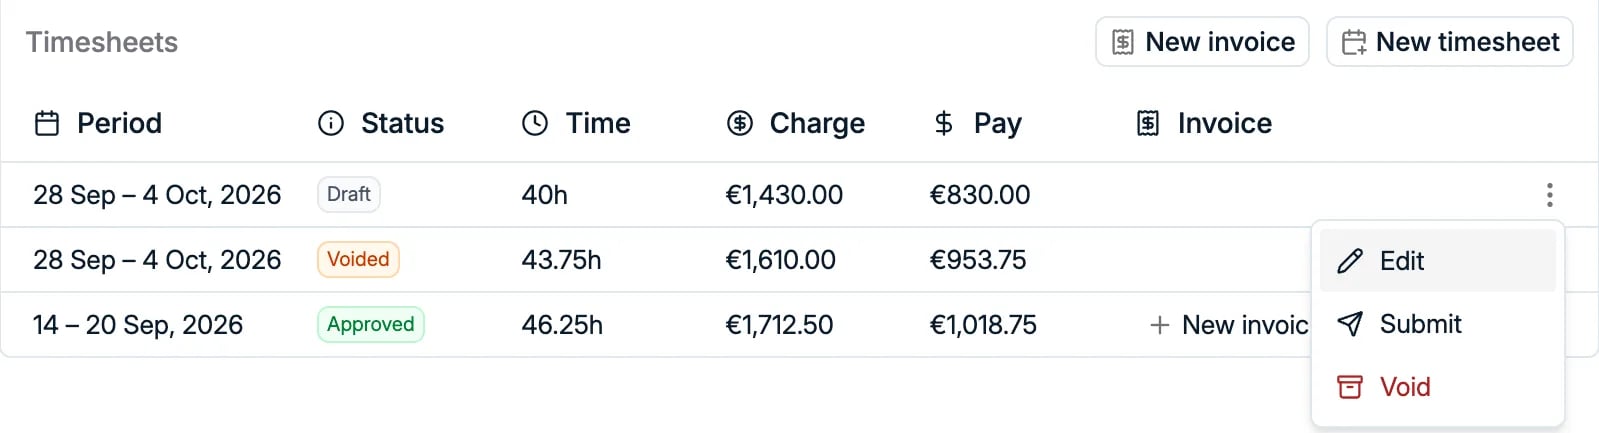
 A saved timesheet starts as **Draft**. From the **⋮** menu on its row, choose **Submit**, then
**Approve** once the client has signed off. You can also **Edit** or **Void** it.
A saved timesheet starts as **Draft**. From the **⋮** menu on its row, choose **Submit**, then
**Approve** once the client has signed off. You can also **Edit** or **Void** it.
 ## 4. Invoice approved timesheets
Only **Approved** timesheets can be invoiced. Click **New invoice** on the placement, choose
**Specific timesheets**, and tick the ones to bill. Several timesheets can go on one invoice,
and once invoiced, each timesheet links to its invoice on the **Invoices** tab beside
**Timesheets**.
Spott fills in the line items from the timesheets, split by rate, so standard and overtime
hours appear separately. The full walkthrough, including the Xero contact and invoice
status, is in [Invoicing with Xero](/docs/integrations/xero-invoicing#invoice-a-contract-placement-from-timesheets).
## Frequently asked
* **Why is New timesheet greyed out?** The placement has no rate card yet. Create one first.
* **Can contractors submit their own timesheets?** Not yet. Timesheets are logged, submitted
and approved by your team in Spott.
* **Can I invoice a draft or submitted timesheet?** No. Only approved timesheets can be
ticked when you create an invoice.
This documentation is built and hosted on [Mintlify](https://mintlify.com), a developer documentation platform.
## 4. Invoice approved timesheets
Only **Approved** timesheets can be invoiced. Click **New invoice** on the placement, choose
**Specific timesheets**, and tick the ones to bill. Several timesheets can go on one invoice,
and once invoiced, each timesheet links to its invoice on the **Invoices** tab beside
**Timesheets**.
Spott fills in the line items from the timesheets, split by rate, so standard and overtime
hours appear separately. The full walkthrough, including the Xero contact and invoice
status, is in [Invoicing with Xero](/docs/integrations/xero-invoicing#invoice-a-contract-placement-from-timesheets).
## Frequently asked
* **Why is New timesheet greyed out?** The placement has no rate card yet. Create one first.
* **Can contractors submit their own timesheets?** Not yet. Timesheets are logged, submitted
and approved by your team in Spott.
* **Can I invoice a draft or submitted timesheet?** No. Only approved timesheets can be
ticked when you create an invoice.
This documentation is built and hosted on [Mintlify](https://mintlify.com), a developer documentation platform.