> ## Documentation Index
> Fetch the complete documentation index at: https://docs.spott.io/llms.txt
> Use this file to discover all available pages before exploring further.
# Set up Spott (admin)
> Configure the workspace settings that apply to everyone: stages, labels, data model, features, access, and more.
Workspace settings define how Spott behaves for your entire organization. Updates here
apply to all users and shape both internal workflows and public-facing experiences.
This page is for admins. Every user should also work through
[Set up Spott (user)](/docs/onboarding/setup-user) for their own account.
## 1. Configure your workspace settings
### 1.1 General
Control your organization's core setup, including branding, public URLs, social links,
and privacy policy.
**Customize the consent disclaimer**
By default Spott provides a [consent](/docs/settings/gdpr-consent) disclaimer shown at the bottom of all public forms.
If you would rather use your own privacy agreement text, paste it into this section of
the settings.
Logo, favicon, accent colour, and the public-facing text.
### 1.2 Stages
Customize the pipeline stages candidates move through in your jobs and speculative
presentations.
The **Job stages** list is the pipeline candidates follow in a job, for example
Application, Long list, Short list, Outreach, Interview, Presentation, and Offer.
* Drag stages by the handle to reorder them.
* Click **Add stage** to create a new one, and use the row menu (the three dots) to
rename or recolor it.
Two markers tell Spott how to measure your pipeline:
* **CV sent**: the stage at which a CV counts as sent to the client. This drives the
"CV sent" reporting metric.
* **First interview**: the stage at which a first interview counts as completed.
The **Speculative presentation stages** define a separate pipeline for speculative
candidate presentations, managed the same way as job stages.
Beyond the recruiting workflow, you also set up:
* **Company stages**, for managing company relationships
* **Job statuses**, for tracking job progress
* **Opportunity statuses**, for your opportunity pipeline
Every stage list, plus sub-stages and closing-rate percentages.
### 1.3 Labels
Create labels to categorize and report on notes, tasks, rejections, and emails across your
workspace.
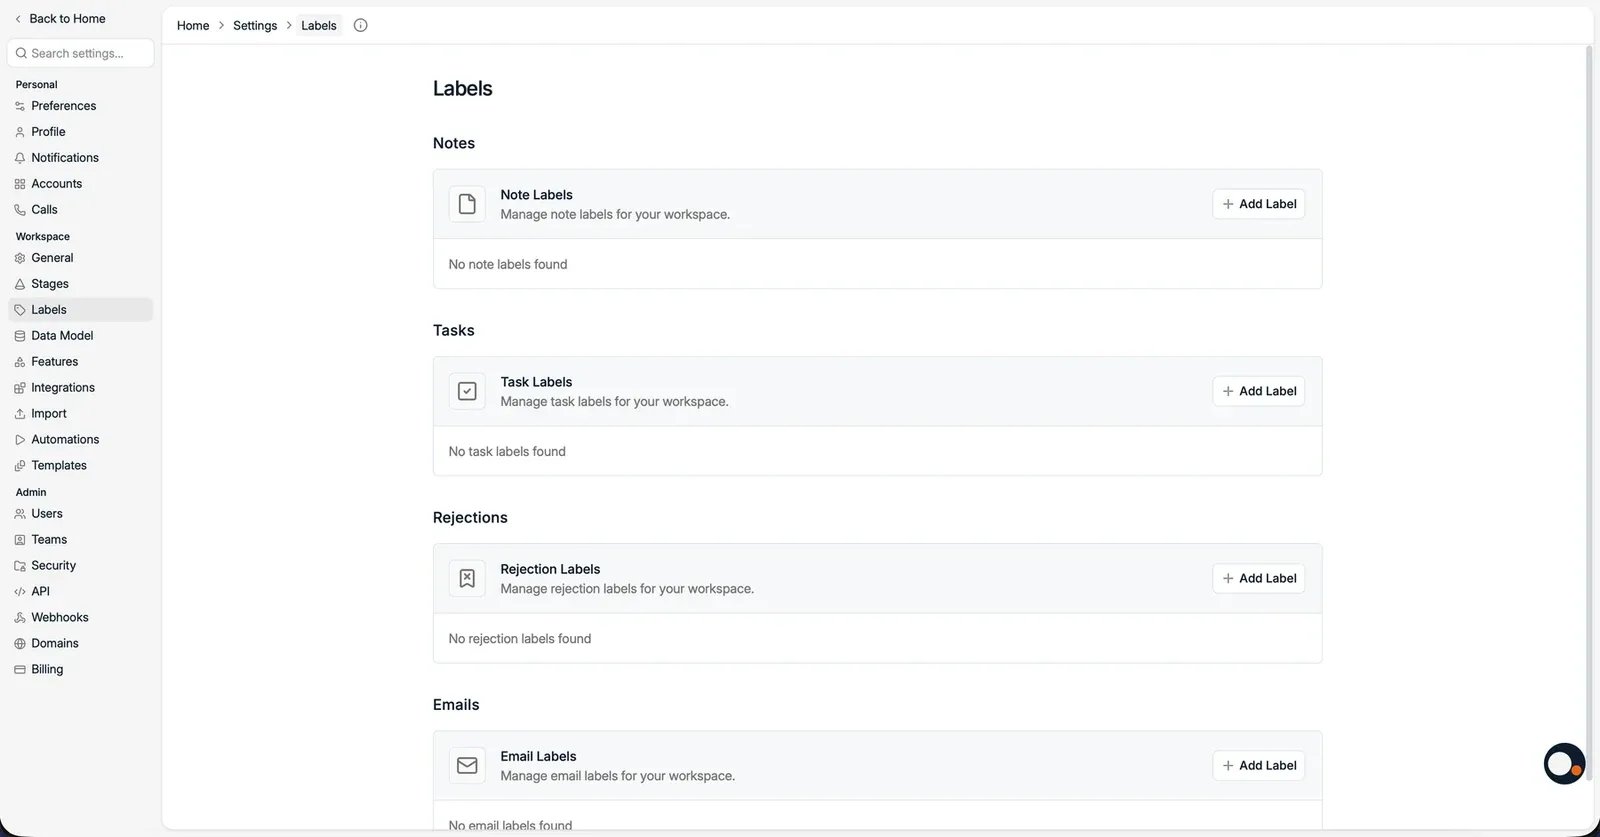 Spott groups labels by where they are used:
* **Note labels**: categorize notes, for example Follow up or Candidate interview.
* **Task labels**: categorize tasks so they surface in the right context.
* **Rejection labels**: standardize the reasons applications are rejected.
* **Email labels**: organize emails in the inbox, for example Submission or Offer.
Click **Add label** in a section to create one, give it a name and colour, and it becomes
available on the matching records.
How labels feed filtering and reporting.
### 1.4 Data model
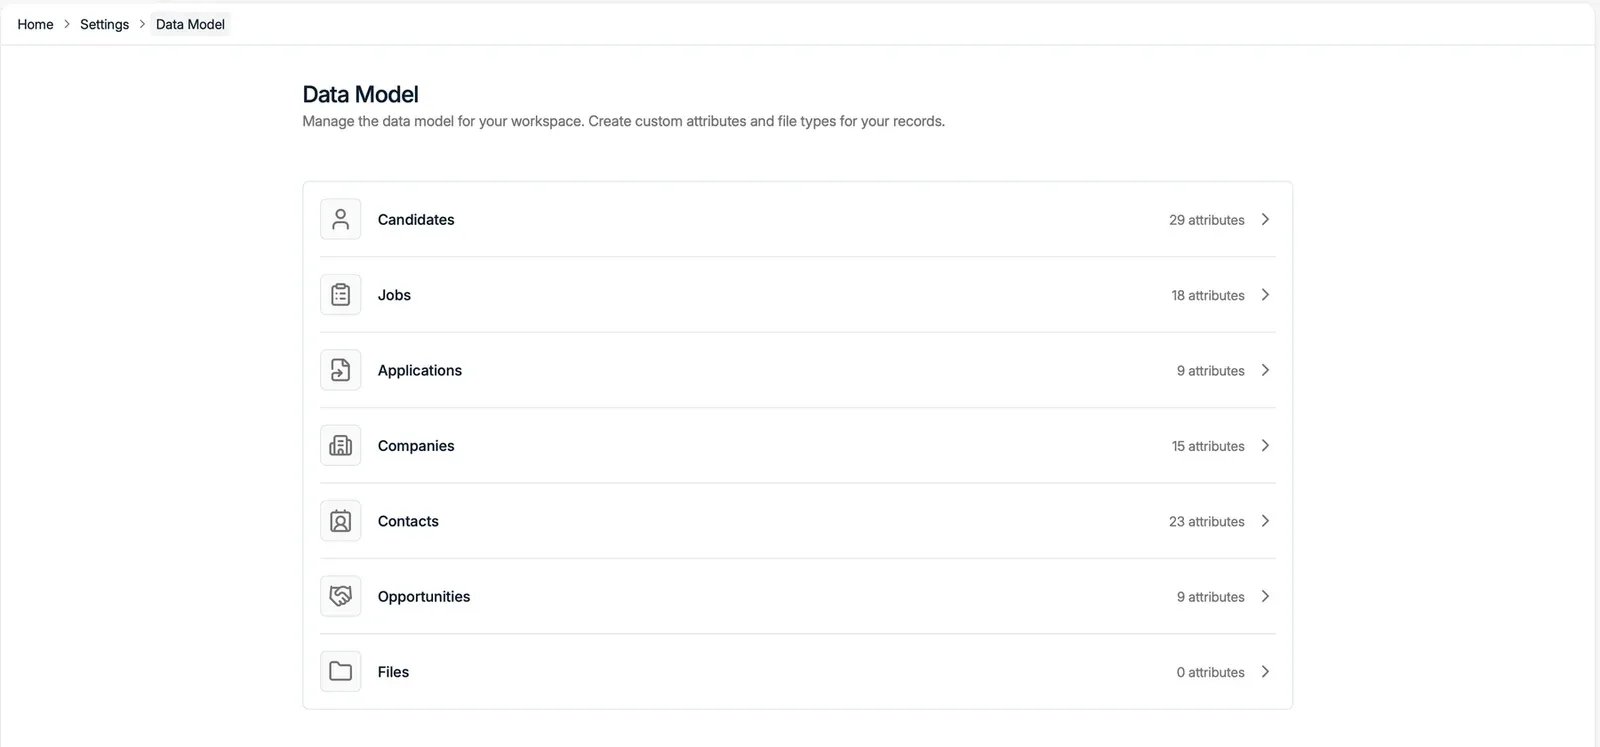
The Data model lists every record type with the number of attributes it has: Candidates,
Jobs, Applications, Companies, Contacts, Opportunities, and Files. Click a record type to
manage its attributes.
Spott groups labels by where they are used:
* **Note labels**: categorize notes, for example Follow up or Candidate interview.
* **Task labels**: categorize tasks so they surface in the right context.
* **Rejection labels**: standardize the reasons applications are rejected.
* **Email labels**: organize emails in the inbox, for example Submission or Offer.
Click **Add label** in a section to create one, give it a name and colour, and it becomes
available on the matching records.
How labels feed filtering and reporting.
### 1.4 Data model
The Data model lists every record type with the number of attributes it has: Candidates,
Jobs, Applications, Companies, Contacts, Opportunities, and Files. Click a record type to
manage its attributes.
 Here is how to create a new attribute:
You can also set up AI-filled columns and let AI populate custom attributes based on
contact and candidate profiles.
**Starred attributes**
Starred attributes appear by default on records, while unstarred ones stay available
under **Show all values**. Drag attributes to set the order they appear in.
Attribute types, and why a type is fixed once created.
When they generate, and how to refresh them.
### 1.5 Features
Enable or disable workspace-wide functionality such as enrichment, auto-updating profiles,
the unified inbox, and outreach campaigns.
What each feature switch turns on.
### 1.6 Integrations
Connect Spott to external tools like calling providers and job board distributors used by
your team. All native integrations live under this tab.
Email, calendar, telephony, messaging, job boards, and data providers.
### 1.7 Import
See [Self-migration guide](/docs/onboarding/self-migration) to learn about the CSV import
function.
### 1.8 Automations
Trigger actions automatically on events in Spott: open dialogs at the right moment, send
emails, update fields, and more.
Triggers, actions, enabling them, and the run log.
### 1.9 Templates
Manage the reusable email, note, insight, and job description templates in your workspace.
Spott reuses these across the product, so your team stays consistent.
Here is how to create a new attribute:
You can also set up AI-filled columns and let AI populate custom attributes based on
contact and candidate profiles.
**Starred attributes**
Starred attributes appear by default on records, while unstarred ones stay available
under **Show all values**. Drag attributes to set the order they appear in.
Attribute types, and why a type is fixed once created.
When they generate, and how to refresh them.
### 1.5 Features
Enable or disable workspace-wide functionality such as enrichment, auto-updating profiles,
the unified inbox, and outreach campaigns.
What each feature switch turns on.
### 1.6 Integrations
Connect Spott to external tools like calling providers and job board distributors used by
your team. All native integrations live under this tab.
Email, calendar, telephony, messaging, job boards, and data providers.
### 1.7 Import
See [Self-migration guide](/docs/onboarding/self-migration) to learn about the CSV import
function.
### 1.8 Automations
Trigger actions automatically on events in Spott: open dialogs at the right moment, send
emails, update fields, and more.
Triggers, actions, enabling them, and the run log.
### 1.9 Templates
Manage the reusable email, note, insight, and job description templates in your workspace.
Spott reuses these across the product, so your team stays consistent.
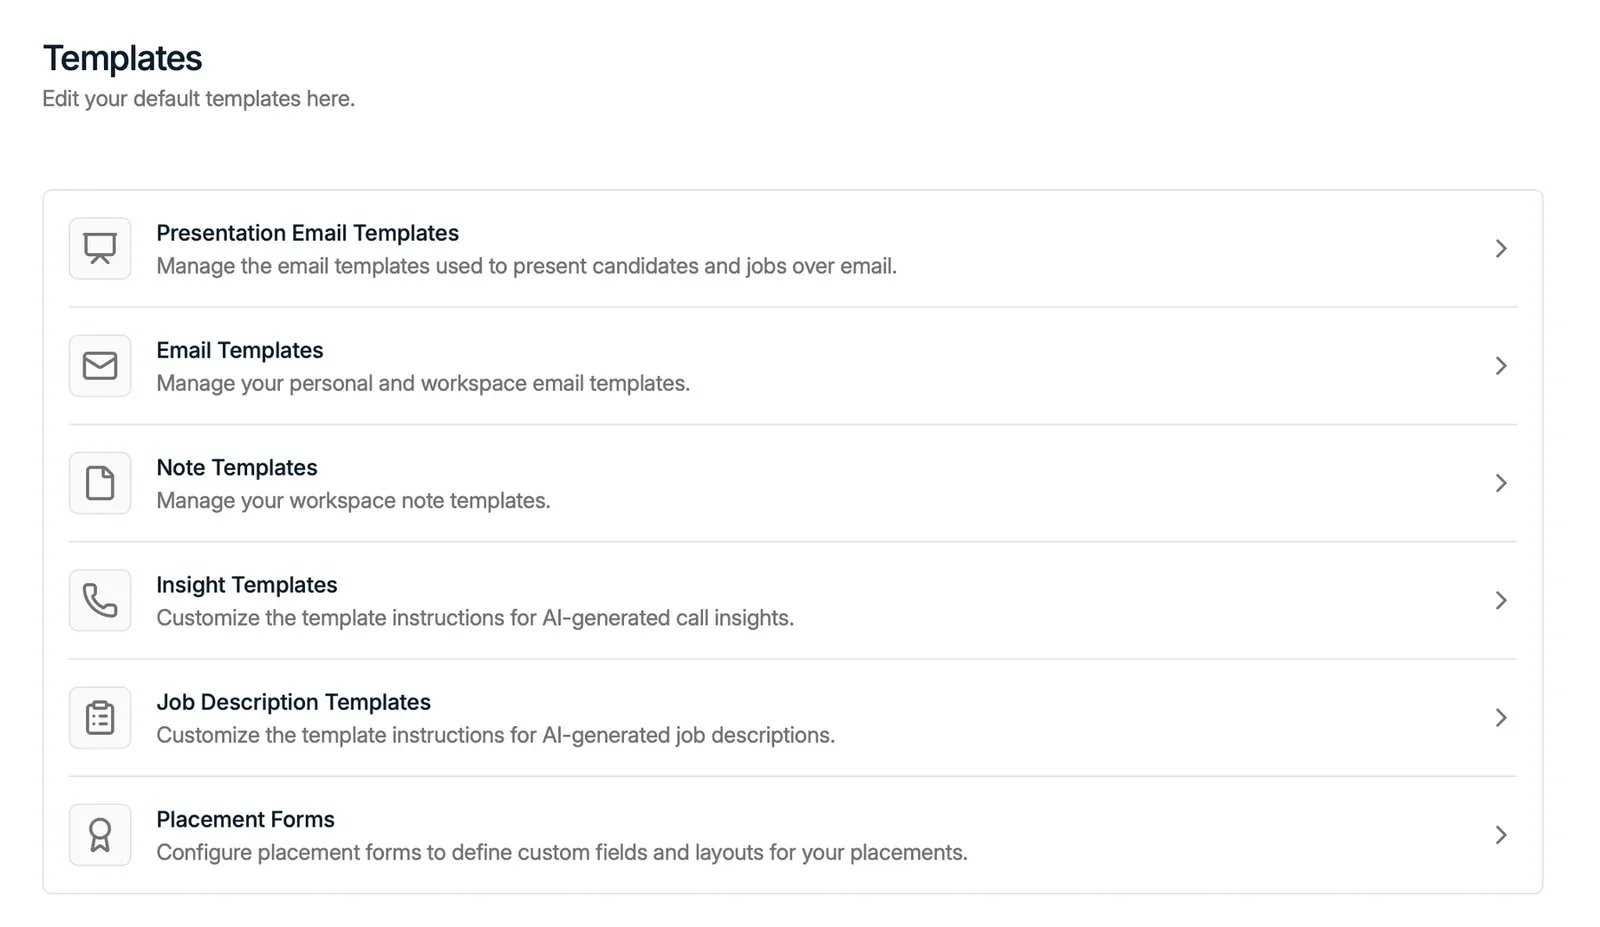 The available template types are:
* **Presentation email templates**: the prompt used to present candidates and jobs.
* **Email templates**: your personal and workspace
[email templates](/docs/inbox/message-templates).
* **Note templates**: reusable note structures for your workspace.
* **Insight templates**: the instructions the AI uses to generate call insights. See
[Spott Note Taker](/docs/notes/note-taker).
* **Job description templates**: the instructions the AI uses to generate job descriptions.
* **Placement forms**: the custom fields and layout used when logging a
[placement](/docs/placements/placements).
Open any category to view, edit, or create templates within it.
Every template type, and how Spott picks one.
## 2. Control access rights
Spott offers Role-Based Access Control (RBAC), which improves security by assigning
permissions to roles so users only access what their job needs. The main restrictions
cover workspace settings, and delete, merge, and export operations.
### 2.1 Configure role-based access control
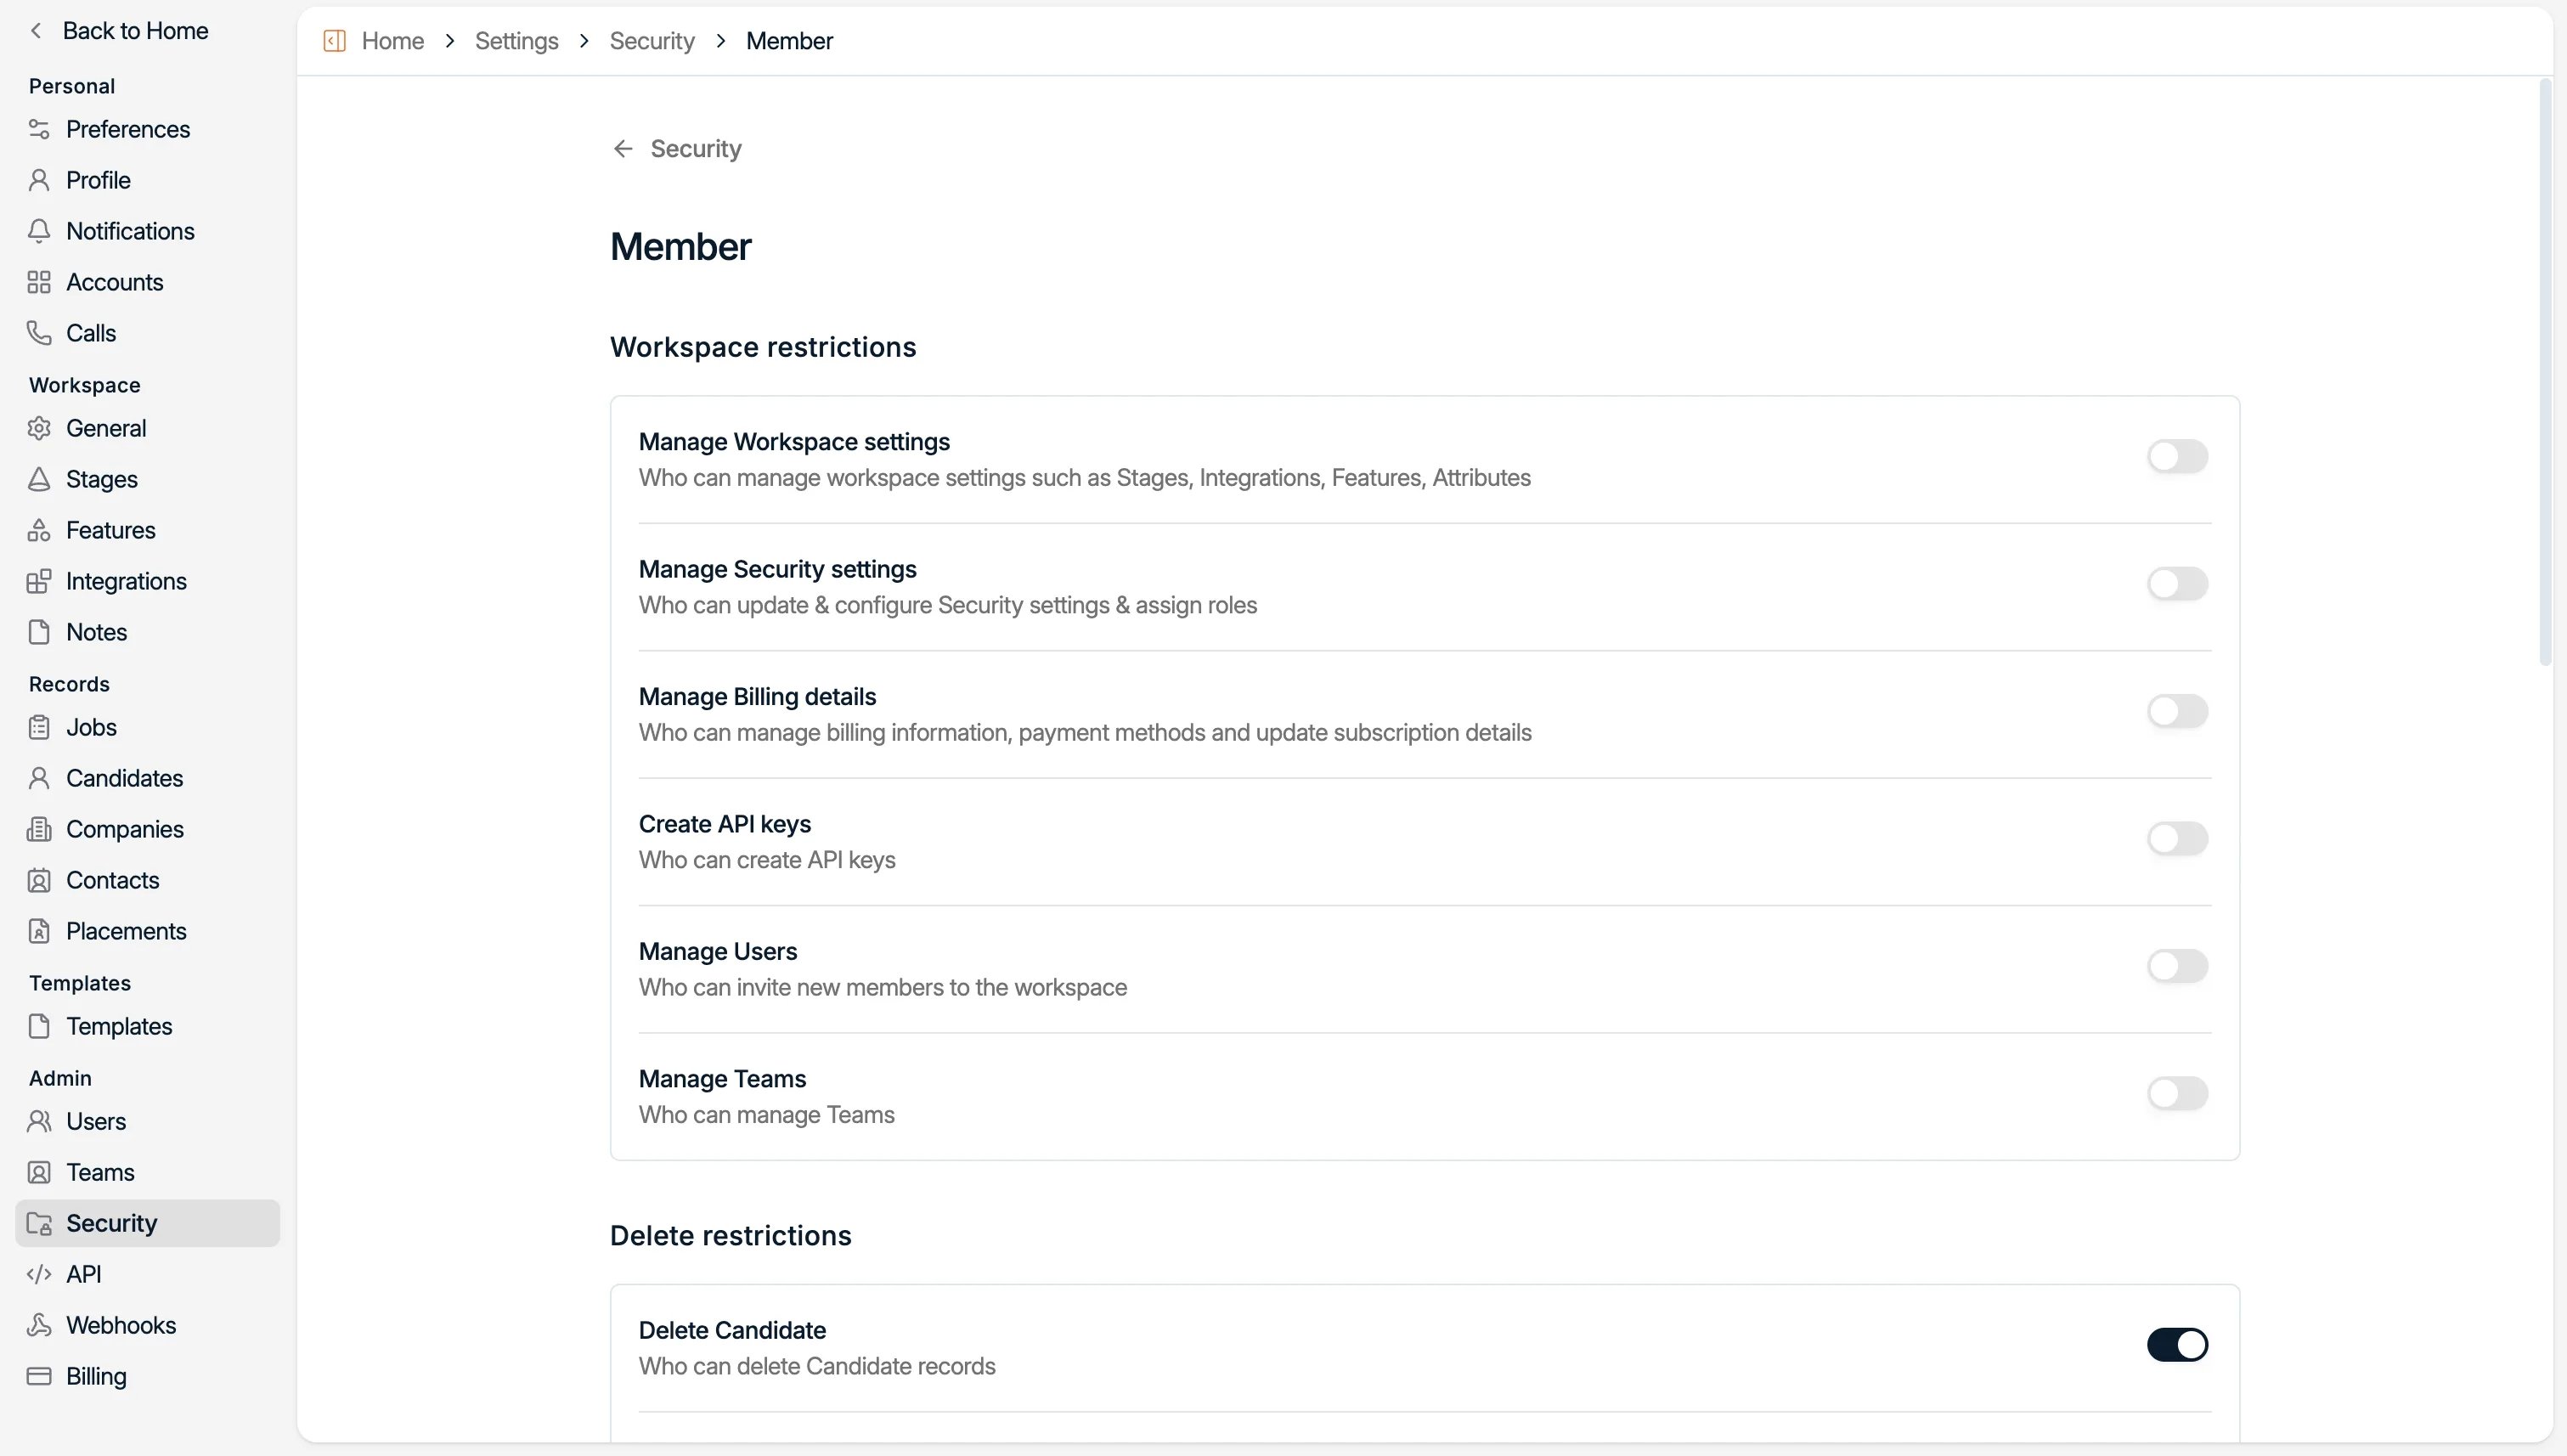
Under the **Security** tab you can create new roles.
The available template types are:
* **Presentation email templates**: the prompt used to present candidates and jobs.
* **Email templates**: your personal and workspace
[email templates](/docs/inbox/message-templates).
* **Note templates**: reusable note structures for your workspace.
* **Insight templates**: the instructions the AI uses to generate call insights. See
[Spott Note Taker](/docs/notes/note-taker).
* **Job description templates**: the instructions the AI uses to generate job descriptions.
* **Placement forms**: the custom fields and layout used when logging a
[placement](/docs/placements/placements).
Open any category to view, edit, or create templates within it.
Every template type, and how Spott picks one.
## 2. Control access rights
Spott offers Role-Based Access Control (RBAC), which improves security by assigning
permissions to roles so users only access what their job needs. The main restrictions
cover workspace settings, and delete, merge, and export operations.
### 2.1 Configure role-based access control
Under the **Security** tab you can create new roles.
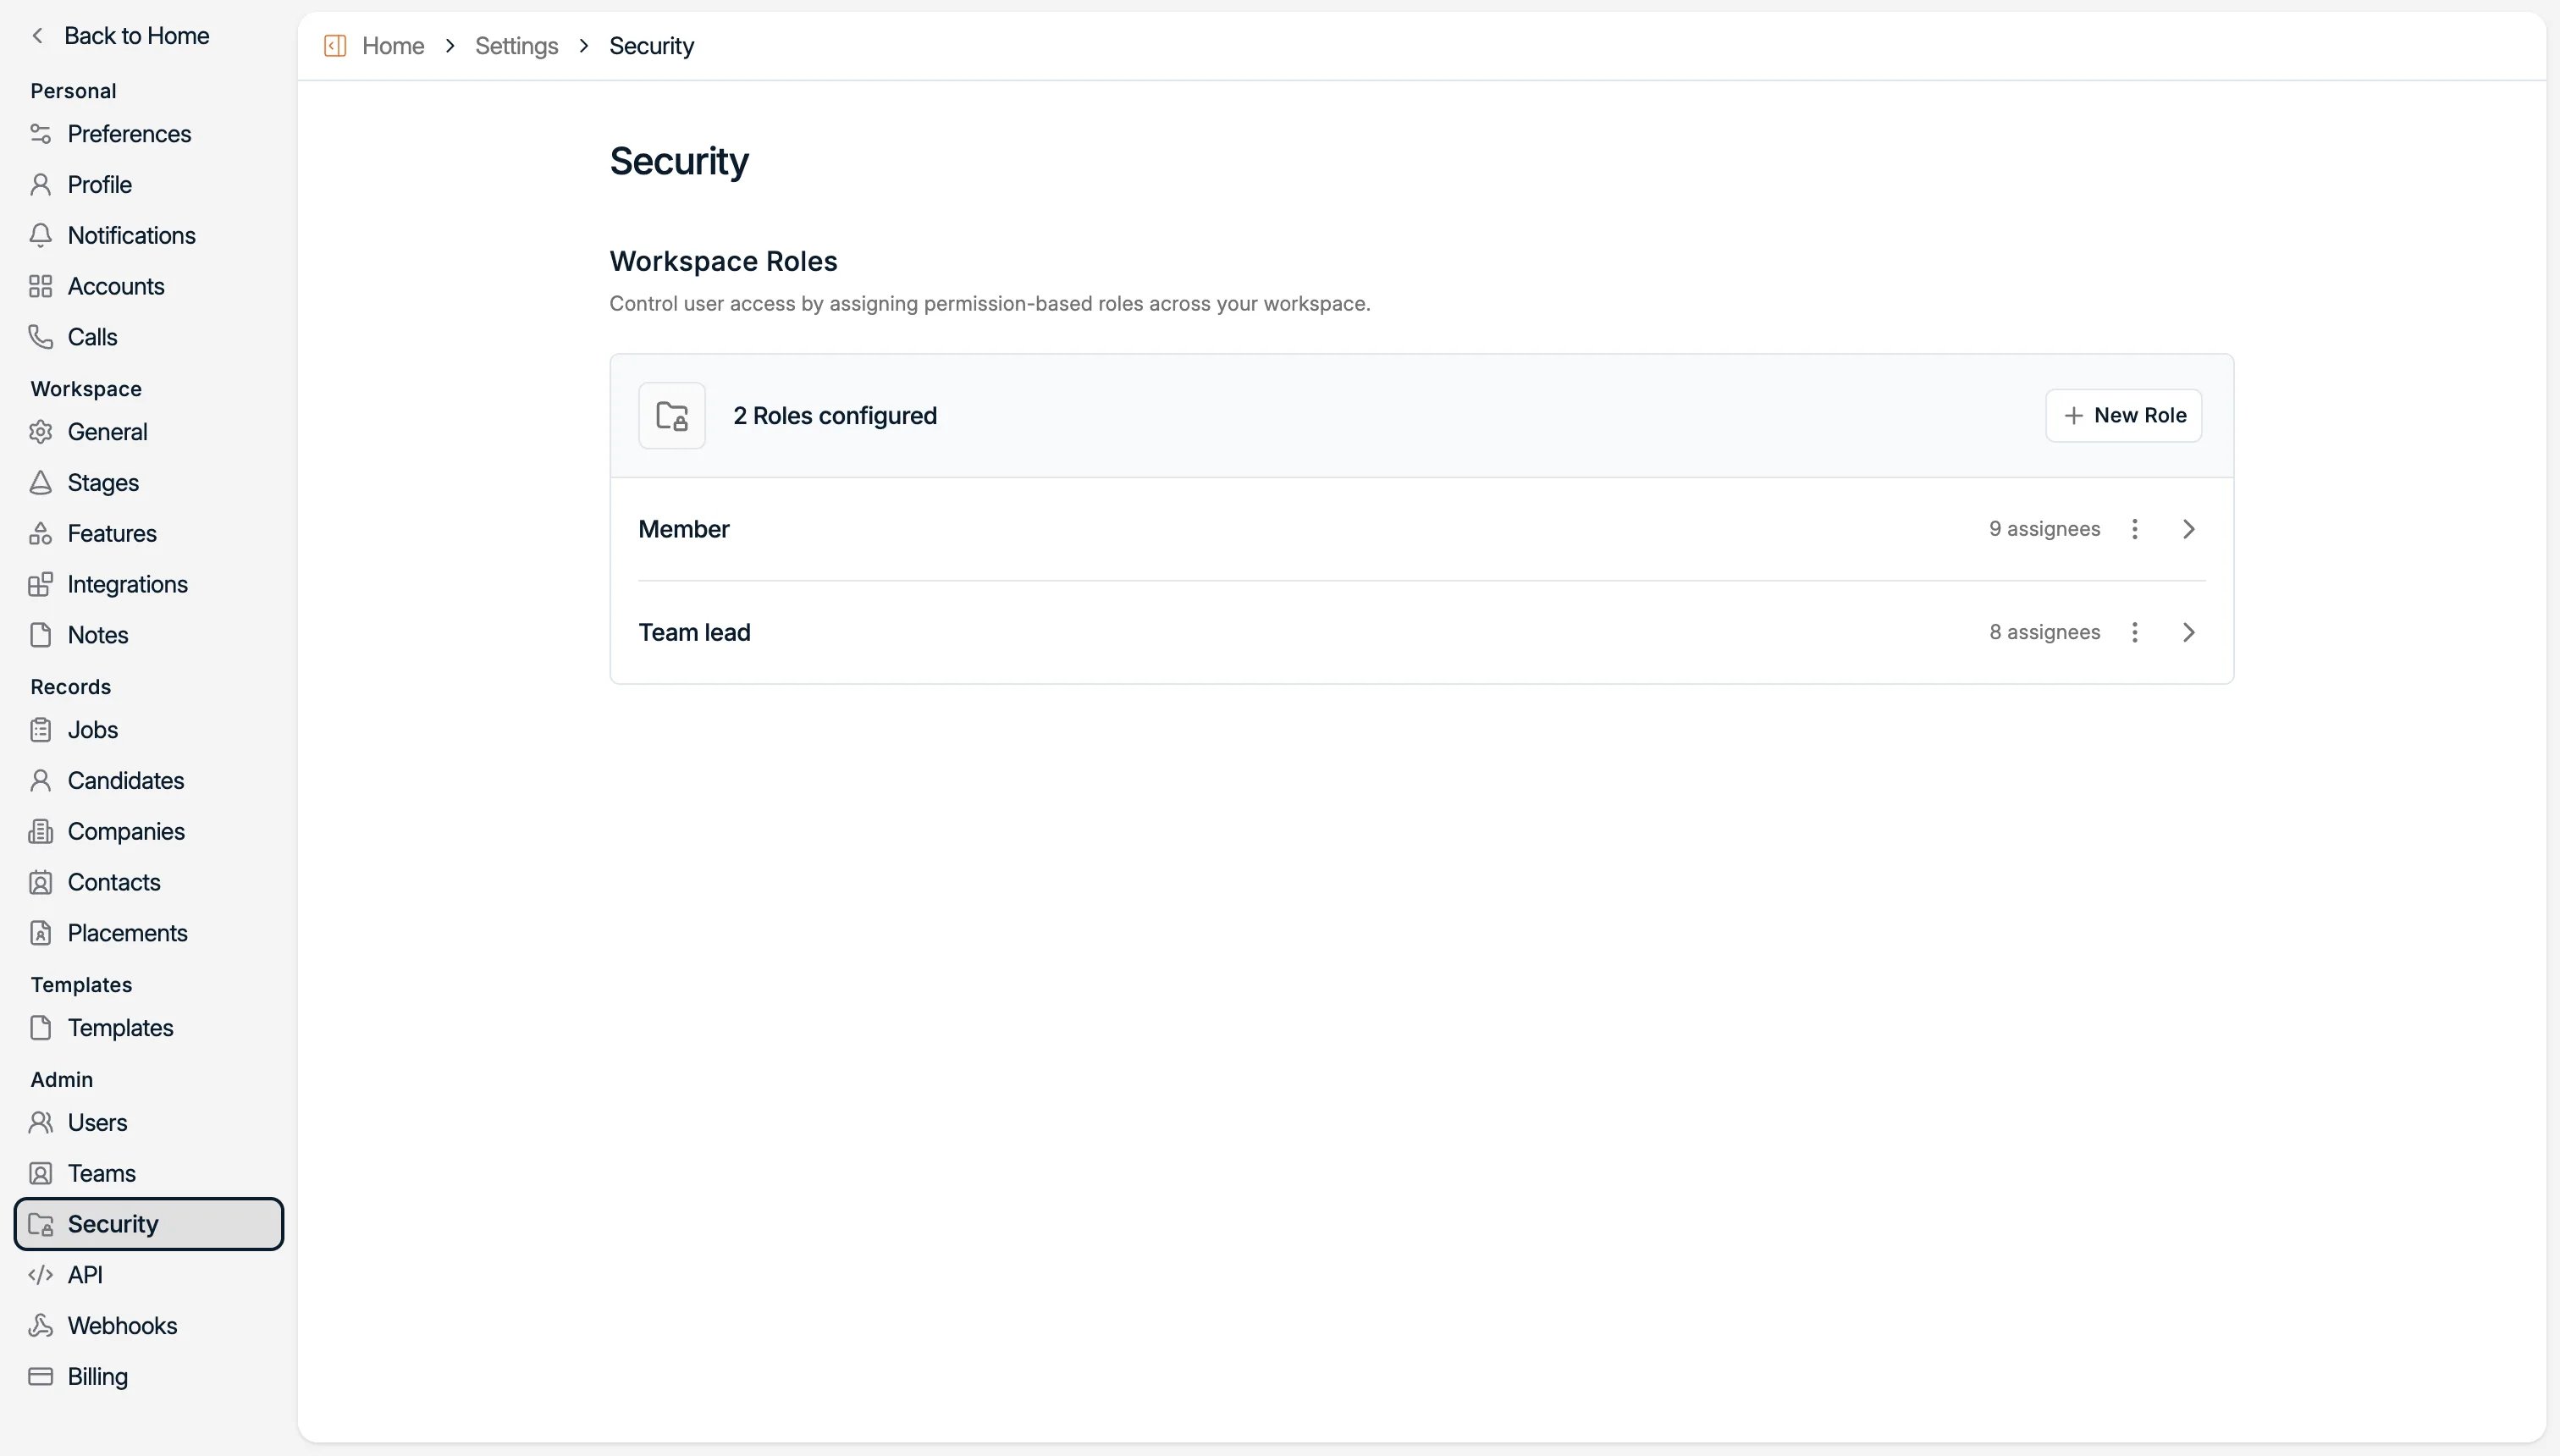 For each role, use the toggles to turn on the features that role should have. For example,
you might give team leads access to workspace settings so they can create new fields,
while regular members cannot.
For each role, use the toggles to turn on the features that role should have. For example,
you might give team leads access to workspace settings so they can create new fields,
while regular members cannot.
 Once you have granted permissions to your roles, invite users with the orange button under
the **Users** tab, then assign them a role.
Once you have granted permissions to your roles, invite users with the orange button under
the **Users** tab, then assign them a role.
 Each row shows the member's name and address, their **status** (`accepted` once they have
signed in, `pending` while an invitation is outstanding), the **roles** they hold, and the
date they joined. Roles are edited straight from the row, and a member can hold more than
one, for example **Team lead** alongside **Admin**.
Removing a user deactivates them rather than deleting the account, so their historical
activity stays attributed to them.
Roles, permissions, and workspace-wide MFA.
Offices and teams, and where you can filter by them.
## 3. Billing
Seats, credits, and topping up.
## 4. To go further
### 4.1 API
Create and manage API keys to securely access Spott data and build custom integrations,
workflows, or applications. See the
[API reference](https://api-docs.spott.io) for available endpoints and usage examples.
### 4.2 Webhooks
Configure webhook endpoints to receive real-time notifications when events occur in Spott.
The [webhooks reference](https://api-docs.spott.io) lists the events currently available.
### 4.3 Verified domains
Manage and verify your sending domains for marketing campaigns and emails sent from
automations.
Set up your sending domain, plus best practices to boost deliverability.
Each row shows the member's name and address, their **status** (`accepted` once they have
signed in, `pending` while an invitation is outstanding), the **roles** they hold, and the
date they joined. Roles are edited straight from the row, and a member can hold more than
one, for example **Team lead** alongside **Admin**.
Removing a user deactivates them rather than deleting the account, so their historical
activity stays attributed to them.
Roles, permissions, and workspace-wide MFA.
Offices and teams, and where you can filter by them.
## 3. Billing
Seats, credits, and topping up.
## 4. To go further
### 4.1 API
Create and manage API keys to securely access Spott data and build custom integrations,
workflows, or applications. See the
[API reference](https://api-docs.spott.io) for available endpoints and usage examples.
### 4.2 Webhooks
Configure webhook endpoints to receive real-time notifications when events occur in Spott.
The [webhooks reference](https://api-docs.spott.io) lists the events currently available.
### 4.3 Verified domains
Manage and verify your sending domains for marketing campaigns and emails sent from
automations.
Set up your sending domain, plus best practices to boost deliverability.
## Now your turn
* [ ] Set your **branding** and consent disclaimer
* [ ] Customize your **stages**, and set the CV sent and First interview markers
* [ ] Create your **labels**
* [ ] Review the **data model** and add the attributes you need
* [ ] Turn on the **features** your team will use
* [ ] Create your **roles** and invite your **users**
* [ ] Verify your **sending domain**
Seats, credits, and what each AI action costs.