> ## Documentation Index
> Fetch the complete documentation index at: https://docs.spott.io/llms.txt
> Use this file to discover all available pages before exploring further.
# Manage jobs
> Create jobs, define who you are looking for, match candidates with AI, and run the pipeline to placement.
In this section you learn how to find and create jobs, define each role, use AI matching,
manage candidates through the pipeline, attract applicants, and share progress with clients.
1. [Search and filter jobs, create or import them](#1-search-and-filter-jobs-create-or-import-them)
2. [Define who you are looking for in the Overview](#2-define-who-you-are-looking-for-in-the-overview)
3. [Find the right candidate matches with AI](#3-find-the-right-candidate-matches-with-ai)
4. [Understand the job pipeline](#4-understand-the-job-pipeline)
5. [Create campaigns or advertising to attract inbound candidates](#5-create-campaigns-or-advertising-to-attract-inbound-candidates)
6. [Make tracking easy for clients with the Company Portal](#6-make-tracking-easy-for-clients-with-the-company-portal)
To open the Jobs page, click **Jobs** in the left-hand navigation bar.
## 1. Search and filter jobs, create or import them
The **Jobs** page is where you search and filter your way to any existing role, and where
you create or import the ones that are not there yet.
### 1.1 Find jobs in the database
There are two ways to find the listing you are looking for: the search bar and the filters.
Use the **search bar** at the top of the Jobs page to find jobs using text from their
fields. For a more precise search, put exact phrases in double quotation marks and combine
them with **AND**, **OR**, or **NOT**.
Click **Filters** when you need to narrow the database by specific job information:
* **Status:** find jobs at a particular stage.
* **Location and company:** focus on roles for a specific place or client.
* **Users and team:** find jobs owned or supported by particular teammates.
* **Dates:** narrow by creation, start, end, or next task dates.
* **Employment details:** filter by location type or employment type.
* **Custom fields:** use the criteria created for your workspace.
You can also sort the database by fields such as job name, company, status, dates,
employment type, location type, or the next task due date.
### 1.2 Save a job view
Switch between **List** and **Board** view depending on how you want to review the database.
The same filters and sorting work in both layouts.
To save the setup as a view, click the current view name in the top right corner, such as
**Default view**, and select **+ Create new view**. Give the view a name, then save it so
you can return to the same filters, sorting, and columns later.
### 1.3 Create a job manually
Click **Add job** in the top right corner of the Jobs page to create a role from scratch.
Add the job title, company, and status, then include any available details such as
employment type, location type, salary range, description, and client contacts.
Click **Create job** to add the role to the Jobs list, then click its title to open the
**Overview** tab.
### 1.4 Import an existing job posting
If the vacancy already exists online, import it instead of typing it again. In the **Add new
job** dialog, use **Import from URL** to paste a public job posting link, or use the
[browser extension](/docs/settings/chrome-extension) to import the posting from the page you
are looking at.
Spott fills the job fields from the posting, and you can review or edit the information
before continuing.
Filters, list and board view, and saved views.
Create a job manually, from a URL, or by import.
## 2. Define who you are looking for in the Overview
The **Overview** tab is where you turn a new job record into a clear brief that your team
and Spott's AI can both use.
### 2.1 Set up the job in order
From the Jobs page, click the job title to open its **Overview** tab. Work through the setup
in this order, so each step gives the next one enough context:
1. **Files and notes:** attach the client's job description, and link briefing or intake
notes to the job.
2. **Generate details:** click **Regenerate details** to create or improve the job
information from the linked material.
3. **Details and fees:** confirm the requirements, locations, compensation, and the agreed
fee structure.
4. **Client contacts:** link the people involved in the role.
5. **Scorecard:** create the evaluation template by hand, or generate it from the sourcing
criteria.
6. **Ask AI:** ask questions once the job record holds the context the AI needs.
Notes are not linked to a job automatically. Open the relevant note and link it to the job,
so it appears on the record and becomes available as AI context.
### 2.2 Use the side panel while defining the role
Use **Details** in the side panel to review the job fields, create follow-up tasks, and
generate a scorecard. Open **Ask AI** when you need an answer based on the job's details,
notes, attachments, and sourcing criteria.
The sourcing criteria on the Overview tab power AI matching, so make the hard requirements
and the preferred qualities as specific as you can.
The six-step setup flow: files and notes, details, fees, contacts, and the scorecard.
## 3. Find the right candidate matches with AI
Once the job brief is complete, use **Matching** to find new candidates whose profiles fit
the role.
### 3.1 Run a job search
Open the job and select **Matching**, then click **Start new job search**. Spott turns the
job's description, notes, and sourcing criteria into suggested pre-filters and criteria.
Review them with **Edit criteria**, make any changes you need, then click **Run search**.
Matching looks for new candidates and leaves out anyone already in the job's pipeline. Use
the **Candidates** tab to review the people already linked to the role.
### 3.2 Use pre-filters and criteria correctly
Spott uses pre-filters and criteria for different parts of the search:
* **Pre-filters** are hard requirements a candidate has to meet before Spott ranks them,
such as job title, field of study, keywords, or years of experience.
* **Criteria** are natural-language qualities used to rank the remaining candidates, for
example "Business-level fluency in French".
Use **Match all filters** to require every pre-filter, or switch it off when candidates can
meet any of them. Spott shows how many candidates pass the filters, so you can widen them if
the pool is too small.
Criteria are numbered by priority: the ones higher in the list weigh more heavily in the
match score. Drag a criterion to change its position, click **×** to remove it, or select
**Add criteria** to create another one.
Use pre-filters for the requirements that must be true, and criteria for the qualities you
want to compare. Keywords belong in the pre-filters, not as a criterion of their own.
### 3.3 Review and act on the results
Start with the candidates who have the highest match scores. Click a score to review Spott's
reasoning, and open the candidate profile before you decide.
Match scores assess the AI criteria only. Every candidate in the results has already passed
the pre-filters, including the ones with a weak score.
From the results you can:
* **Review candidates:** compare their overall score and their rating for each criterion.
* **Add strong matches:** move suitable candidates into the job pipeline.
* **Refine the search:** edit the pre-filters or criteria and run it again.
* **Change the layout:** use Card view for deeper reading, or Table view for faster
comparison.
Use **Search history** to reopen an earlier search instead of rebuilding it.
Card and table views, search history, and sharing a search.
## 4. Understand the job pipeline
The **Candidates** tab shows everyone linked to the job, and where each person is in the
hiring process.
### 4.1 Review the pipeline
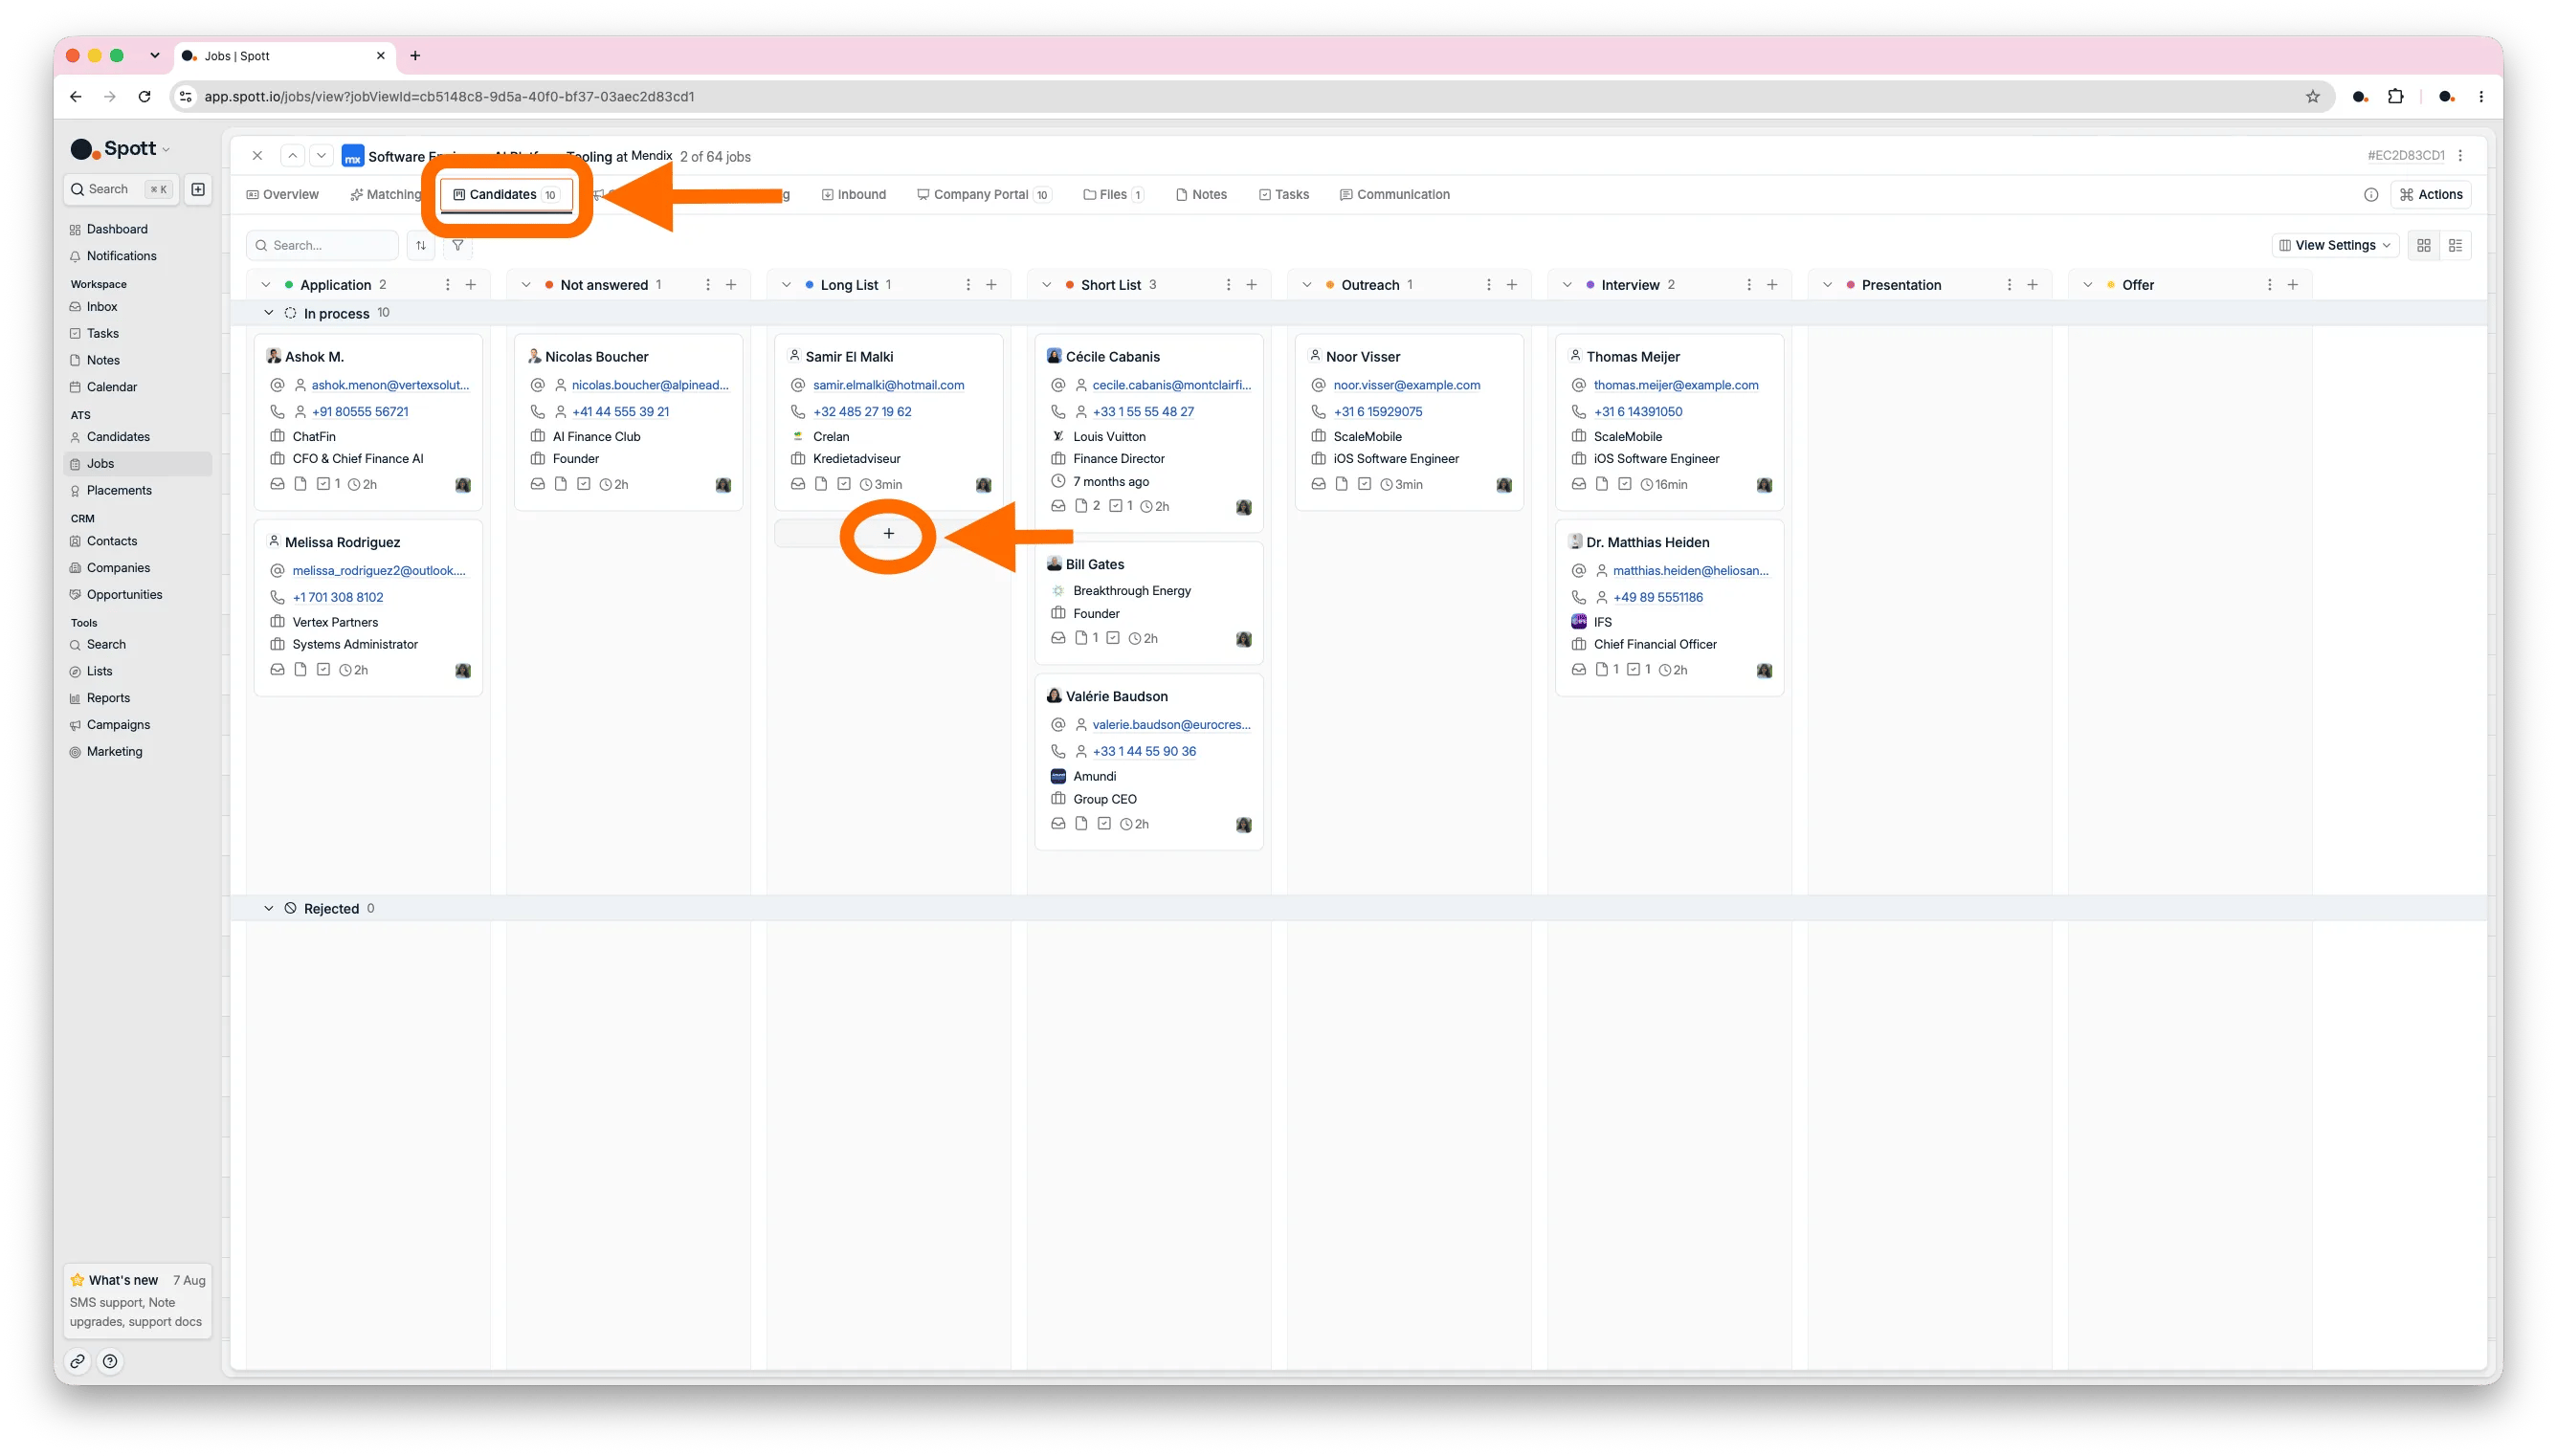
Open a job and select **Candidates**. Use **Board view** to move candidate cards through
stages visually, or **List view** when you need a sortable, filterable table.
Drag a card to move a candidate between stages, or drop it into the rejected group to reject
the candidate at their current stage. That keeps stage-conversion reporting accurate without
needing a separate rejected stage.
Select several candidates with the checkboxes when you want to take the same action on all
of them. You can:
* **Update the pipeline:** move candidates to a stage, change their label, or reject them.
* **Organise candidates:** add them to another job or to a list.
* **Contact candidates:** send an email, present them, or enroll them in a
[campaign](/docs/outreach/campaigns).
* **Share with the client:** publish them to the Company Portal.
Pipeline stages are configured for the whole workspace rather than per job. To change them,
open **Settings → Stages**, and remember the change affects every job using that pipeline.
### 4.2 Add candidates to a stage
Click **+** on the stage where the candidate should start. Search for an existing candidate,
or select **Upload CV** to create a new one, then click **Add to job**.
 ### 4.3 Work from the application record
Click a candidate card to open the application that connects that person to this job. The
application holds the activity feed, your team's internal thread, Ask AI, scorecards,
meetings, and quick actions for the next step.
From the application you can send an email, add a note or a scorecard, present the
candidate, publish them to the Company Portal, or mark them as rejected or placed.
A candidate is only marked as placed once you complete the required placement information,
including the fee details and the fee splits.
Cards, view settings, and bulk actions.
Upcoming meetings, interview buttons, and the internal thread.
## 5. Create campaigns or advertising to attract inbound candidates
Use campaigns to approach people already in your database, or advertise the job publicly
when you want candidates to apply themselves.
### 5.1 Create a campaign for the job
If campaigns are enabled for your workspace, use the job's **Campaigns** tab to enroll
selected profiles in a sequence of messages and reminders. You can also create and manage
campaigns from **Campaigns** in the left-hand navigation bar.
### 5.2 Write or generate the vacancy
Open the job and select **Advertising**. Write or paste the vacancy description, or click
**Generate job description** to create it with AI from the job details.
Use **Ask AI** in the side panel to refine the tone, requirements, length, or language before
publishing.
### 5.3 Choose where to publish
The Spott job board showcases your open positions online and receives applications
directly into Spott. In the right-hand panel:
* Switch the **Spott job board** toggle to **Open** to publish the vacancy. You can set
it back to **Closed** at any time.
* Pick the **inbound applications stage** where new applicants should land.
* Use **Preview** to see the posting as candidates will, and **Copy link** to share the
application link.
Connect an existing LinkedIn Recruiter job posting so its applicants flow into Spott. See
[connecting a LinkedIn job board post](/docs/jobs/linkedin-job-posting).
With a multiposter integration enabled, distribute the vacancy to many job boards at
once:
* [Broadbean](/docs/integrations/broadbean)
* [Idibu](/docs/integrations/idibu)
* [VDAB](/docs/integrations/vdab), for the Flemish public job board
Multiposting uses **your own commercial account** with the multiposter. Posting credits,
per-board fees, and pricing are handled with the multiposter, not Spott.
Closing a job in Spott does not close its published adverts. Close each advert separately,
or configure an automation, so a filled role stops receiving applications.
### 5.4 Review inbound applications
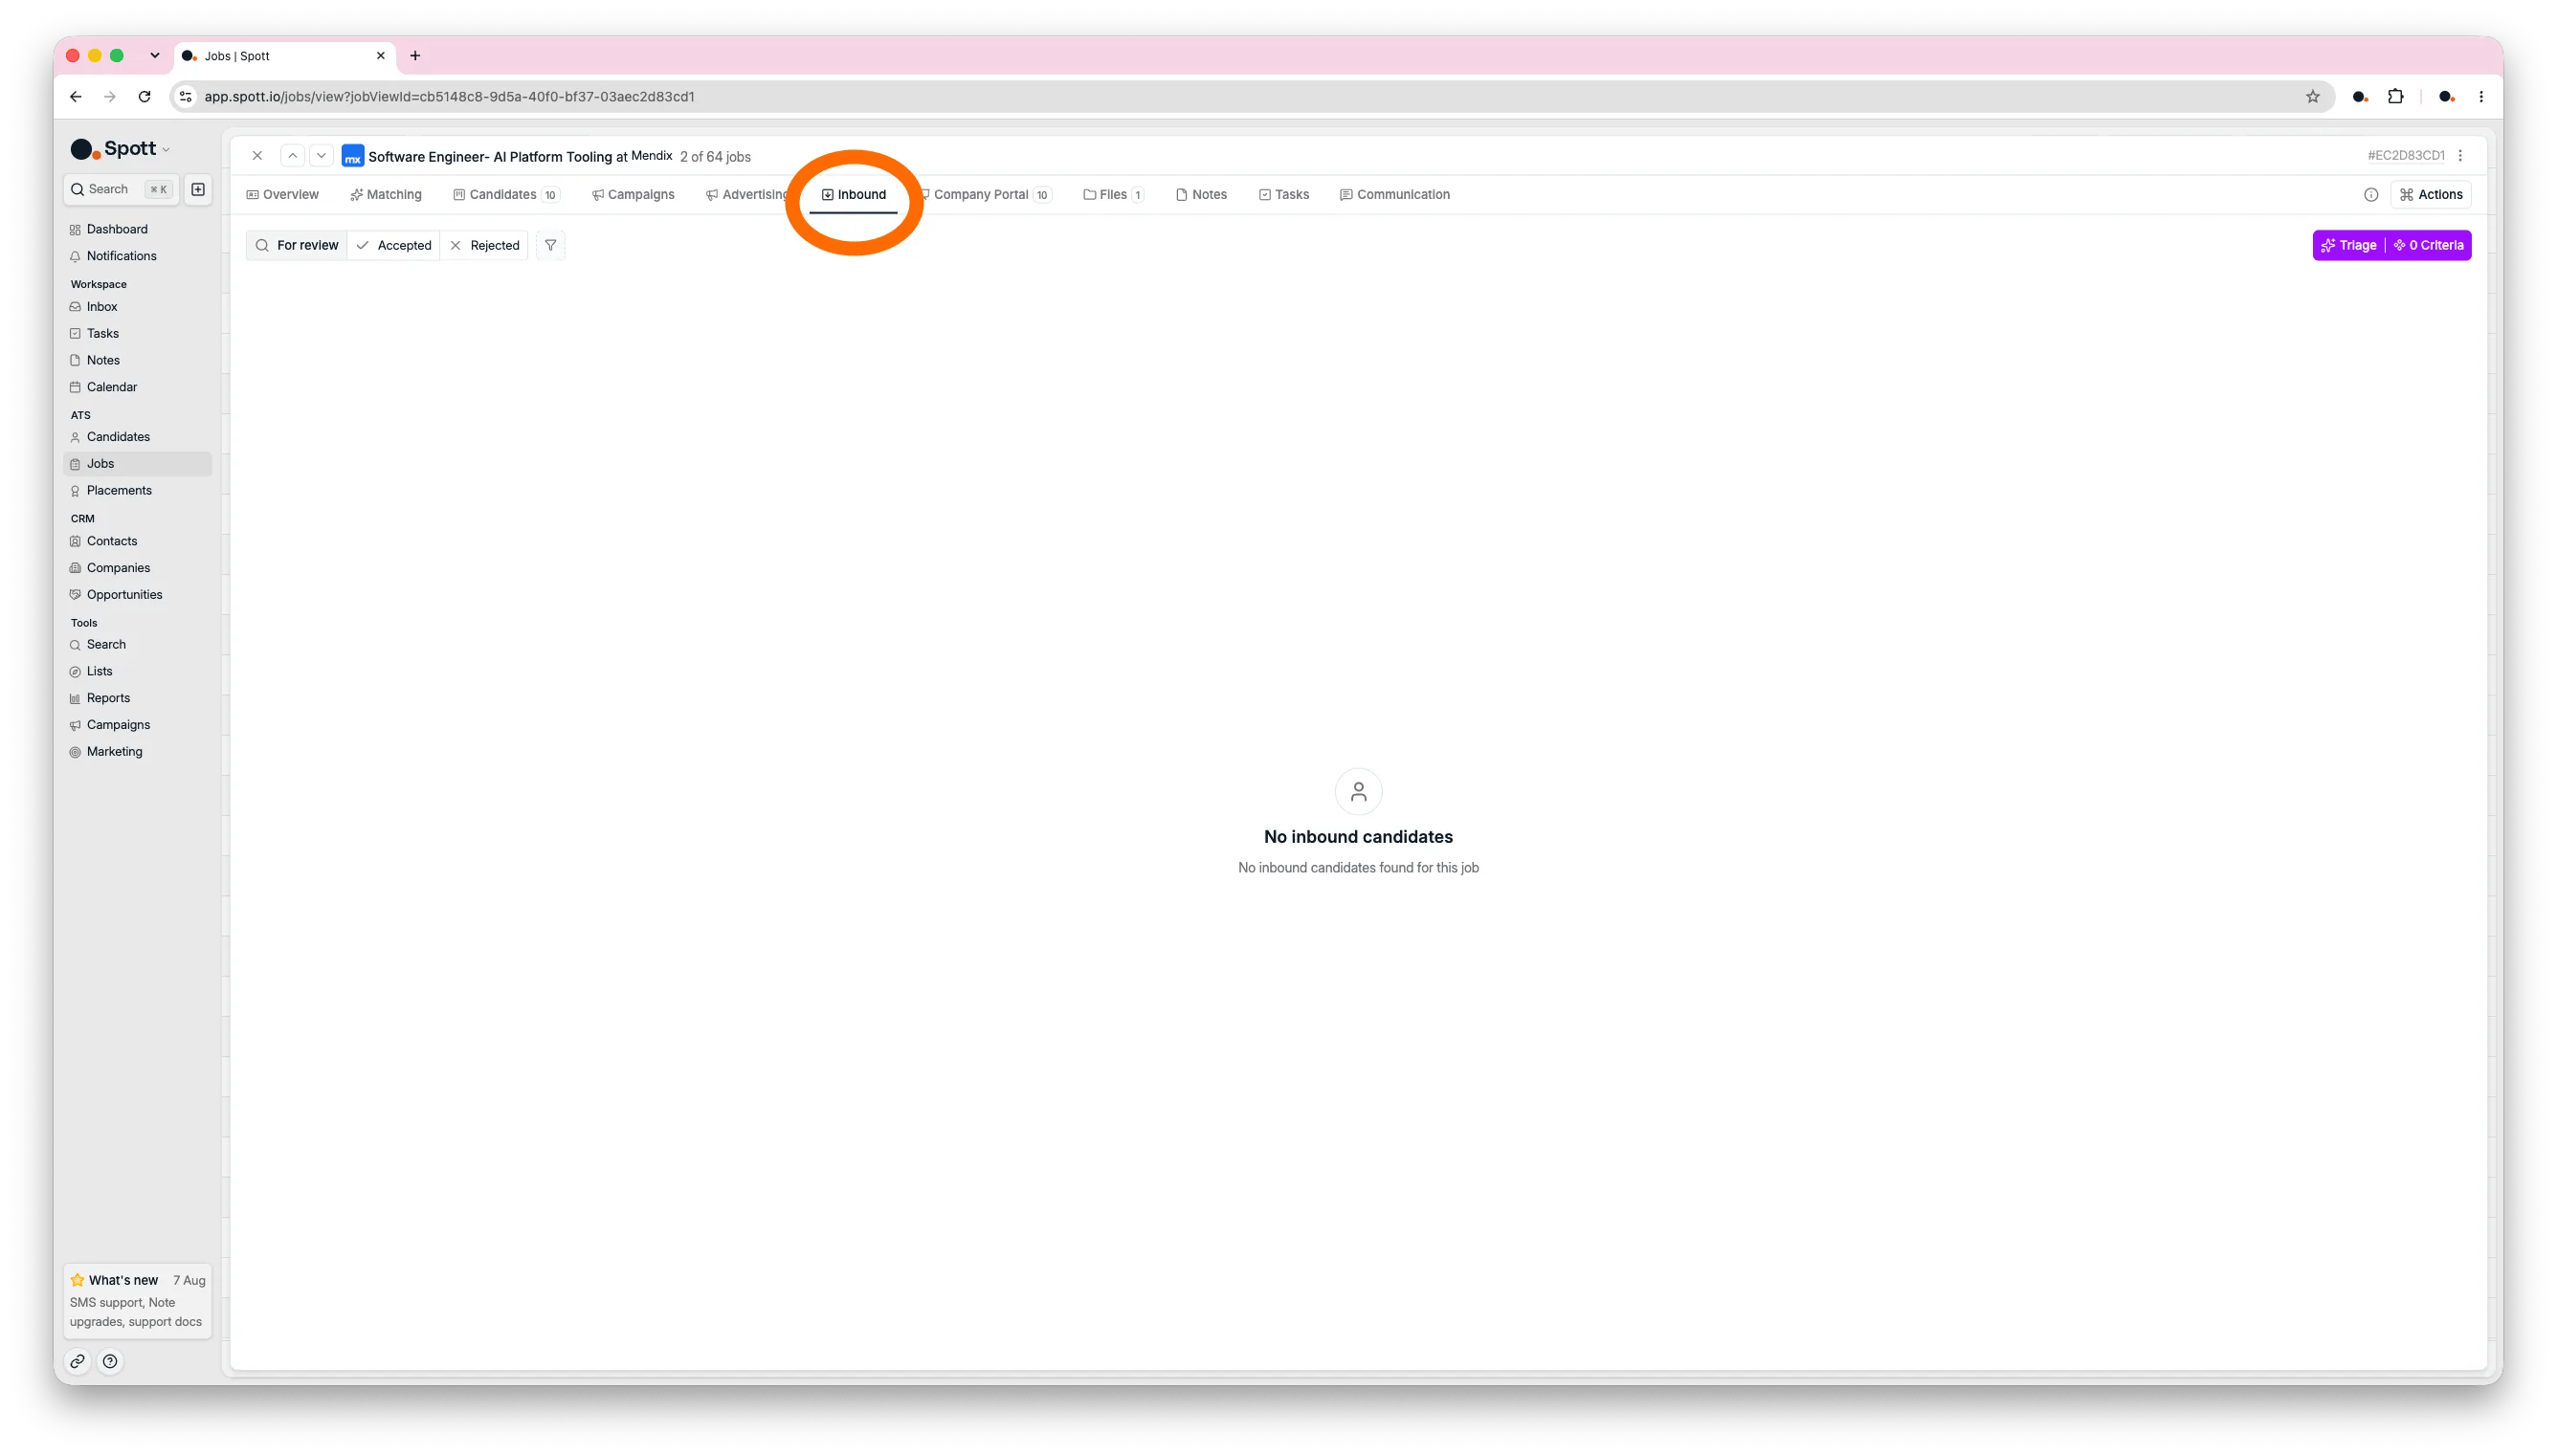
Open the job's **Inbound** tab to review the people who applied through the Spott job board,
LinkedIn, or a multiposter. Spott links each application to the job, enriches the candidate
data, and queues the person for review.
For each applicant you can:
* **Review the AI score:** open the score to see the assessment for each criterion.
* **Accept the candidate:** move one or several applicants into the pipeline stage you
choose.
* **Reject the candidate:** reject the application, and choose whether to keep or delete the
candidate's database record.
To reject someone and email them at the same time, click **Send email** first and use the
rejection toggle in the message composer. That closes the application and sends the
explanation in one step.
An inbound applicant only receives a match score after you have run a search on the job.
### 4.3 Work from the application record
Click a candidate card to open the application that connects that person to this job. The
application holds the activity feed, your team's internal thread, Ask AI, scorecards,
meetings, and quick actions for the next step.
From the application you can send an email, add a note or a scorecard, present the
candidate, publish them to the Company Portal, or mark them as rejected or placed.
A candidate is only marked as placed once you complete the required placement information,
including the fee details and the fee splits.
Cards, view settings, and bulk actions.
Upcoming meetings, interview buttons, and the internal thread.
## 5. Create campaigns or advertising to attract inbound candidates
Use campaigns to approach people already in your database, or advertise the job publicly
when you want candidates to apply themselves.
### 5.1 Create a campaign for the job
If campaigns are enabled for your workspace, use the job's **Campaigns** tab to enroll
selected profiles in a sequence of messages and reminders. You can also create and manage
campaigns from **Campaigns** in the left-hand navigation bar.
### 5.2 Write or generate the vacancy
Open the job and select **Advertising**. Write or paste the vacancy description, or click
**Generate job description** to create it with AI from the job details.
Use **Ask AI** in the side panel to refine the tone, requirements, length, or language before
publishing.
### 5.3 Choose where to publish
The Spott job board showcases your open positions online and receives applications
directly into Spott. In the right-hand panel:
* Switch the **Spott job board** toggle to **Open** to publish the vacancy. You can set
it back to **Closed** at any time.
* Pick the **inbound applications stage** where new applicants should land.
* Use **Preview** to see the posting as candidates will, and **Copy link** to share the
application link.
Connect an existing LinkedIn Recruiter job posting so its applicants flow into Spott. See
[connecting a LinkedIn job board post](/docs/jobs/linkedin-job-posting).
With a multiposter integration enabled, distribute the vacancy to many job boards at
once:
* [Broadbean](/docs/integrations/broadbean)
* [Idibu](/docs/integrations/idibu)
* [VDAB](/docs/integrations/vdab), for the Flemish public job board
Multiposting uses **your own commercial account** with the multiposter. Posting credits,
per-board fees, and pricing are handled with the multiposter, not Spott.
Closing a job in Spott does not close its published adverts. Close each advert separately,
or configure an automation, so a filled role stops receiving applications.
### 5.4 Review inbound applications
Open the job's **Inbound** tab to review the people who applied through the Spott job board,
LinkedIn, or a multiposter. Spott links each application to the job, enriches the candidate
data, and queues the person for review.
For each applicant you can:
* **Review the AI score:** open the score to see the assessment for each criterion.
* **Accept the candidate:** move one or several applicants into the pipeline stage you
choose.
* **Reject the candidate:** reject the application, and choose whether to keep or delete the
candidate's database record.
To reject someone and email them at the same time, click **Send email** first and use the
rejection toggle in the message composer. That closes the application and sends the
explanation in one step.
An inbound applicant only receives a match score after you have run a search on the job.
 The job board, branding, and where the posting appears.
Review, accept, and reject, including rejection emails.
## 6. Make tracking easy for clients with the Company Portal
The **Company Portal** gives selected client contacts a secure, real-time view of the
candidates you choose to share.
### 6.1 Publish candidates to the portal
Open the job and select **Company Portal**. Publish one candidate with **Publish on
portal**, or select several candidates in the pipeline and choose **Add to company portal**.
If you want candidates to appear automatically, enable **Show all candidates in real time**
and choose which pipeline stages should publish to the portal.
### 6.2 Configure client access
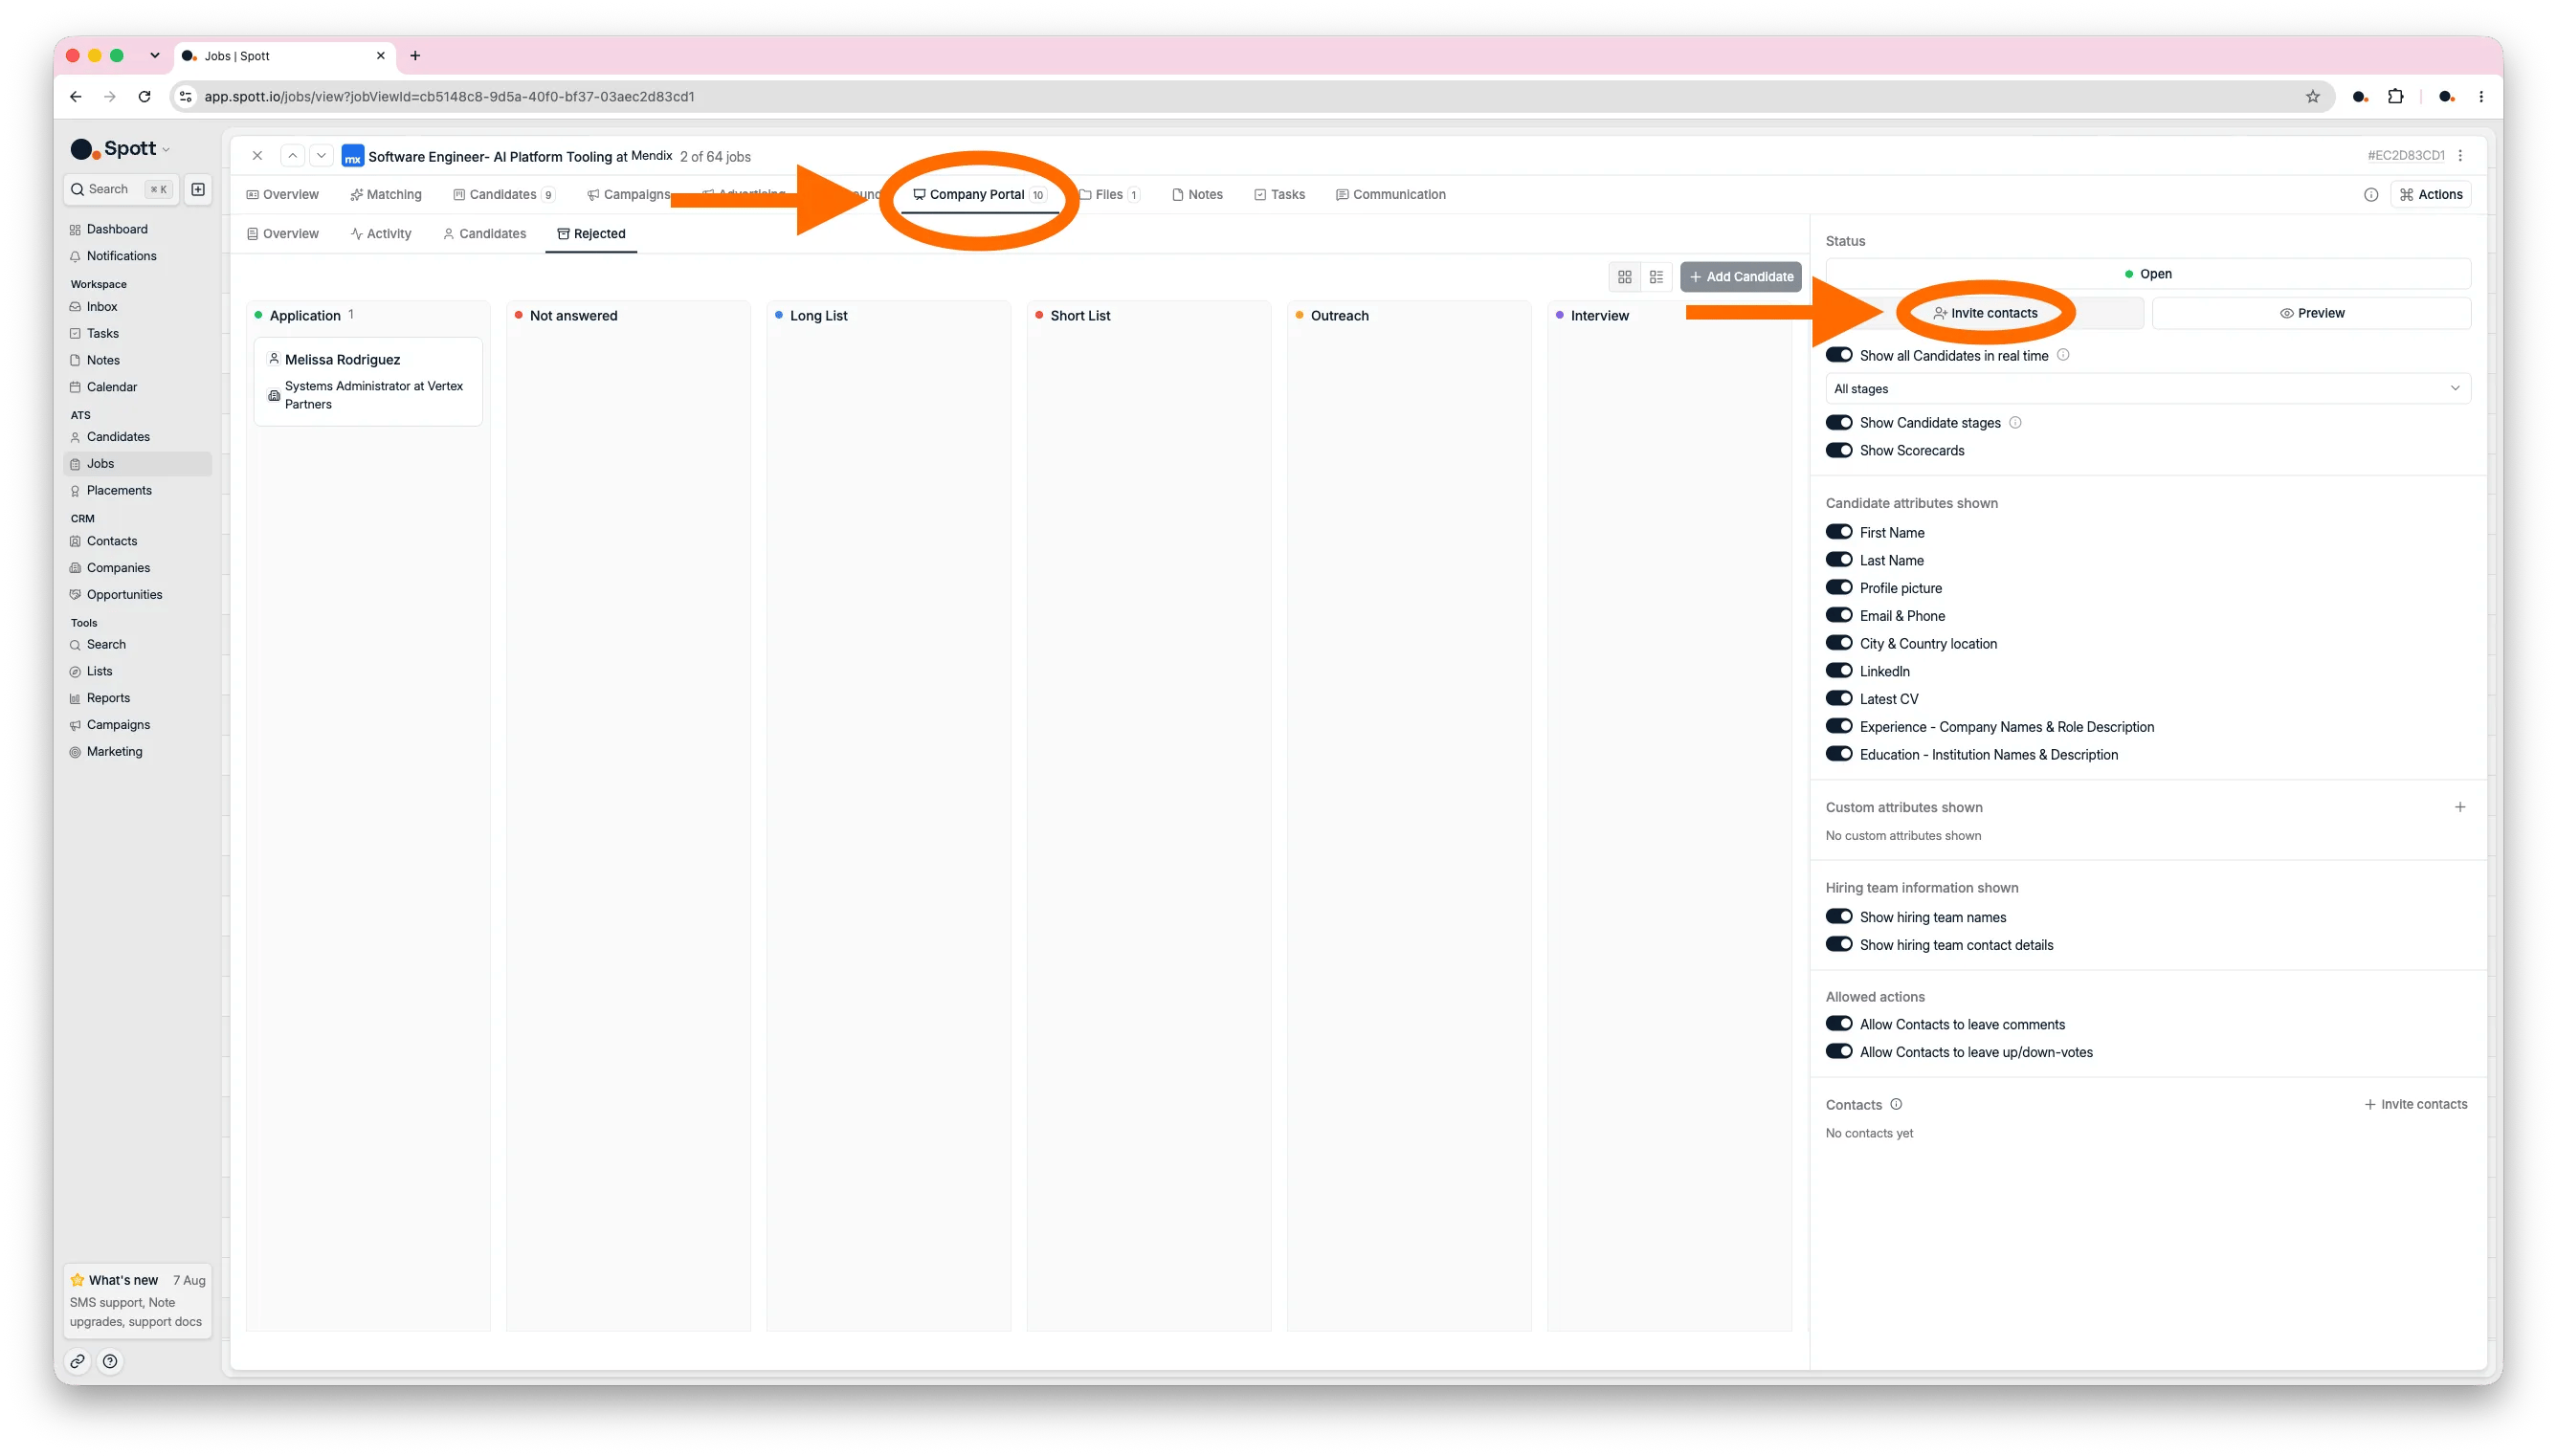
Use the panel on the right to open or close the portal, invite client contacts, preview
their experience, and choose which candidate fields they can see.
Only contacts registered under the company associated with the job can be invited to its
Company Portal.
Clients can review candidates, comment, and request an interview. They cannot move
candidates between stages, reject them, or bulk-export files.
The job board, branding, and where the posting appears.
Review, accept, and reject, including rejection emails.
## 6. Make tracking easy for clients with the Company Portal
The **Company Portal** gives selected client contacts a secure, real-time view of the
candidates you choose to share.
### 6.1 Publish candidates to the portal
Open the job and select **Company Portal**. Publish one candidate with **Publish on
portal**, or select several candidates in the pipeline and choose **Add to company portal**.
If you want candidates to appear automatically, enable **Show all candidates in real time**
and choose which pipeline stages should publish to the portal.
### 6.2 Configure client access
Use the panel on the right to open or close the portal, invite client contacts, preview
their experience, and choose which candidate fields they can see.
Only contacts registered under the company associated with the job can be invited to its
Company Portal.
Clients can review candidates, comment, and request an interview. They cannot move
candidates between stages, reject them, or bulk-export files.
 ### 6.3 Track client feedback
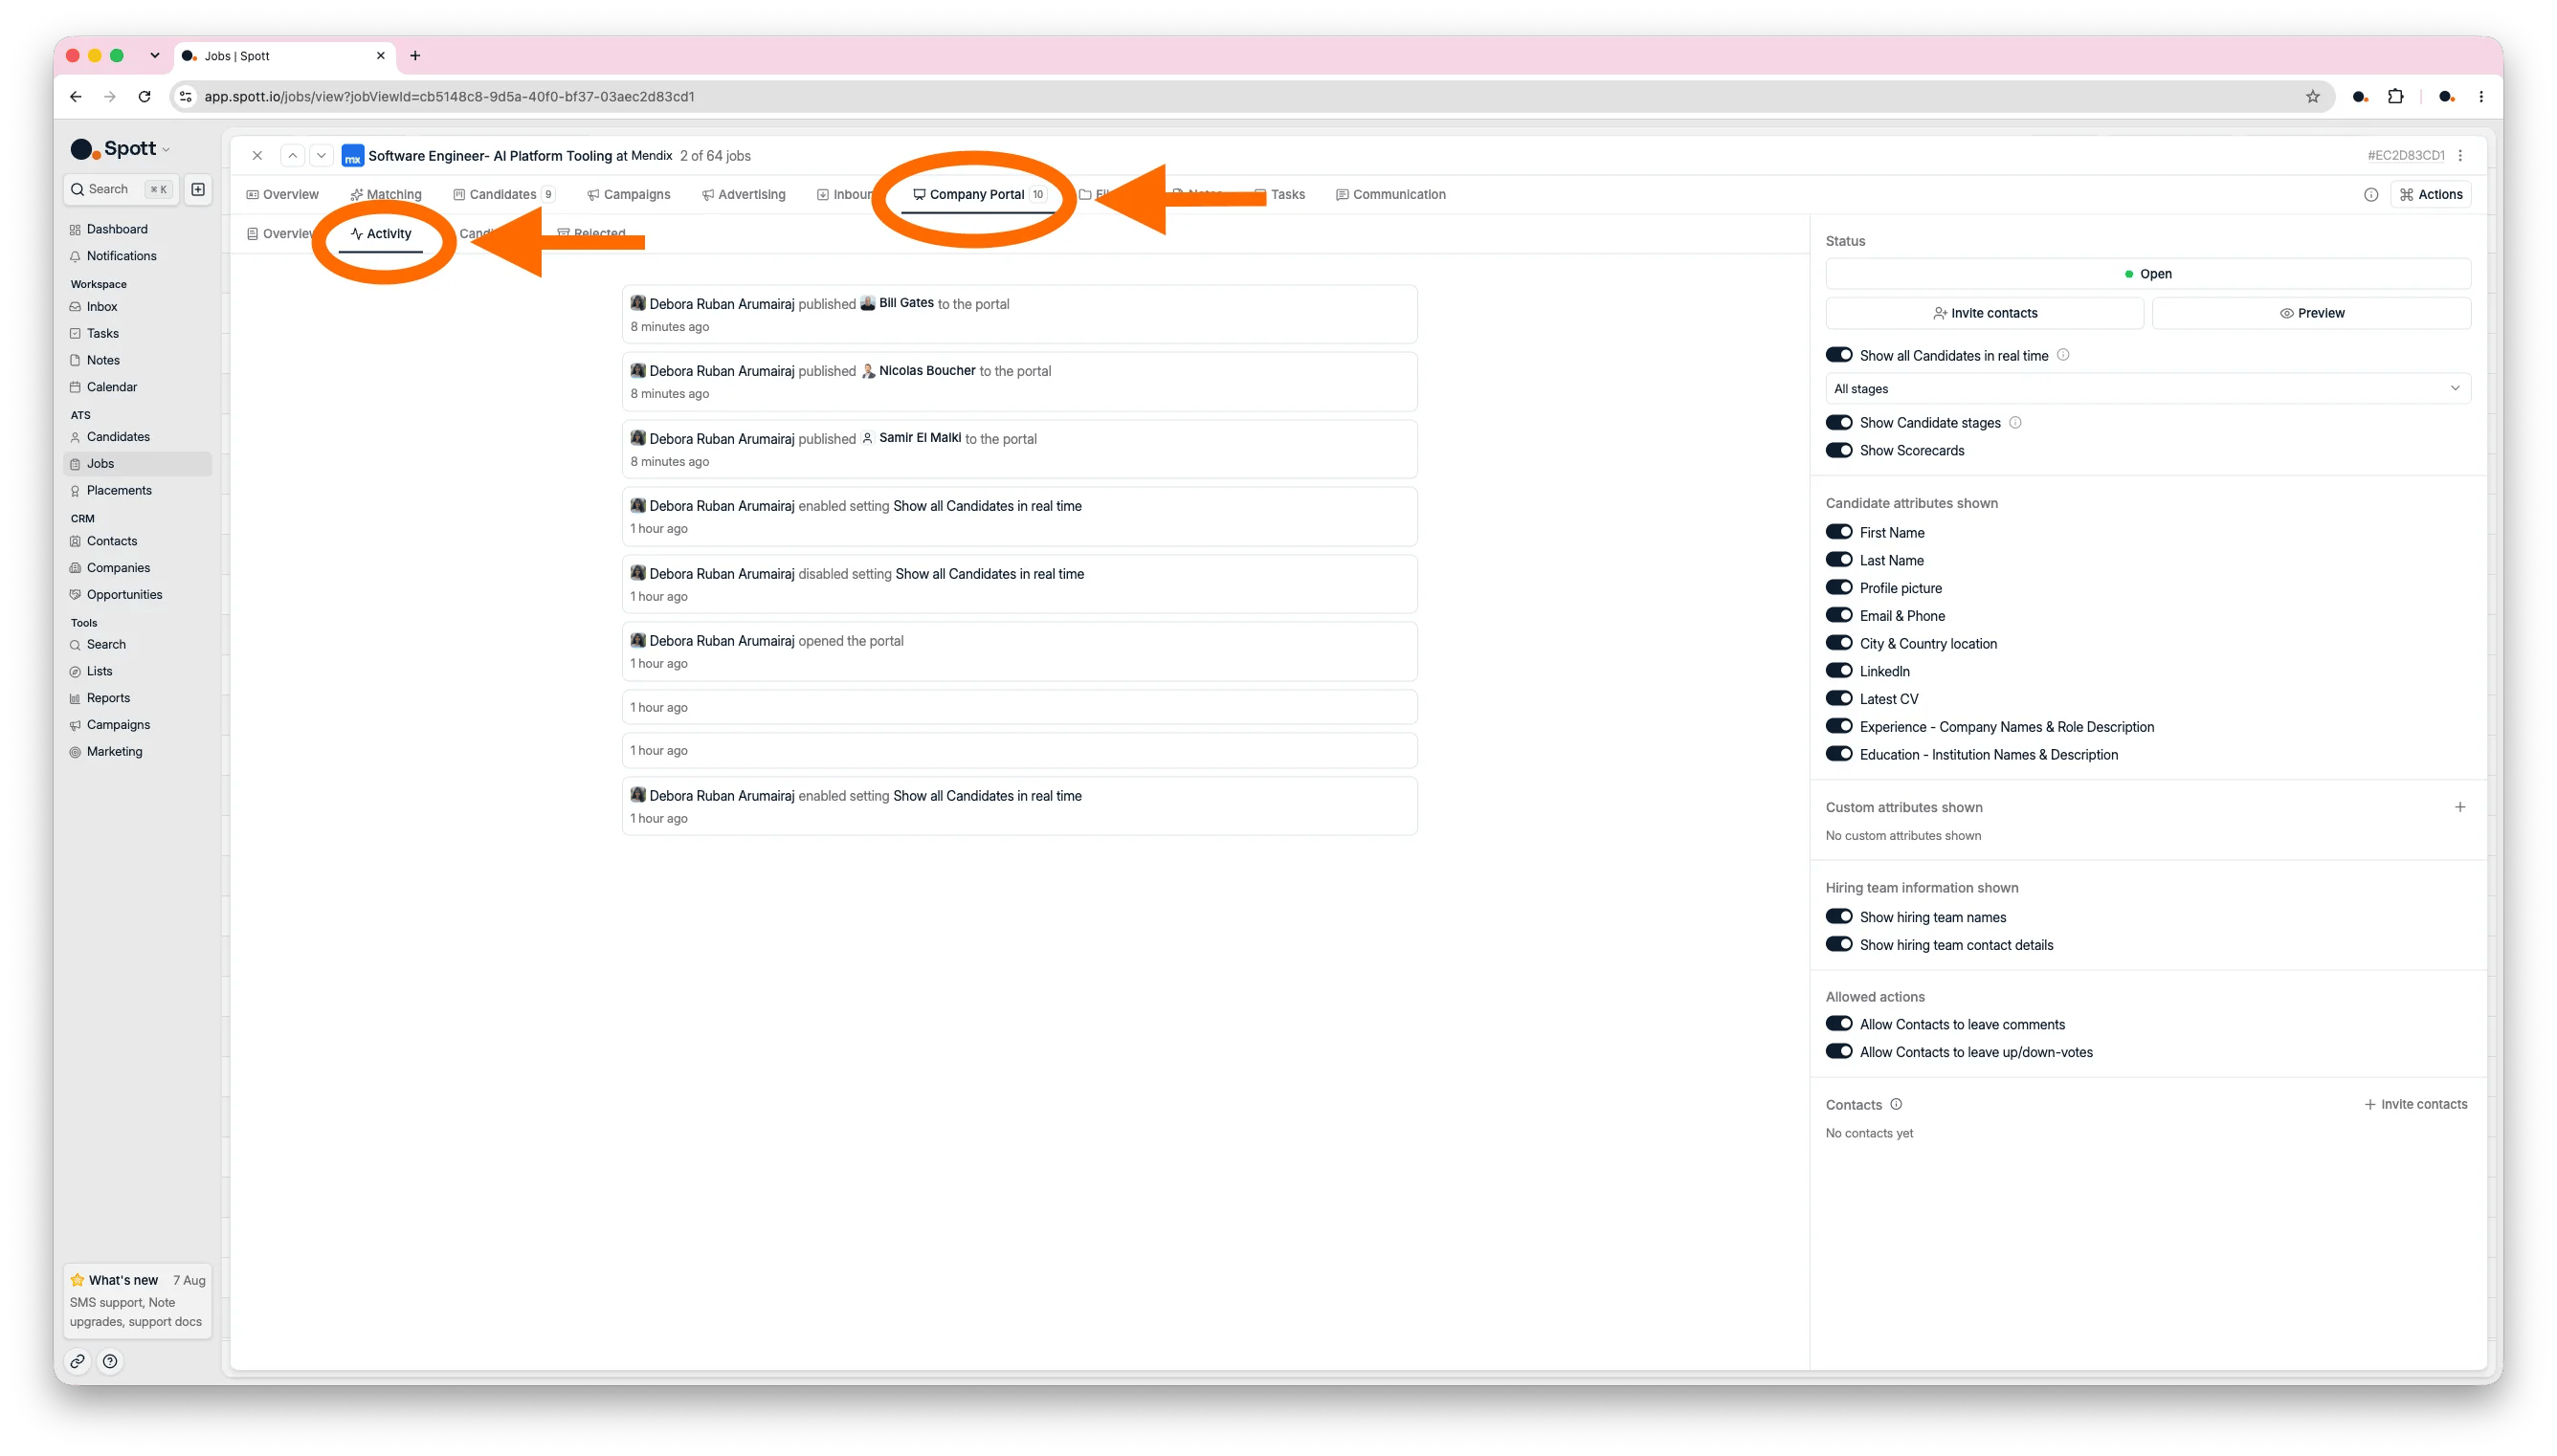
Open **Activity** inside the Company Portal for a running log of what your client did:
who was invited to the portal, which candidate they commented on and what they said, and
the impression score they left on a candidate.
The feed records what a client **does**, not what they look at. There is no indicator for
whether a particular profile has been opened, so a candidate with no comment and no
impression has not necessarily been skipped.
### 6.3 Track client feedback
Open **Activity** inside the Company Portal for a running log of what your client did:
who was invited to the portal, which candidate they commented on and what they said, and
the impression score they left on a candidate.
The feed records what a client **does**, not what they look at. There is no indicator for
whether a particular profile has been opened, so a candidate with no comment and no
impression has not necessarily been skipped.
 The job record also keeps its **Files**, **Notes**, **Tasks**, and **Communication** beside
the portal, so the internal context stays attached to the same role.
The job record also keeps its **Files**, **Notes**, **Tasks**, and **Communication** beside
the portal, so the internal context stays attached to the same role.
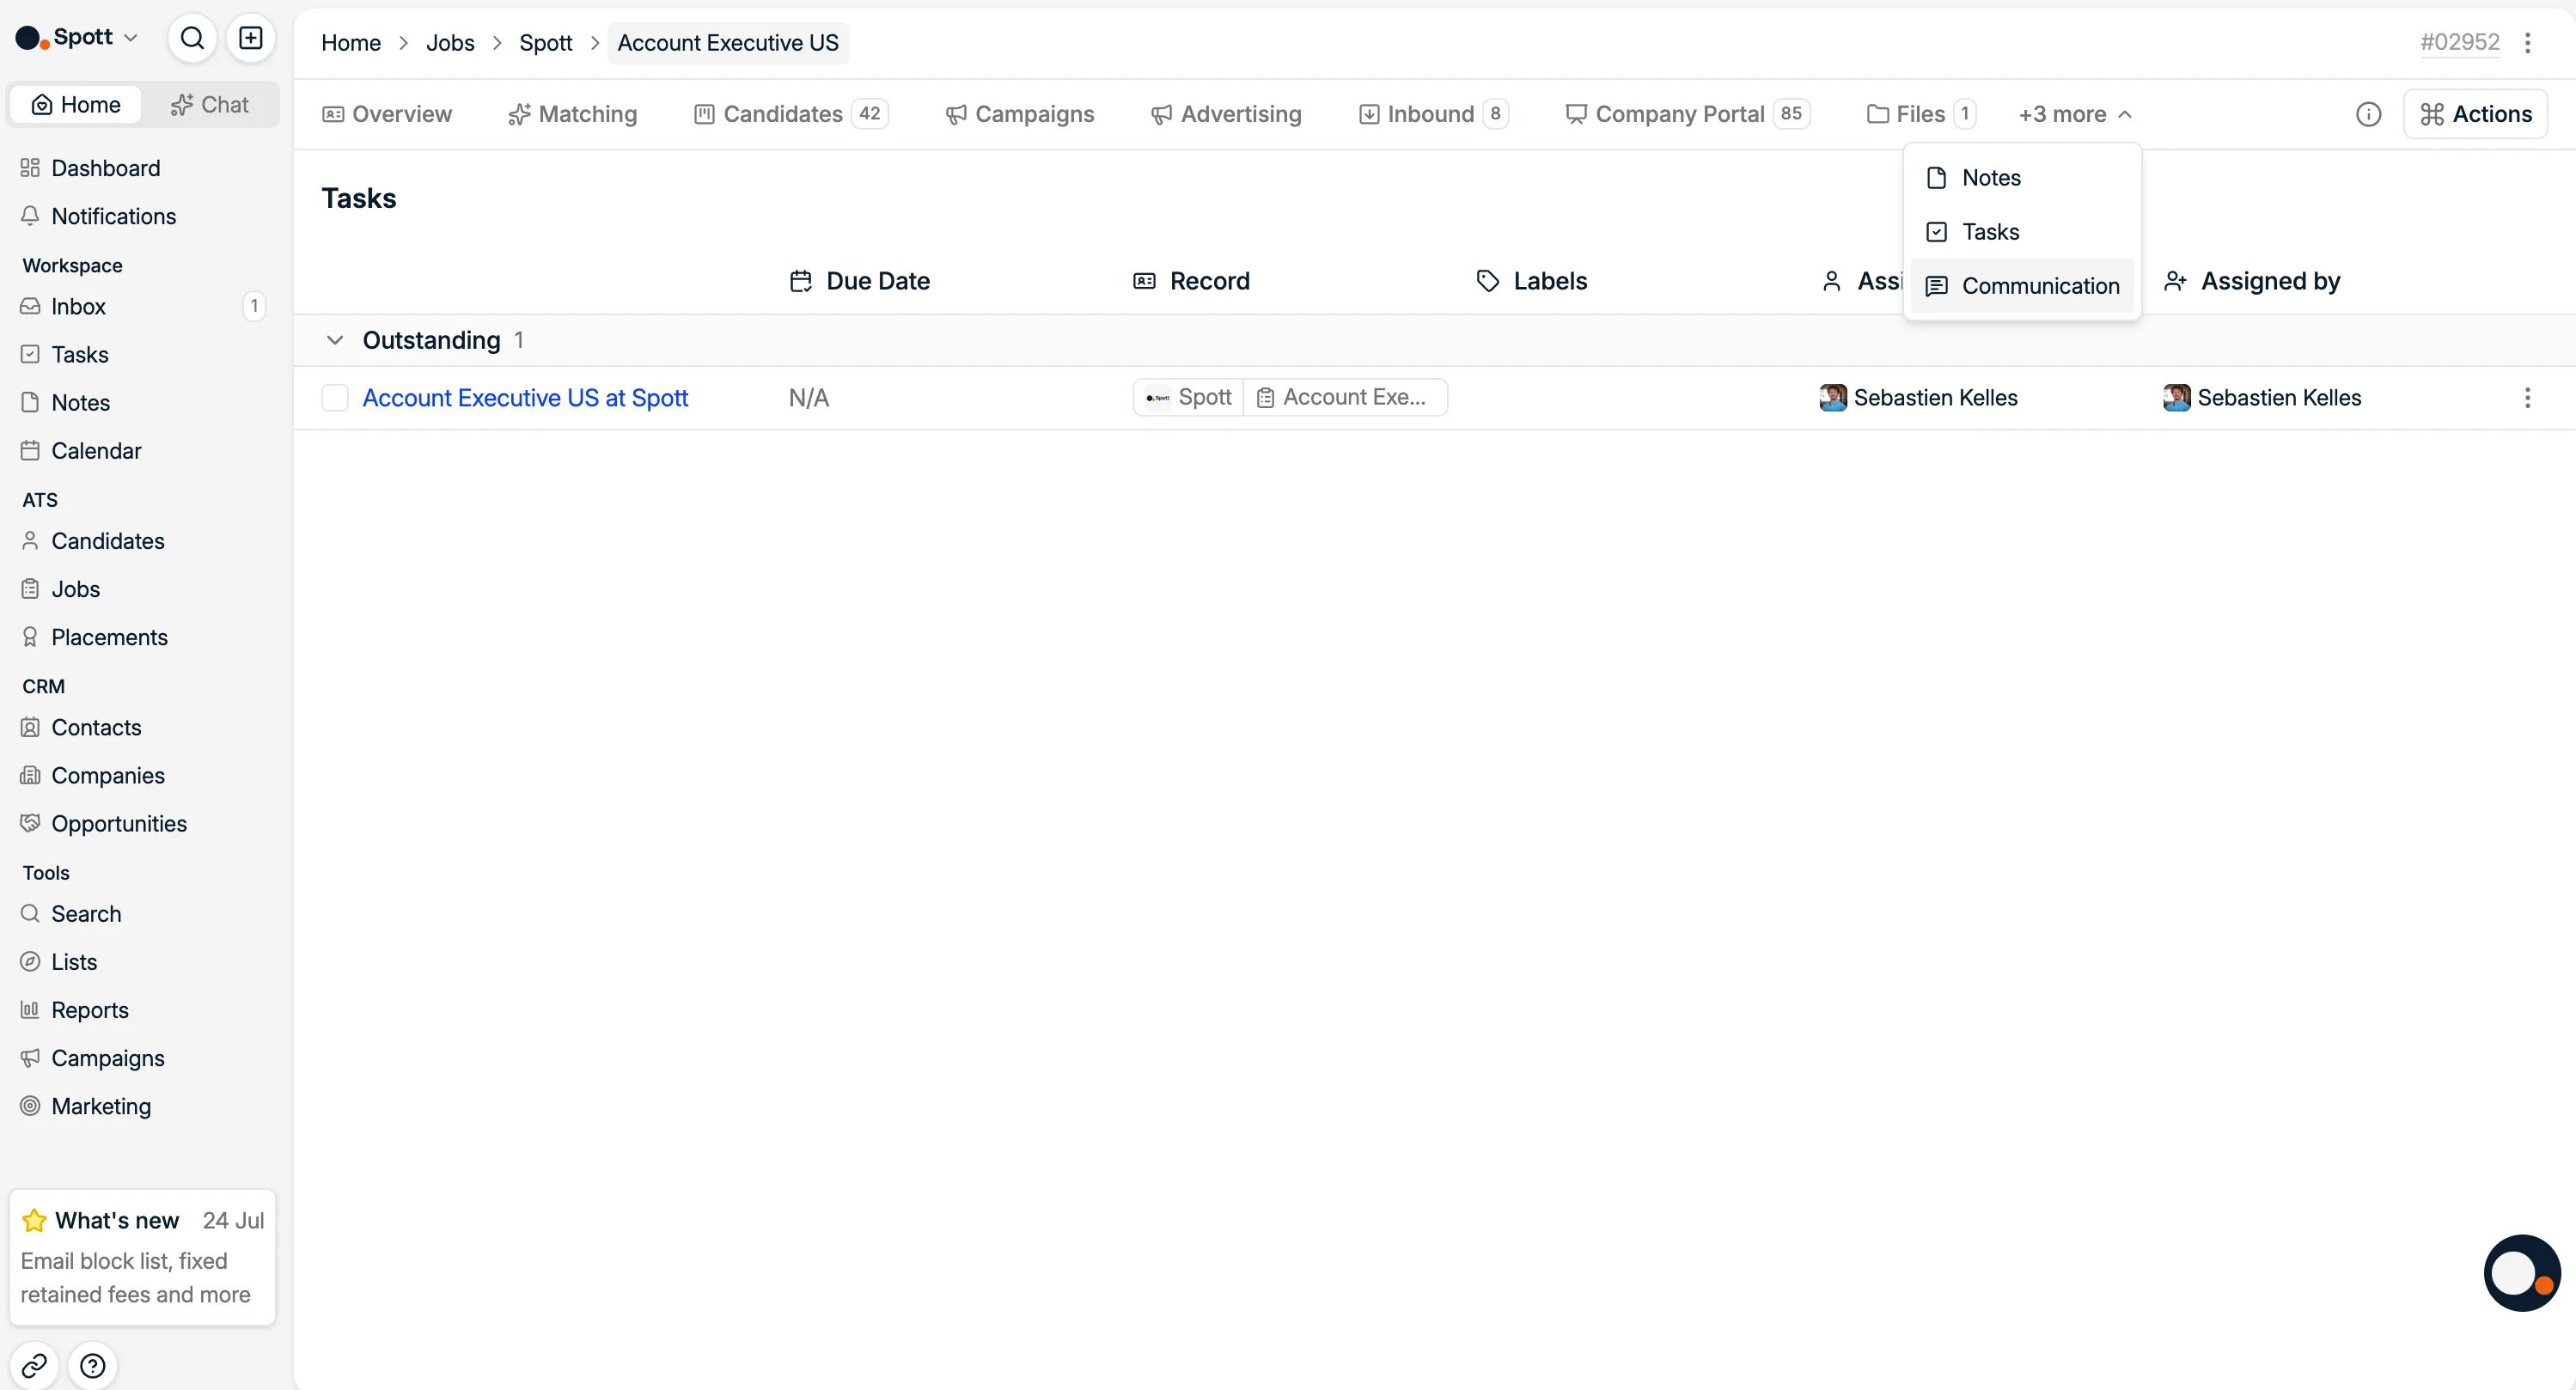 Inviting contacts, what clients can do, and activity tracking.
## Now your turn
* [ ] Create a **job list view** using two filters
* [ ] Create a **new job**
* [ ] Have the **Note Taker** join a briefing call, or add briefing notes to the job
* [ ] **Generate details** and a job description with AI
* [ ] **Post the job** on the portal
* [ ] Apply **AI matching** to your candidates, and add one hard filter
* [ ] **Add candidates** to the job pipeline
Companies, contacts, and business development.