> ## Documentation Index
> Fetch the complete documentation index at: https://docs.spott.io/llms.txt
> Use this file to discover all available pages before exploring further.
# Understanding Spott's Matching Tool
> The Matching tab runs an AI search across your candidate database to surface the best new candidates for a role.
**Matching** in Spott uses AI to compare the job's requirements against your candidate
database, surfacing the most relevant matches in seconds. It runs on the same engine as
[candidate search](/docs/candidates/search-candidates), using the job's description,
notes, and sourcing criteria as input.
Matching is built to surface **new** candidates, so it leaves out anyone already in
this job's pipeline. To review the people already on the job, use its
[pipeline](/docs/jobs/job-pipeline) instead.
## Access a job's Matching tab
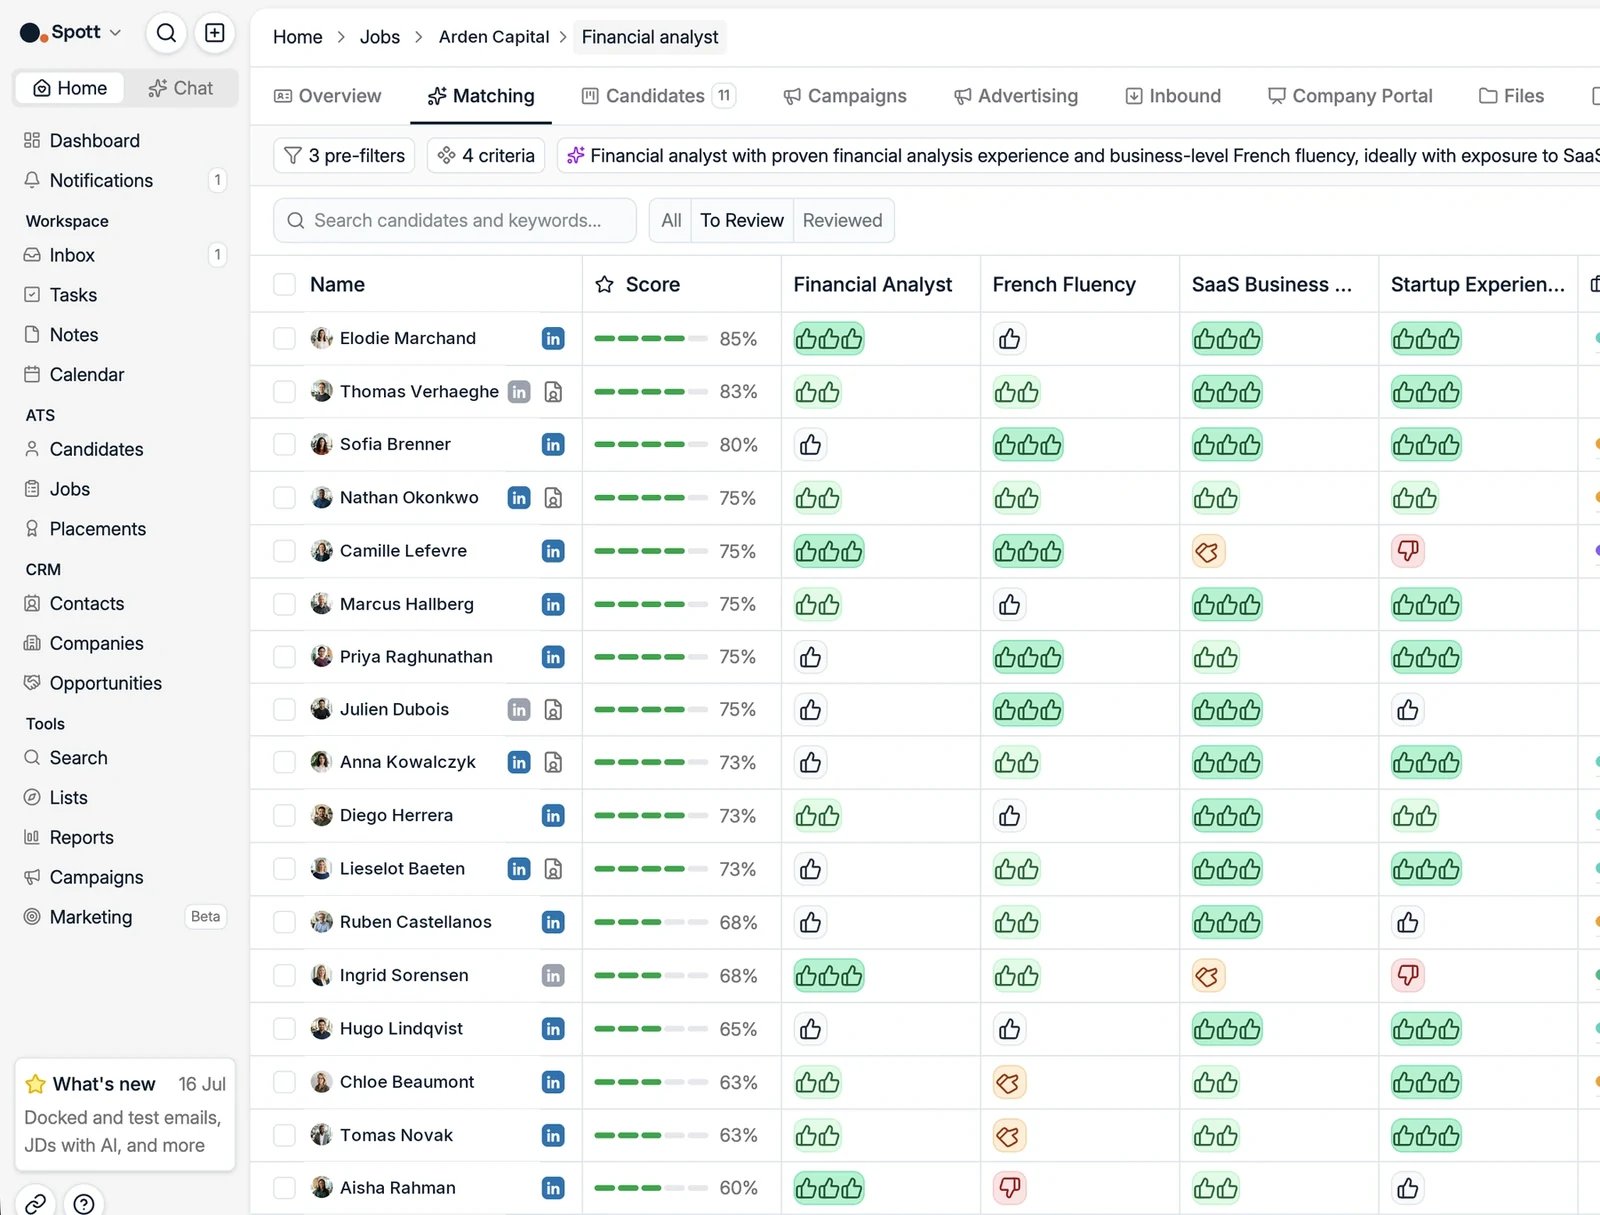 In Spott, go to **Jobs**, open the job, and click the **Matching** tab.
## Run a search for the job
The first time, click **Start new job search**. Spott converts the job's context
from the Overview tab into filters and criteria, which you can review and adjust
with **Edit criteria** before clicking **Run search**.
The better the sourcing criteria on the job's Overview tab, the better the
matches. Upload intake call notes or a detailed job description first.
## Filters vs criteria
When Spott builds the search from the job, it splits your requirements into two parts,
shown separately when you use **Edit criteria**:
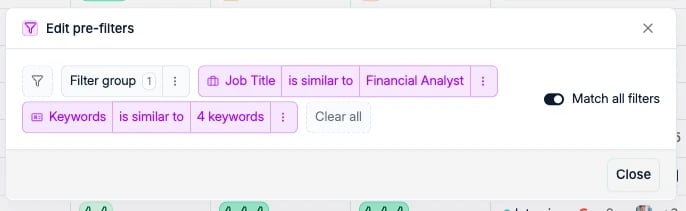
**Pre-filters** narrow the candidate pool *before* ranking. They are structured
conditions such as **Job Title**, **Field of Study**, **Keywords**, and **Years of
Experience**. Use the **Match all filters** toggle to require every filter (AND) or any
of them (OR). Spott shows how many candidates currently match, so you can widen the
filters when too few come through.
In Spott, go to **Jobs**, open the job, and click the **Matching** tab.
## Run a search for the job
The first time, click **Start new job search**. Spott converts the job's context
from the Overview tab into filters and criteria, which you can review and adjust
with **Edit criteria** before clicking **Run search**.
The better the sourcing criteria on the job's Overview tab, the better the
matches. Upload intake call notes or a detailed job description first.
## Filters vs criteria
When Spott builds the search from the job, it splits your requirements into two parts,
shown separately when you use **Edit criteria**:
**Pre-filters** narrow the candidate pool *before* ranking. They are structured
conditions such as **Job Title**, **Field of Study**, **Keywords**, and **Years of
Experience**. Use the **Match all filters** toggle to require every filter (AND) or any
of them (OR). Spott shows how many candidates currently match, so you can widen the
filters when too few come through.
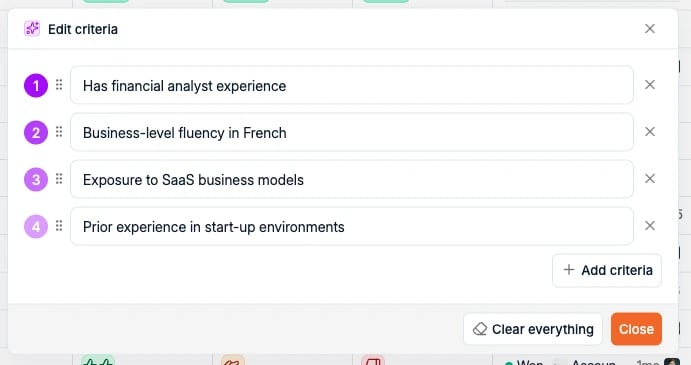
 **Criteria** rank the candidates that pass the pre-filters. They are plain
natural-language statements (for example, "Business-level fluency in French") and are
**numbered in priority order** — criteria higher in the list weigh more heavily in the
match score. Drag a criterion by its handle to change that order, click the **×** on a
row to drop it, or use **Add criteria** to add your own.
**Criteria** rank the candidates that pass the pre-filters. They are plain
natural-language statements (for example, "Business-level fluency in French") and are
**numbered in priority order** — criteria higher in the list weigh more heavily in the
match score. Drag a criterion by its handle to change that order, click the **×** on a
row to drop it, or use **Add criteria** to add your own.
 A good rule of thumb: use **pre-filters** for the hard requirements that must be true,
and **criteria** for the softer qualities you want to rank on.
Both editors open from the **pre-filters** and **criteria** chips above the results,
so you can adjust a search and re-run it without starting over.
## Read the results
Candidates are ranked by a **match score from 0 to 100**, from Very Weak to Very
Strong Match.
Every **criterion** you set also becomes its own column: each candidate gets a thumbs
rating for it, from one to three thumbs-up for a match down to a thumbs-down where they
fall short. This lets you see at a glance *which* requirements a candidate meets, not
just their overall score.
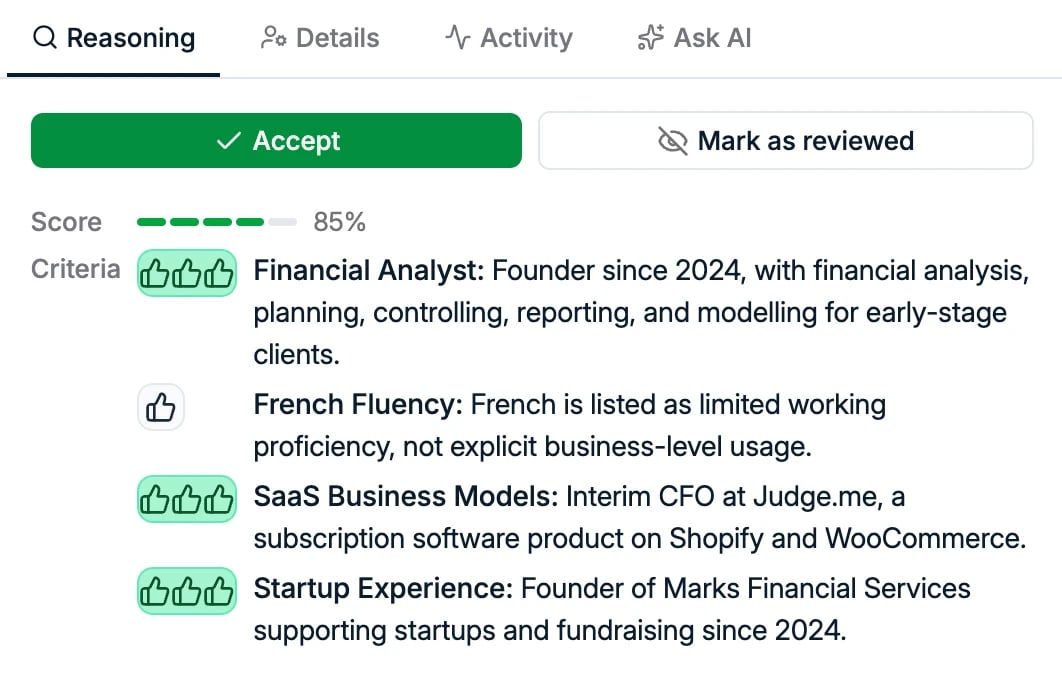
Click a candidate's score to open the full **reasoning** — the assessment behind each
per-criterion rating — where you can **Accept** the candidate or **mark them reviewed**.
A good rule of thumb: use **pre-filters** for the hard requirements that must be true,
and **criteria** for the softer qualities you want to rank on.
Both editors open from the **pre-filters** and **criteria** chips above the results,
so you can adjust a search and re-run it without starting over.
## Read the results
Candidates are ranked by a **match score from 0 to 100**, from Very Weak to Very
Strong Match.
Every **criterion** you set also becomes its own column: each candidate gets a thumbs
rating for it, from one to three thumbs-up for a match down to a thumbs-down where they
fall short. This lets you see at a glance *which* requirements a candidate meets, not
just their overall score.
Click a candidate's score to open the full **reasoning** — the assessment behind each
per-criterion rating — where you can **Accept** the candidate or **mark them reviewed**.
 Each row also shows the candidate's active jobs and last interaction, so you can spot
who is already in a process elsewhere.
## Review workflow
Use the **All**, **To Review**, and **Reviewed** tabs to work through the results:
* Review the candidates with the highest match scores.
* Add strong fits directly to the job's pipeline.
* You can re-run or refine the search at any time by editing the criteria.
**Accept**, **Reject**, and **Reviewed** only track your progress through the list.
They do not train or personalize the matching model, so marking candidates does not
change future results.
## Next steps
Send your best matches to the client.
Track applicants through the job's stages.
Each row also shows the candidate's active jobs and last interaction, so you can spot
who is already in a process elsewhere.
## Review workflow
Use the **All**, **To Review**, and **Reviewed** tabs to work through the results:
* Review the candidates with the highest match scores.
* Add strong fits directly to the job's pipeline.
* You can re-run or refine the search at any time by editing the criteria.
**Accept**, **Reject**, and **Reviewed** only track your progress through the list.
They do not train or personalize the matching model, so marking candidates does not
change future results.
## Next steps
Send your best matches to the client.
Track applicants through the job's stages.