> ## Documentation Index
> Fetch the complete documentation index at: https://docs.spott.io/llms.txt
> Use this file to discover all available pages before exploring further.
# Adding and Managing Jobs
> Create a new job in Spott, link it to a client, add sourcing criteria, and manage the full workflow from one record.
You can quickly navigate to the Jobs page with `G` then `J`. See all
[keyboard shortcuts](/docs/settings/keyboard-shortcuts).
## 1. Open the Jobs view
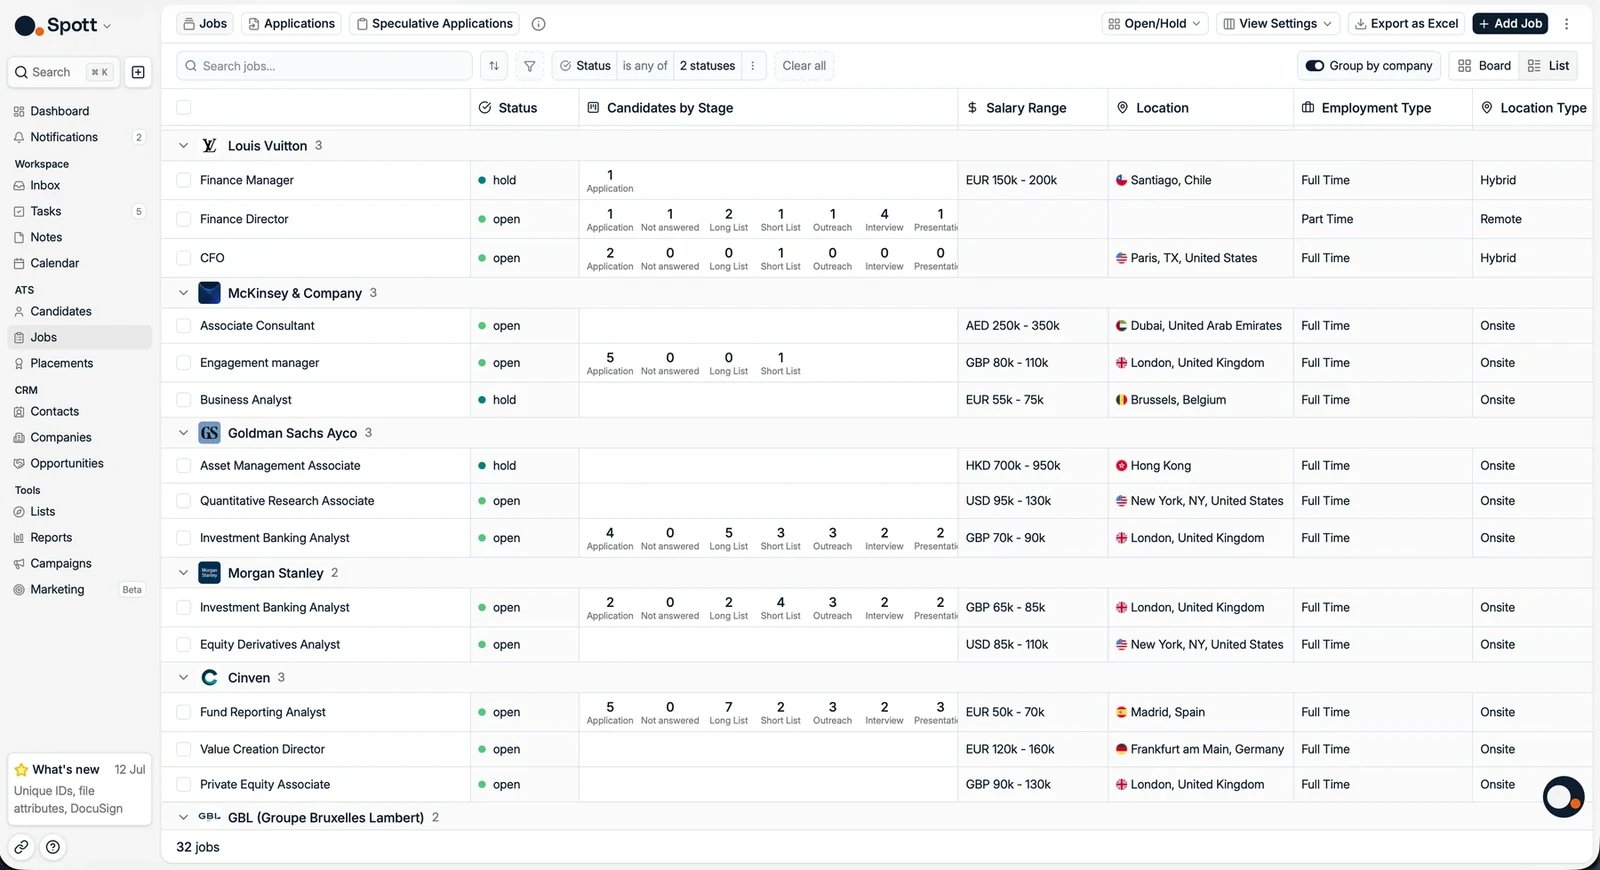
From the left-hand navigation bar, select **Jobs** to open your job listings.
 ## 2. Add a new job
Click the **Add Job** button in the top-right corner. In the **Add New Job** dialog,
fill in the essentials:
* **Job Title**: the position you are adding
* **Company**: the client this job belongs to
* **Status**: the job's stage
## 2. Add a new job
Click the **Add Job** button in the top-right corner. In the **Add New Job** dialog,
fill in the essentials:
* **Job Title**: the position you are adding
* **Company**: the client this job belongs to
* **Status**: the job's stage
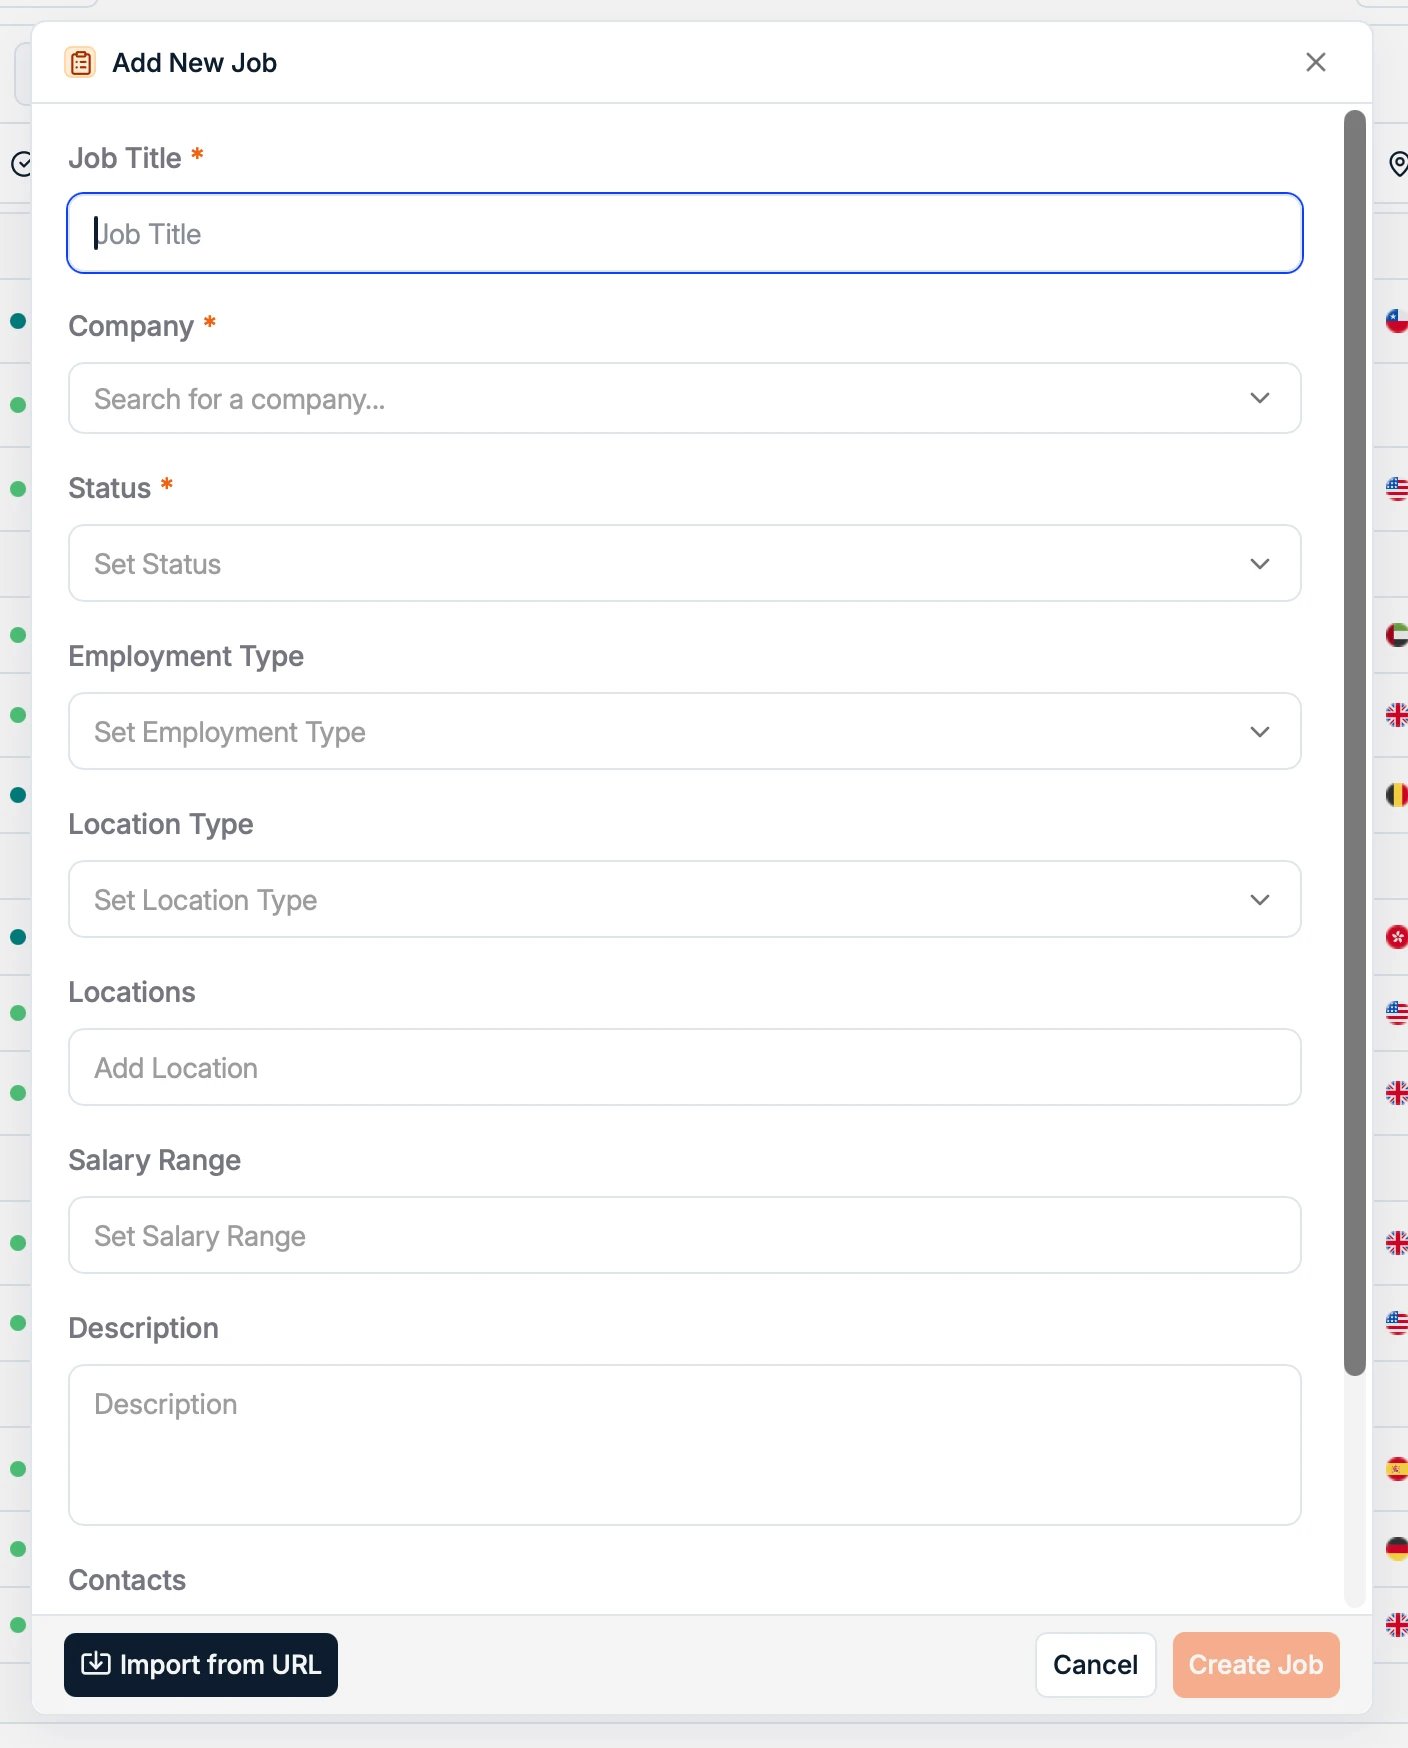 You can add more details right away: employment type, location type, one or **multiple
locations**, salary range, description, and the client contacts involved. You can also
use **Import from URL** to create the job from a public job posting, or import one
with the [browser extension](/docs/settings/chrome-extension).
## 3. Create the job record
Click **Create Job** at the bottom-right of the dialog. Your new job appears in the
Jobs list with its own record.
## 4. Define the job on the Overview tab
You can add more details right away: employment type, location type, one or **multiple
locations**, salary range, description, and the client contacts involved. You can also
use **Import from URL** to create the job from a public job posting, or import one
with the [browser extension](/docs/settings/chrome-extension).
## 3. Create the job record
Click **Create Job** at the bottom-right of the dialog. Your new job appears in the
Jobs list with its own record.
## 4. Define the job on the Overview tab
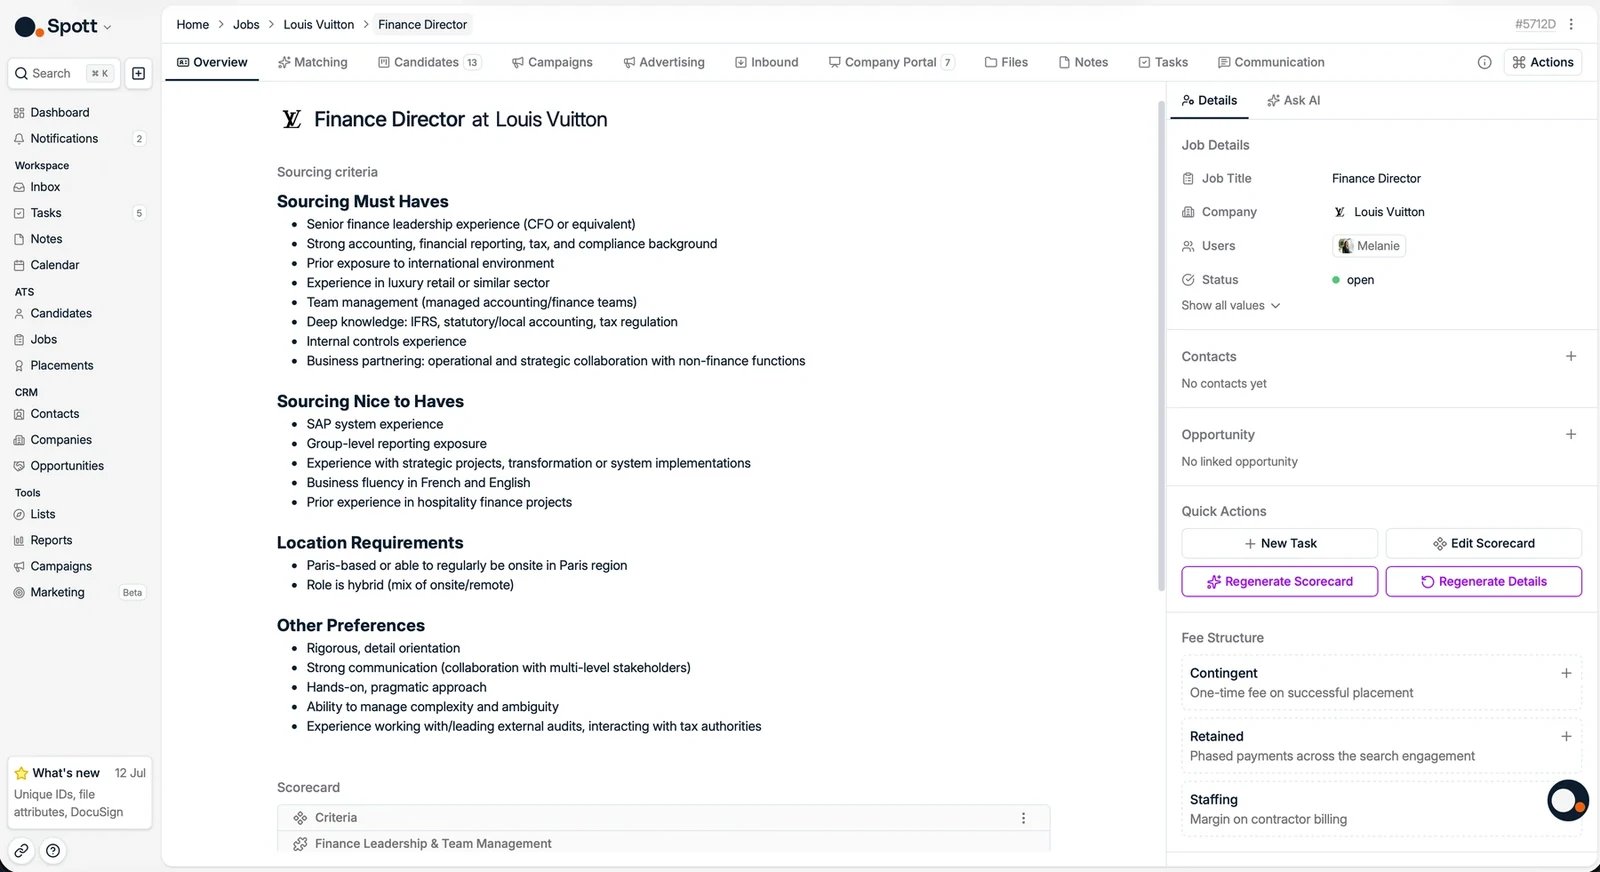 The **Overview** tab holds the job's details and sourcing criteria, which power both
AI matching and job description generation:
* Fill in the **Sourcing criteria** field with responsibilities, requirements, and
qualifications.
* Attach files, such as the client's job description, and link notes from intake
calls.
* Click **Regenerate Details** to let AI rewrite and complete the job details from
the attached resources, in the language you pick.
* Use the **Ask AI** panel on the right to ask anything about the job.
## 5. Manage the job through its tabs
* **Candidates**: the pipeline. Track candidates through each stage, take quick
actions, and place or reject them. See
[the job pipeline](/docs/jobs/job-pipeline).
* **Matching**: AI search across your database to find the best new candidates for
this role, excluding anyone already in its pipeline. See
[matching](/docs/jobs/matching).
* **Advertising**: write or generate the vacancy text and publish it to the Spott
job board, LinkedIn, or multiposters. See
[advertising](/docs/jobs/job-portal).
* **Inbound**: review candidates who applied. See
[inbound applications](/docs/jobs/inbound-applications).
* **Company Portal**: share selected candidates with your client. See
[the company portal](/docs/jobs/company-portal).
* **Files** and **Notes**: documents and notes related to the job. With the Spott
Note Taker enabled, meetings are transcribed into notes attached to the job.
* **Tasks**: follow-up actions for the role. See
[job tasks](/docs/jobs/job-tasks).
Depending on the features enabled for your workspace, you may also see **Campaigns**
(outreach sequences for this job) and **Communication** (tagged emails) tabs.
Each job in Spott is linked to a specific client. Make sure the correct client is
selected before creating the job to avoid rework.
## Next steps
Use Matching to surface the best fits from your database.
Move applicants through the job's stages.
The **Overview** tab holds the job's details and sourcing criteria, which power both
AI matching and job description generation:
* Fill in the **Sourcing criteria** field with responsibilities, requirements, and
qualifications.
* Attach files, such as the client's job description, and link notes from intake
calls.
* Click **Regenerate Details** to let AI rewrite and complete the job details from
the attached resources, in the language you pick.
* Use the **Ask AI** panel on the right to ask anything about the job.
## 5. Manage the job through its tabs
* **Candidates**: the pipeline. Track candidates through each stage, take quick
actions, and place or reject them. See
[the job pipeline](/docs/jobs/job-pipeline).
* **Matching**: AI search across your database to find the best new candidates for
this role, excluding anyone already in its pipeline. See
[matching](/docs/jobs/matching).
* **Advertising**: write or generate the vacancy text and publish it to the Spott
job board, LinkedIn, or multiposters. See
[advertising](/docs/jobs/job-portal).
* **Inbound**: review candidates who applied. See
[inbound applications](/docs/jobs/inbound-applications).
* **Company Portal**: share selected candidates with your client. See
[the company portal](/docs/jobs/company-portal).
* **Files** and **Notes**: documents and notes related to the job. With the Spott
Note Taker enabled, meetings are transcribed into notes attached to the job.
* **Tasks**: follow-up actions for the role. See
[job tasks](/docs/jobs/job-tasks).
Depending on the features enabled for your workspace, you may also see **Campaigns**
(outreach sequences for this job) and **Communication** (tagged emails) tabs.
Each job in Spott is linked to a specific client. Make sure the correct client is
selected before creating the job to avoid rework.
## Next steps
Use Matching to surface the best fits from your database.
Move applicants through the job's stages.