> ## Documentation Index
> Fetch the complete documentation index at: https://docs.spott.io/llms.txt
> Use this file to discover all available pages before exploring further.
# Invoicing with Xero
> Create Xero draft invoices from contingent, retained and contract placements, including rate cards and timesheets.
You create invoices from the **placement record**. Spott sends each invoice to Xero as a
**draft**, ready for your finance team to review, approve and send from Xero.
This needs the [Xero integration](/docs/integrations/xero) connected and your pay codes
synced. Once an invoice is in Xero, its status comes back to the placement, as described under
[Track invoice status](#track-invoice-status).
## Invoice a contingent placement
1. Open the placement and click **New invoice** under **Quick Actions**, or **+ New invoice**
in the **Invoices** section.
2. **Provider:** select **Xero**.
3. **Recipient:** Spott selects the placement's company. Switch to **Contact** if you bill a
person instead.
4. **Xero contact:** the first time you invoice a company, pick its matching Xero contact and
confirm **Link**. Spott remembers the link for every future invoice to that company, so you
will not see this step again. The link cannot be undone, so double-check the contact before
you confirm.
5. Click **Next** and check the invoice details:
* **Invoice date** and **Due date**, both required.
* **Currency**, taken from the placement. Spott does not convert between currencies.
* **Line items:** choose a pay code and Spott fills in the description. Set **Units** and
**Unit cost**. For a one-off placement fee, units is usually 1 and unit cost is the
placement's total fee.
6. Click **Create**. The invoice appears in the placement's **Invoices** table with status
**Draft** and provider **Xero**.
While an invoice is a draft, you can edit it from the **⋮** menu on its row. Your changes sync
to the draft in Xero. The invoice history is kept in Xero, not in Spott.
You can also link a company to its Xero contact ahead of time, from the company's
**External Links**. See [Link companies to Xero contacts](/docs/integrations/xero#link-companies-to-xero-contacts).
## Invoice a retained search
Retained searches are invoiced **per milestone**, so you can bill each stage as it is reached.
The milestones come from the fee structure on the job, set up as described under
[retained placements](/docs/placements/placements#retained-placements).
1. Open the retained search and click **New invoice**.
2. Under **What would you like to invoice?**, tick the milestones to include, for example only
**Shortlist** for the first payment. Each shows its percentage and amount.
3. Click **Next** and continue with provider, recipient, Xero contact and line items, as for a
contingent placement.
4. Click **Create**. The draft appears under the search's **Invoices**.
## Invoice a contract placement from timesheets
For contract placements, revenue comes from the days or hours actually worked. You set up a
**rate card** once per placement, log **timesheets**, and invoice each approved timesheet.
### 1. Set up a rate card
A rate card sets what you charge the client and pay the contractor for the days and times
worked, and which pay code applies.
1. Open the contract placement and choose **Create rate card** from the **⋮** menu.
2. Pick a **Template** if your admin has created one, or fill in the fields yourself:
* **Name**, for example "Standard rates".
* **Pay code**, the Xero pay code used when you invoice.
* **Unit**, **Day** or **Hour**. If you only bill daily, use Day.
* **Currency**, **Base charge rate** (billed to the client) and **Base pay rate** (paid to
the contractor).
3. Click **Next** to add rules for rates that differ from the base, such as overtime. For each
rule, set:
* **Rule name**, for example "Overtime".
* **Applies to**, the whole day or part of the day. Part of the day takes a start and end
time and is only available on hourly rate cards.
* **Days**, for example Saturday and Sunday.
* **Pay code**, **Billable**, **Charge rate** and **Pay rate**.
4. Add more rules with **+ Add rule**, then click **Create**.
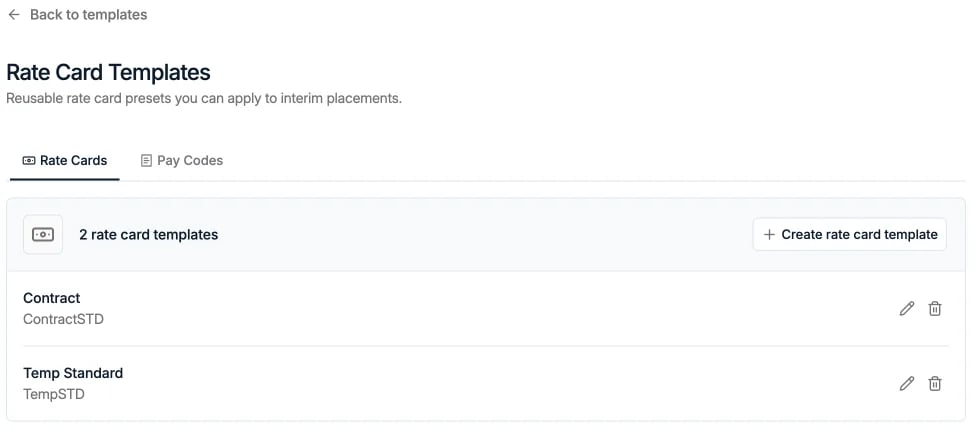
Admins can save reusable rate cards under **Settings → Templates → Rate Card Templates →
Rate Cards**. If a template leaves the charge and pay rates blank, Spott uses the rates from
the placement.
 ### 2. Log a timesheet
1. On the placement, choose **New timesheet** from the **⋮** menu or the **Timesheets**
section.
2. **Period:** choose **This week**, **Last week**, **Last 2 weeks**, **This month** or
**Custom**. A timesheet must fall within the placement dates and cannot overlap an existing
one.
3. Leave **Prefill the week from the working schedule** ticked to start from the placement's
normal working days and hours.
4. **Days / Hours:** adjust what was worked.
* **Daily rate cards:** toggle each day worked. Only full days are supported.
* **Hourly rate cards:** set start and end times per day. Double-click the bar to add
another block, for example evening overtime. Each color is a different rate card rule.
5. **Check:** review the total time, charge and pay per day, then click **Next** and **Save**.
### 3. Submit and approve the timesheet
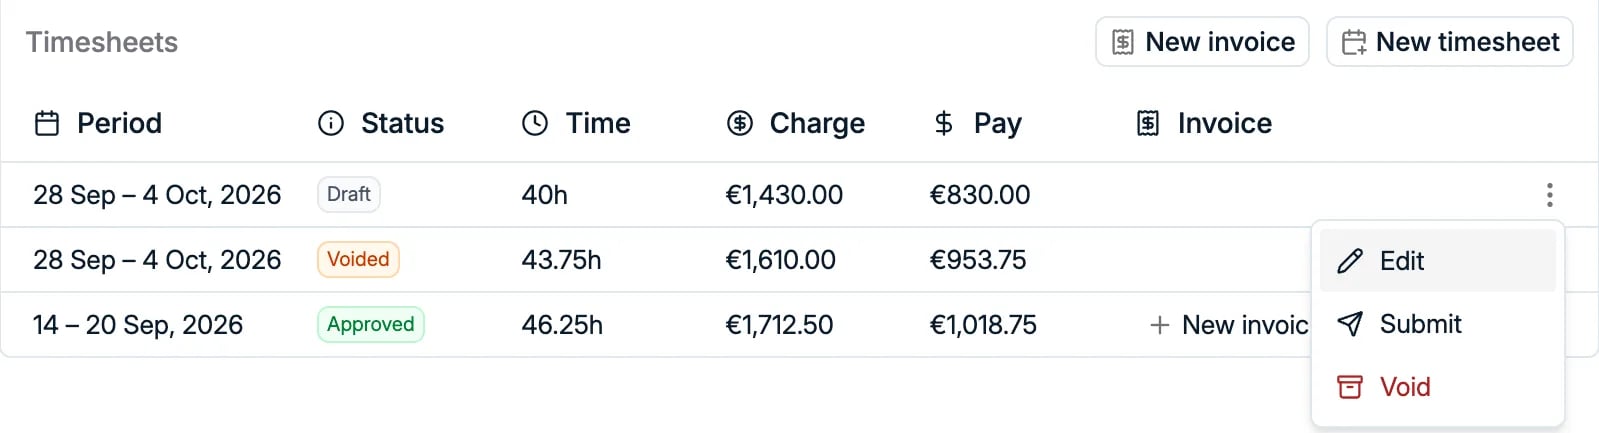
A saved timesheet starts as **Draft**. From the **⋮** menu on its row, choose **Submit**, then
**Approve** once the client has signed off. You can also **Edit** or **Void** it.
### 2. Log a timesheet
1. On the placement, choose **New timesheet** from the **⋮** menu or the **Timesheets**
section.
2. **Period:** choose **This week**, **Last week**, **Last 2 weeks**, **This month** or
**Custom**. A timesheet must fall within the placement dates and cannot overlap an existing
one.
3. Leave **Prefill the week from the working schedule** ticked to start from the placement's
normal working days and hours.
4. **Days / Hours:** adjust what was worked.
* **Daily rate cards:** toggle each day worked. Only full days are supported.
* **Hourly rate cards:** set start and end times per day. Double-click the bar to add
another block, for example evening overtime. Each color is a different rate card rule.
5. **Check:** review the total time, charge and pay per day, then click **Next** and **Save**.
### 3. Submit and approve the timesheet
A saved timesheet starts as **Draft**. From the **⋮** menu on its row, choose **Submit**, then
**Approve** once the client has signed off. You can also **Edit** or **Void** it.
 ### 4. Invoice the approved timesheet
1. On the approved timesheet's row, click **+ New invoice** in the **Invoice** column.
2. Confirm provider, recipient and Xero contact, as for any other invoice.
3. Spott fills in the line items from the timesheet: pay code, description, units worked and
unit cost. Lines are split by rate, so standard and overtime hours appear separately.
4. Click **Create**. The timesheet row now links to the new draft invoice.
## Track invoice status
Once an invoice is pushed to Xero, Spott keeps its **invoice number** and **status** in sync.
Each invoice's status in Spott follows its progress in Xero. Updates can take a minute or two
to appear and may need a page refresh.
| Status in Spott | What it means | Can you edit it in Spott? |
| - | - | - |
| **Draft** | Created in Spott and sent to Xero as a draft | Yes |
| **Submitted** | Submitted for approval in Xero | No, it is locked |
| **Authorised** | Approved in Xero and awaiting payment | No |
| **Paid** | Payment recorded in Xero | No |
Once an invoice leaves **Draft**, finance handles it in Xero. Changes made there, such as a
corrected tax rate or amount, do not sync back to Spott yet. Only the status and invoice
number do.
## Frequently asked
* **Can I record a payment in Spott?** No. Record payments in Xero, and Spott updates the
invoice to **Paid**.
* **The Xero contact I need is not in the list.** Create the contact in Xero first, then open
the invoice again. Creating Xero contacts from Spott is not available yet.
* **A pay code is missing.** Ask an admin to click **Sync pay codes** under
**Settings → Templates → Rate Card Templates → Pay Codes**. If it is still missing, check
that the item exists in Xero.
* **Can contractors submit their own timesheets?** Not yet. Timesheets are logged, submitted
and approved by your team in Spott.
* **Can I link more than one Xero organization?** Not yet. Support for several organizations
is coming in the next few weeks.
### 4. Invoice the approved timesheet
1. On the approved timesheet's row, click **+ New invoice** in the **Invoice** column.
2. Confirm provider, recipient and Xero contact, as for any other invoice.
3. Spott fills in the line items from the timesheet: pay code, description, units worked and
unit cost. Lines are split by rate, so standard and overtime hours appear separately.
4. Click **Create**. The timesheet row now links to the new draft invoice.
## Track invoice status
Once an invoice is pushed to Xero, Spott keeps its **invoice number** and **status** in sync.
Each invoice's status in Spott follows its progress in Xero. Updates can take a minute or two
to appear and may need a page refresh.
| Status in Spott | What it means | Can you edit it in Spott? |
| - | - | - |
| **Draft** | Created in Spott and sent to Xero as a draft | Yes |
| **Submitted** | Submitted for approval in Xero | No, it is locked |
| **Authorised** | Approved in Xero and awaiting payment | No |
| **Paid** | Payment recorded in Xero | No |
Once an invoice leaves **Draft**, finance handles it in Xero. Changes made there, such as a
corrected tax rate or amount, do not sync back to Spott yet. Only the status and invoice
number do.
## Frequently asked
* **Can I record a payment in Spott?** No. Record payments in Xero, and Spott updates the
invoice to **Paid**.
* **The Xero contact I need is not in the list.** Create the contact in Xero first, then open
the invoice again. Creating Xero contacts from Spott is not available yet.
* **A pay code is missing.** Ask an admin to click **Sync pay codes** under
**Settings → Templates → Rate Card Templates → Pay Codes**. If it is still missing, check
that the item exists in Xero.
* **Can contractors submit their own timesheets?** Not yet. Timesheets are logged, submitted
and approved by your team in Spott.
* **Can I link more than one Xero organization?** Not yet. Support for several organizations
is coming in the next few weeks.