> ## Documentation Index
> Fetch the complete documentation index at: https://docs.spott.io/llms.txt
> Use this file to discover all available pages before exploring further.
# Ringover
> Connect Ringover to make and receive calls from Spott, with call transcripts synced and summarized into Notes automatically.
## Overview
Ringover is a VoIP provider. Connecting it to Spott lets you call any Candidate or Contact with Click-to-Dial, so you can launch calls without switching tools.
## How it works
Spott automatically syncs and summarizes your call transcripts into Notes. Each call creates a Note that includes a short summary, the date and time of the call, and a link to the correct caller and recipient. Incoming calls automatically open the caller's file in Spott, so you don't need to scramble for information.
Once Ringover is connected:
* Open any Candidate or Contact record with a phone number and click the **Call** button.
* If the Ringover app or browser widget isn't open, you are prompted to launch it. The phone number is prefilled automatically.
* Click **Call** in Ringover to dial directly from your browser.
Within a few minutes of the call, Spott creates a Note containing a concise summary generated from the transcript, the date and time of the call, and a link to the correct caller and recipient.
## Enable Ringover for your workspace
Set up the connection with an account that is an **admin in both Spott and Ringover**.
Connecting with someone else's Ringover admin credentials is a common cause of failed
connections.
### 1. Create an API key
1. Go to `https://dashboard.ringover.com/api`.
2. Click **Create API key**.
3. Select a user from the dropdown menu.
4. Add a label to identify your key (for example, "Spott Integration").
5. Click **Create** to generate your API key.
6. Scroll down to the **Rights** section and enable all permissions (both Read and Write) for: Monitoring, Calls, Contacts, Users, Numbers, IVRs, Conversations, and Empower.
### 2. Configure the webhook
1. Go to `https://dashboard.ringover.com/webhooks`.
2. Toggle on **Activate webhook**.
3. Locate the **Calls ended** field and enter the webhook URL shown on the Ringover integration page in Spott.
4. Save your changes.
The exact **Calls ended** webhook URL is generated for your workspace and shown on the Ringover integration page in Spott. Copy it from there.
### 3. Enable the integration
1. Click **Enable** at the top of the Ringover integration page in Spott.
2. Paste your **API key** into the API key field.
3. Paste your **Webhook key** into the Webhook key field.
4. Save your changes.
 ## Select your Ringover number
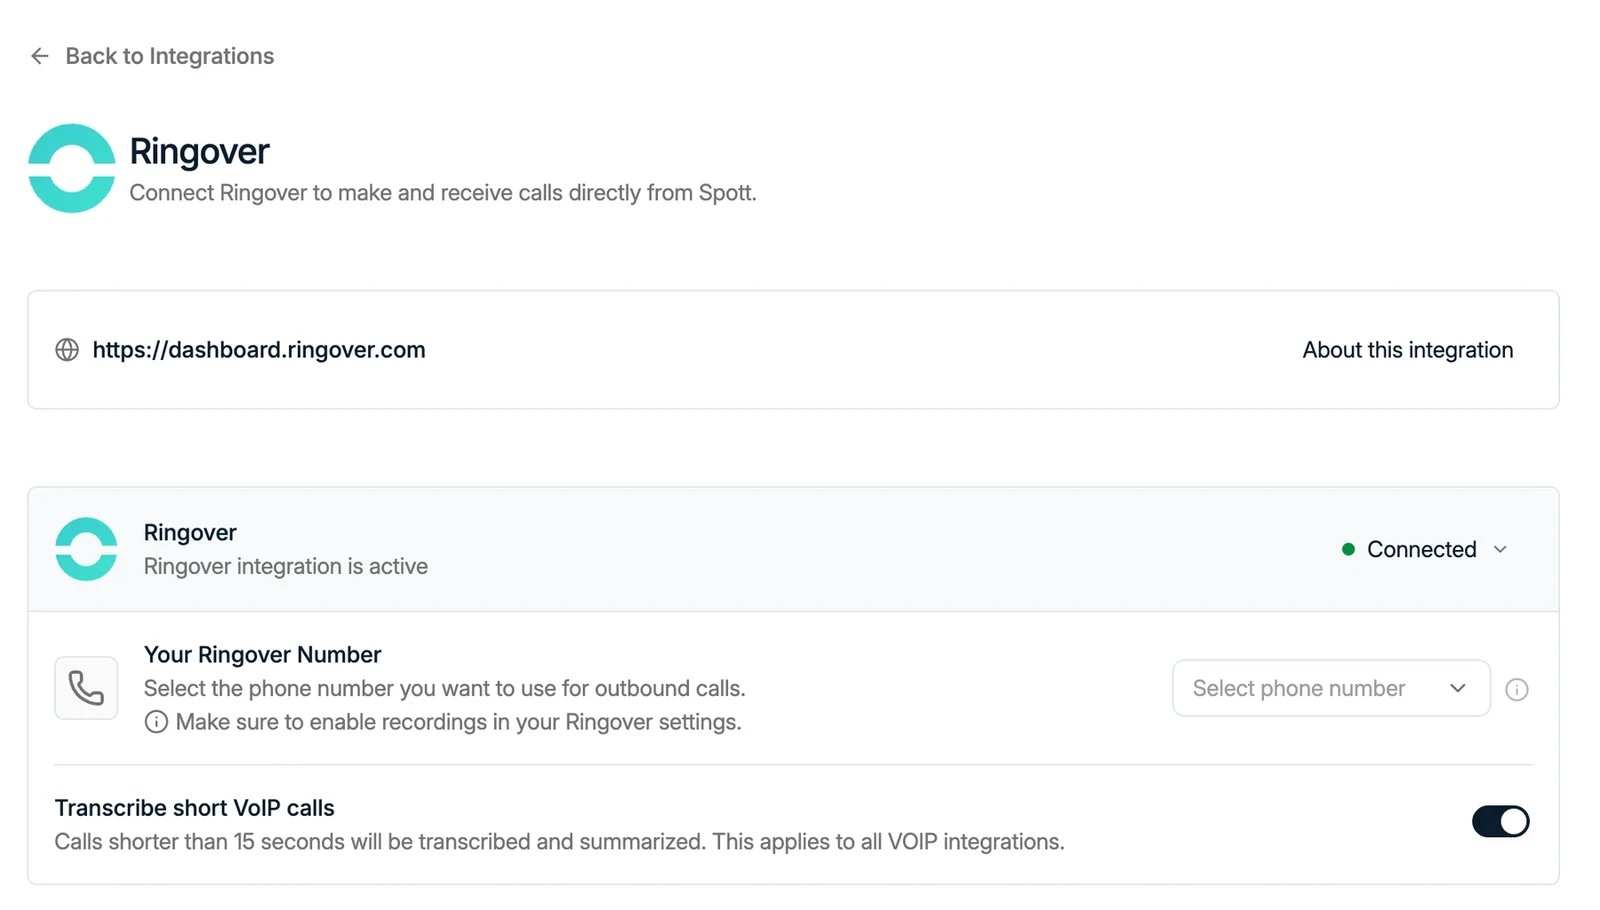
1. Go to **Settings → Personal → Calls**. You should now see Ringover listed as active.
2. Choose your Ringover number from the available list. This number is essential for receiving incoming calls and linking call notes to the correct caller.
Numbers must be assigned in Ringover by your admin before they appear here.
## Enable call recording in Ringover
Spott transcribes and summarizes the recordings Ringover makes, so **call recording must
be enabled in your Ringover dashboard**. Without it, calls still show up in the activity
feed, but no transcript or note is created.
Once connected, call data is synchronized automatically when calls end.
## Select your Ringover number
1. Go to **Settings → Personal → Calls**. You should now see Ringover listed as active.
2. Choose your Ringover number from the available list. This number is essential for receiving incoming calls and linking call notes to the correct caller.
Numbers must be assigned in Ringover by your admin before they appear here.
## Enable call recording in Ringover
Spott transcribes and summarizes the recordings Ringover makes, so **call recording must
be enabled in your Ringover dashboard**. Without it, calls still show up in the activity
feed, but no transcript or note is created.
Once connected, call data is synchronized automatically when calls end.