> ## Documentation Index
> Fetch the complete documentation index at: https://docs.spott.io/llms.txt
> Use this file to discover all available pages before exploring further.
# Searching & Filtering Candidates
> Find candidates with the search bar, Boolean queries, structured filters, and AI text to filters, and save your setup as a view.
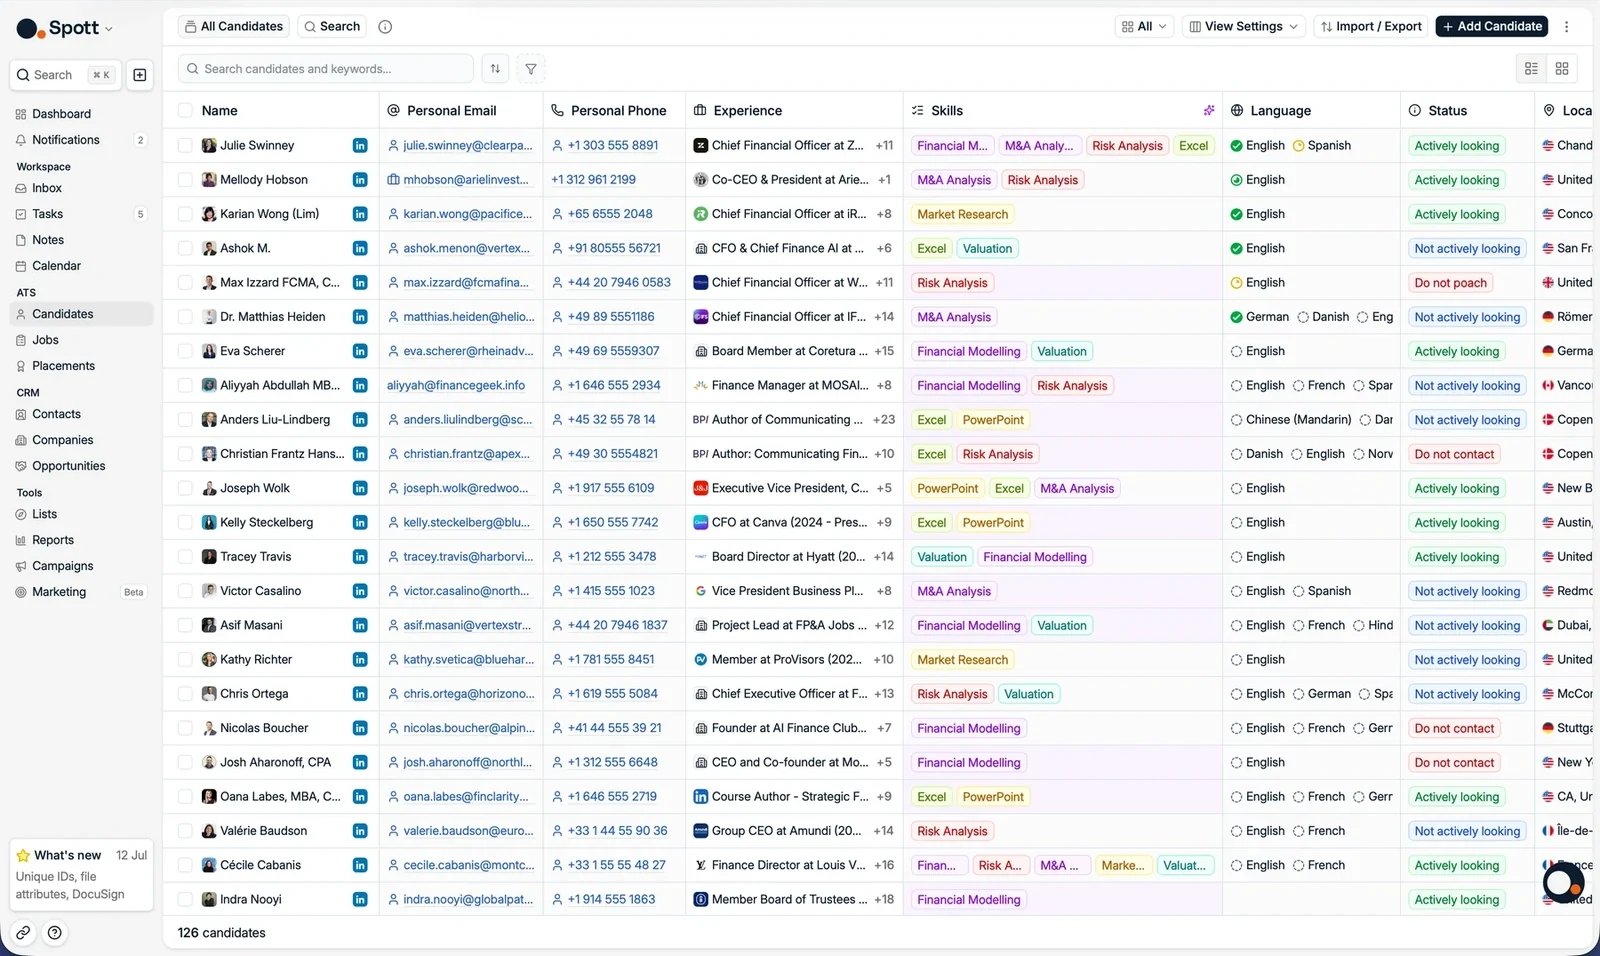
The Candidates page gives you three ways to find people: the search bar for quick lookups,
structured filters for precise slices of your database, and the **Search** tab for deep,
AI-powered sourcing across the whole pool.
Open the **Candidates** page from the left menu (shortcut: `G` then `A`; see all
[keyboard shortcuts](/docs/settings/keyboard-shortcuts)).
 ## Use the search bar
The search bar sits in the top left of the candidate table. Type a name or keyword to
narrow the list as you type.
Looking up who owns an **email address or phone number**? Use global search
(`⌘K` / `Ctrl+K`) instead. It finds the person an identifier belongs to across the
whole database.
### Boolean search
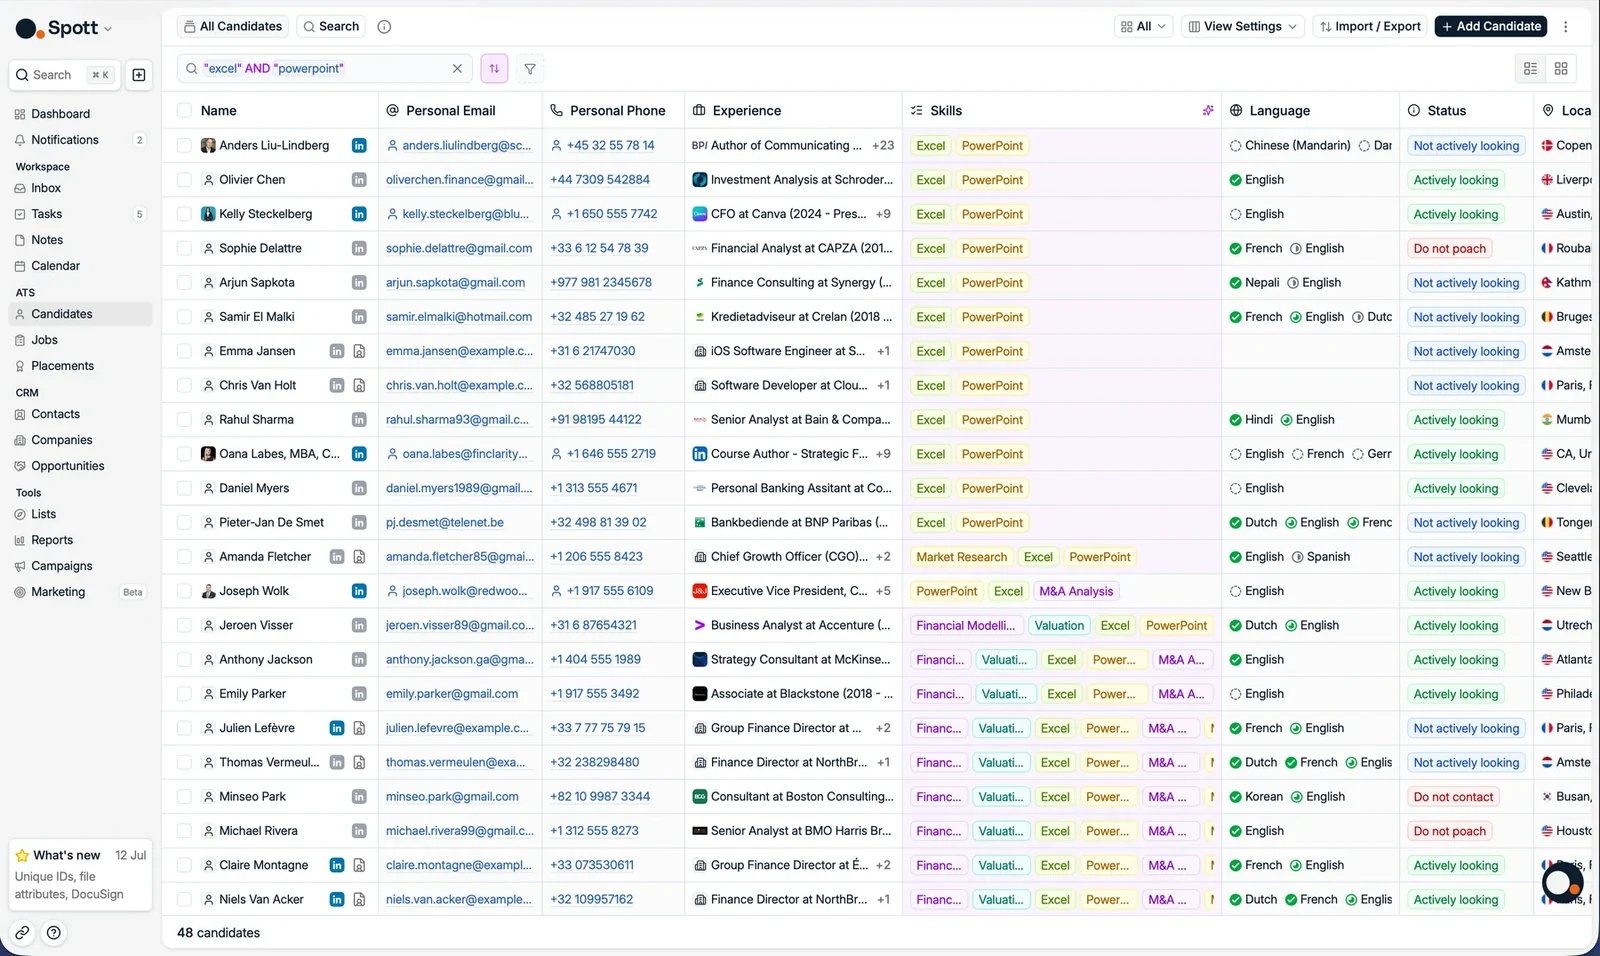
The search bar supports full Boolean queries with **AND**, **OR**, **NOT**, and
parentheses. Spott switches to Boolean mode automatically as soon as your query
contains double quotes:
```
("Java developer" OR "backend engineer") AND NOT "intern"
```
This gives you precise control when a plain keyword search returns too much.
## Use the search bar
The search bar sits in the top left of the candidate table. Type a name or keyword to
narrow the list as you type.
Looking up who owns an **email address or phone number**? Use global search
(`⌘K` / `Ctrl+K`) instead. It finds the person an identifier belongs to across the
whole database.
### Boolean search
The search bar supports full Boolean queries with **AND**, **OR**, **NOT**, and
parentheses. Spott switches to Boolean mode automatically as soon as your query
contains double quotes:
```
("Java developer" OR "backend engineer") AND NOT "intern"
```
This gives you precise control when a plain keyword search returns too much.
 ## Apply structured filters
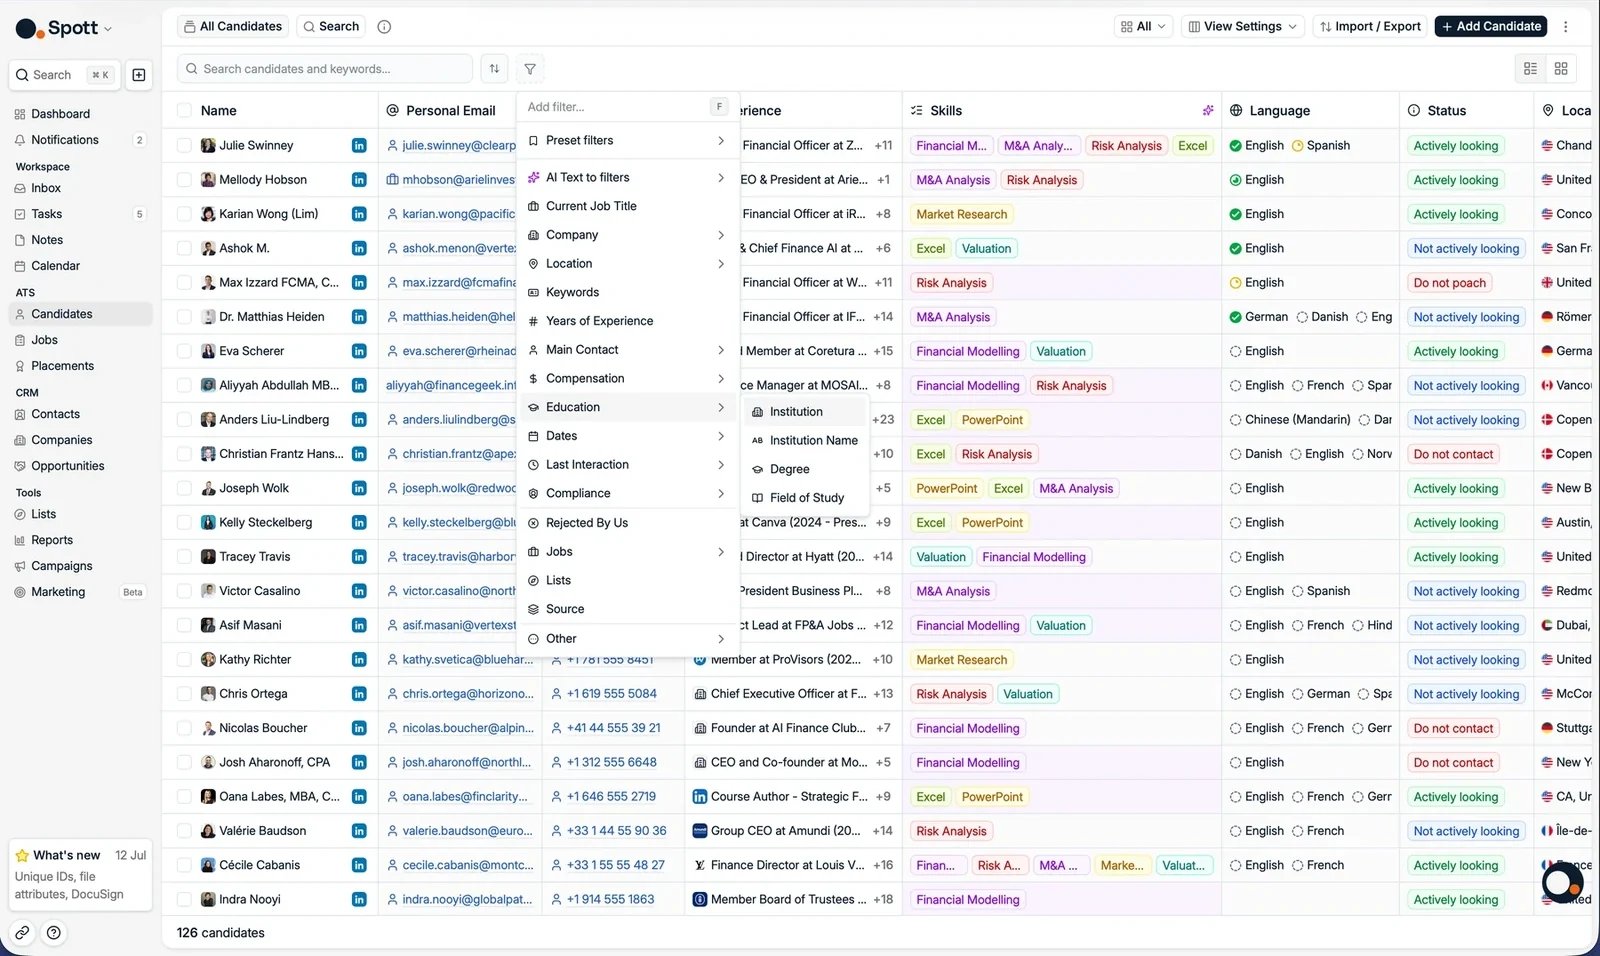
Click the **Filters** button above the table to add a filter. Filters are grouped by
the kind of data they match, including:
* **Current Job Title**, **Years of Experience**, and **Keywords**
* **Company**, with industry and past companies
* **Location** and **Education**
* **Compensation** and **Last Interaction**
* **Jobs**, **Lists**, and **Source**
* Any **custom fields** your workspace has configured
* **Compliance** filters such as consent status, when consent tracking is enabled
## Apply structured filters
Click the **Filters** button above the table to add a filter. Filters are grouped by
the kind of data they match, including:
* **Current Job Title**, **Years of Experience**, and **Keywords**
* **Company**, with industry and past companies
* **Location** and **Education**
* **Compensation** and **Last Interaction**
* **Jobs**, **Lists**, and **Source**
* Any **custom fields** your workspace has configured
* **Compliance** filters such as consent status, when consent tracking is enabled
 By default, results match **all** applied filters. Use the three-dot menu on an applied
filter to combine filters as **any** instead, for example "Paris or London".
A couple of filters people look for that do not exist as such:
* There is **no region-level filter**. To cover a region, add each country to a
**Location** filter set to match **any**, and save it as a view to reuse.
* There is **no "has received an email" filter**. Use **Last Interaction** to find
candidates you have or have not been in touch with recently.
**Location** is geocoded, so a **radius** search works and both "London" and "Greater
London" resolve to the same area.
### AI text to filters
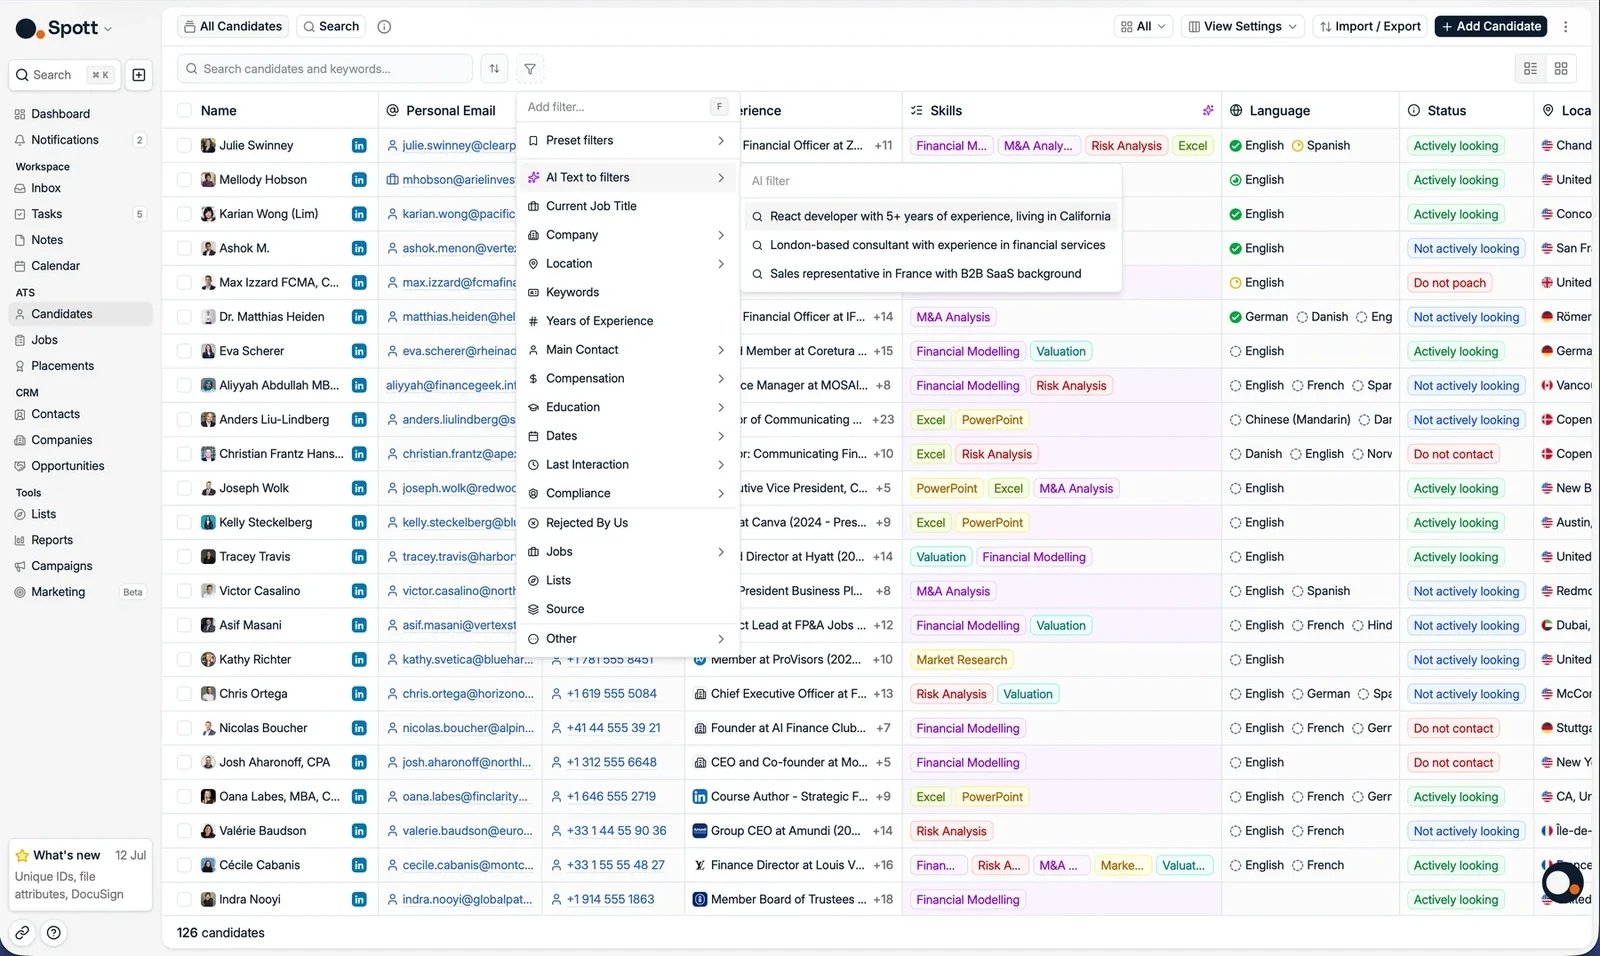
You do not need to know where each filter lives. Keep typing a description in the
filter box, for example "React developer with 5+ years of experience, living in
California", and Spott converts it into filters for you with **AI Text to filters**.
By default, results match **all** applied filters. Use the three-dot menu on an applied
filter to combine filters as **any** instead, for example "Paris or London".
A couple of filters people look for that do not exist as such:
* There is **no region-level filter**. To cover a region, add each country to a
**Location** filter set to match **any**, and save it as a view to reuse.
* There is **no "has received an email" filter**. Use **Last Interaction** to find
candidates you have or have not been in touch with recently.
**Location** is geocoded, so a **radius** search works and both "London" and "Greater
London" resolve to the same area.
### AI text to filters
You do not need to know where each filter lives. Keep typing a description in the
filter box, for example "React developer with 5+ years of experience, living in
California", and Spott converts it into filters for you with **AI Text to filters**.
 ## Deep sourcing with the Search tab
Where the search bar and filters match profile fields, **Search** runs an AI-ranked
search across every candidate in your database, including their notes and attachments.
Open it from **Search** under **Tools** in the left menu, or from the **Search** tab
next to **All candidates** at the top left of the Candidates page.
## Deep sourcing with the Search tab
Where the search bar and filters match profile fields, **Search** runs an AI-ranked
search across every candidate in your database, including their notes and attachments.
Open it from **Search** under **Tools** in the left menu, or from the **Search** tab
next to **All candidates** at the top left of the Candidates page.
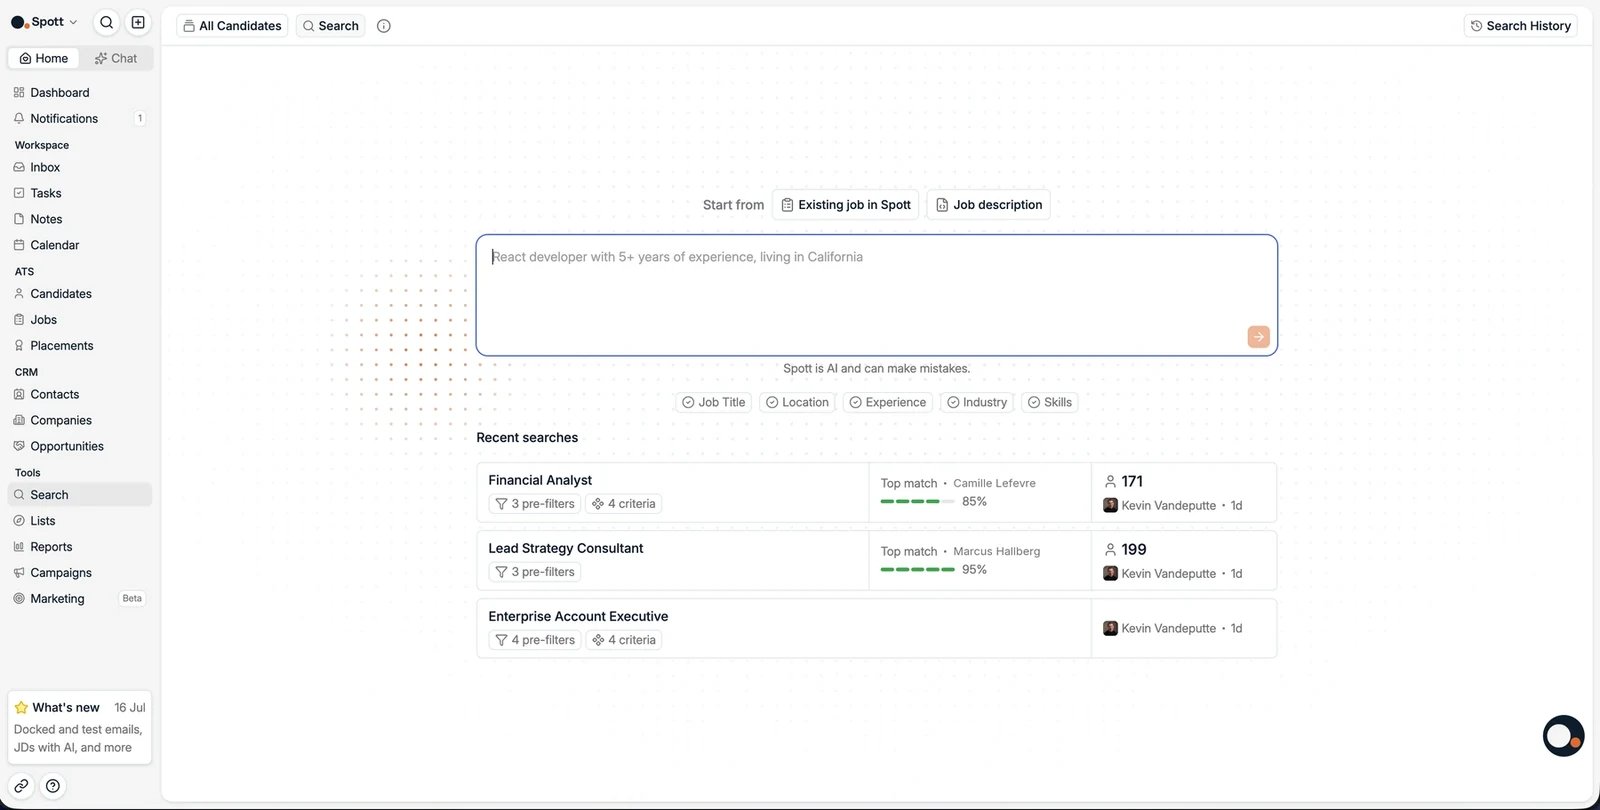 Describe your ideal profile in your own words, or use **Start from** to base the search
on an existing job in Spott or on a pasted job description. Spott turns your input into
pre-filters and criteria that you review before running the search, then ranks the
results by match score.
The tags under the prompt box, for example **Job Title**, **Location**, and
**Experience**, light up as Spott recognises those details in your description. They let
you check what was picked up before you run the search.
### Recent searches and history
Your recent searches sit under the prompt box, each with its pre-filters and criteria,
its top match, and the number of candidates found. Click one to reopen it instead of
describing the profile again. **Search History**, in the top right, shows the full list.
### Reading the results
Search and [Matching](/docs/jobs/matching) run on the same engine and return the same
result table. How the two halves of a search work together is explained in full there:
Why pre-filters narrow the pool and criteria rank what is left.
Scores from 0 to 100, the thumbs rating per criterion, and the reasoning behind them.
The difference is the starting point. Matching builds the search from a job's context
automatically, so use it when you are filling a specific role. Use Search when you want
to explore your database without tying the search to a job.
The **pre-filters** and **criteria** chips above the results stay editable. Open either
one to adjust the search and run it again, rather than describing the profile from
scratch.
### Act on the results
Work through the list with the **All**, **To Review**, and **Reviewed** tabs. Tick the
candidates you want, and an action bar appears at the bottom of the table.
Describe your ideal profile in your own words, or use **Start from** to base the search
on an existing job in Spott or on a pasted job description. Spott turns your input into
pre-filters and criteria that you review before running the search, then ranks the
results by match score.
The tags under the prompt box, for example **Job Title**, **Location**, and
**Experience**, light up as Spott recognises those details in your description. They let
you check what was picked up before you run the search.
### Recent searches and history
Your recent searches sit under the prompt box, each with its pre-filters and criteria,
its top match, and the number of candidates found. Click one to reopen it instead of
describing the profile again. **Search History**, in the top right, shows the full list.
### Reading the results
Search and [Matching](/docs/jobs/matching) run on the same engine and return the same
result table. How the two halves of a search work together is explained in full there:
Why pre-filters narrow the pool and criteria rank what is left.
Scores from 0 to 100, the thumbs rating per criterion, and the reasoning behind them.
The difference is the starting point. Matching builds the search from a job's context
automatically, so use it when you are filling a specific role. Use Search when you want
to explore your database without tying the search to a job.
The **pre-filters** and **criteria** chips above the results stay editable. Open either
one to adjust the search and run it again, rather than describing the profile from
scratch.
### Act on the results
Work through the list with the **All**, **To Review**, and **Reviewed** tabs. Tick the
candidates you want, and an action bar appears at the bottom of the table.
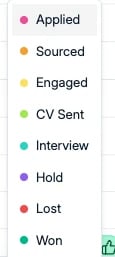
 * **Accept** moves the selected candidates into a pipeline. A stage picker opens so you
choose where they land, using the [stages](/docs/settings/stages) your workspace has
configured.
* **Mark as reviewed** moves them to the Reviewed tab, so you can keep working through
the ones you have not judged yet.
* **Candidate Actions** and **Communication Actions** hold the bulk operations on the
selected records.
* **Enrich** looks up missing emails and phone numbers for the selection. See
[contact enrichment](/docs/candidates/contact-enrichment).
* **Accept** moves the selected candidates into a pipeline. A stage picker opens so you
choose where they land, using the [stages](/docs/settings/stages) your workspace has
configured.
* **Mark as reviewed** moves them to the Reviewed tab, so you can keep working through
the ones you have not judged yet.
* **Candidate Actions** and **Communication Actions** hold the bulk operations on the
selected records.
* **Enrich** looks up missing emails and phone numbers for the selection. See
[contact enrichment](/docs/candidates/contact-enrichment).
 Use **Share Search**, in the top right, to hand the search over to a colleague.
## Save filters into Views
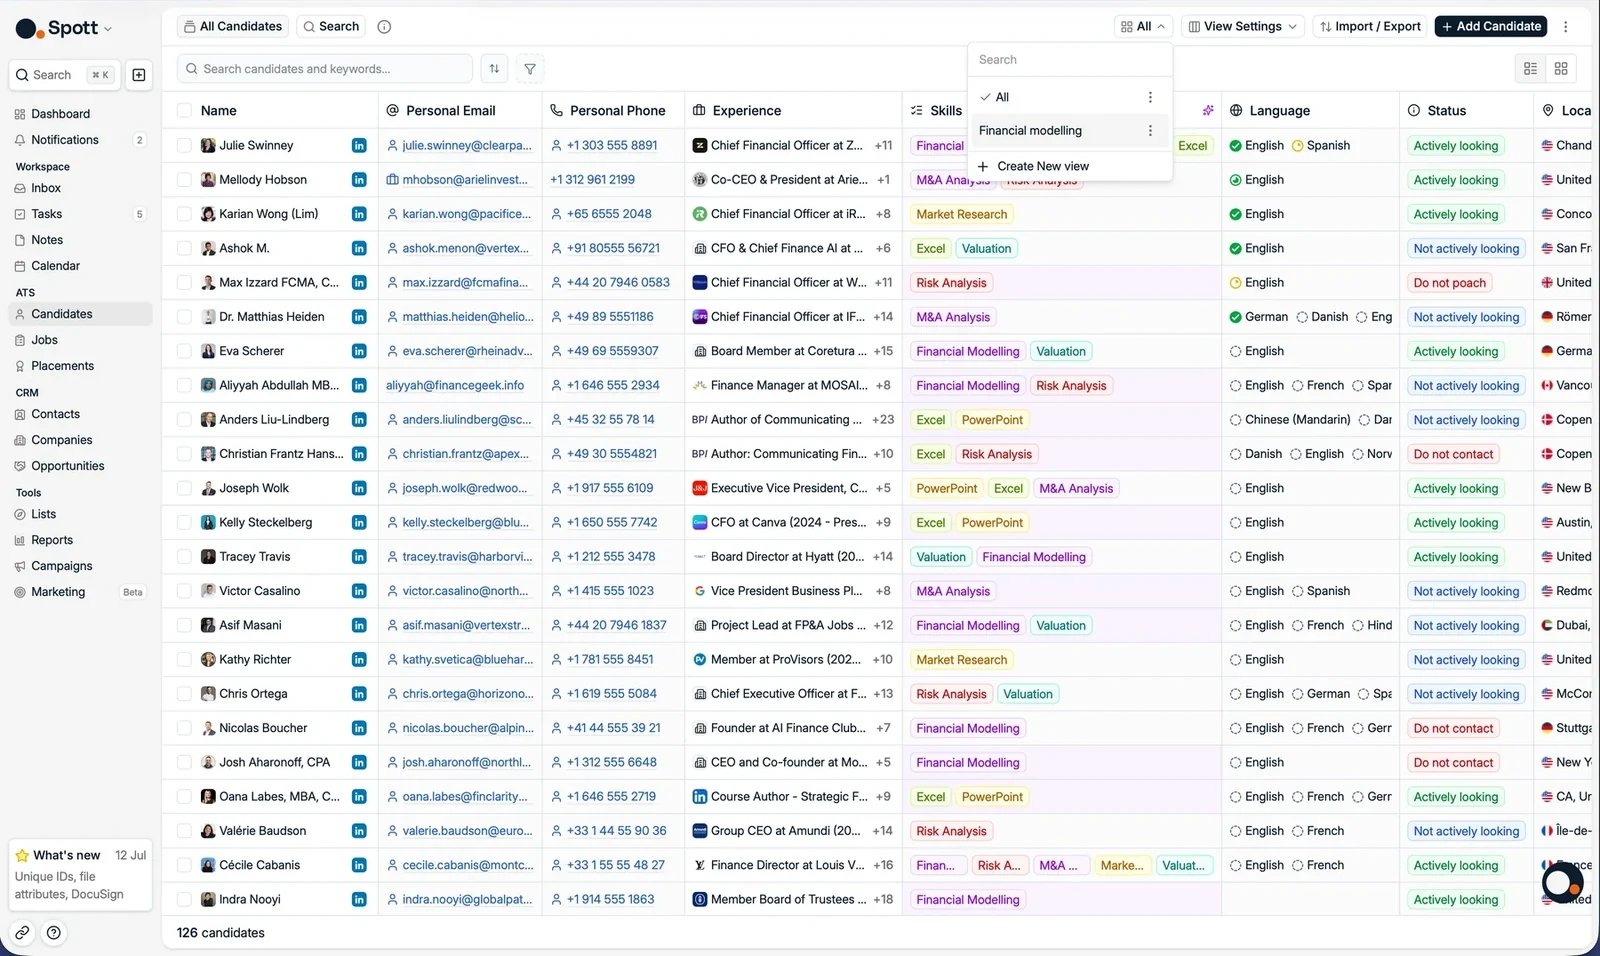
Save a set of filters as a view to come back to it later. You can create as many views
as you want:
* Click the view picker (it shows **All** at first)
* Set your filters
* Click **Save view**
* The saved view is now available from the dropdown
When you change filters, sorts, or columns on a view, a save / discard prompt appears
at the top of the table. Changes only stick after you save them.
Use **Share Search**, in the top right, to hand the search over to a colleague.
## Save filters into Views
Save a set of filters as a view to come back to it later. You can create as many views
as you want:
* Click the view picker (it shows **All** at first)
* Set your filters
* Click **Save view**
* The saved view is now available from the dropdown
When you change filters, sorts, or columns on a view, a save / discard prompt appears
at the top of the table. Changes only stick after you save them.
 ## Organize results
* By default the table is sorted by **last activity**, so recently active candidates
come first.
* Sort on any sortable column from its header menu. Sorts are saved as part of the view.
* Results in the Search tab and in matching are always ranked by **match score**.
* Clear all filters to return to the full candidate list.
## Organize results
* By default the table is sorted by **last activity**, so recently active candidates
come first.
* Sort on any sortable column from its header menu. Sorts are saved as part of the view.
* Results in the Search tab and in matching are always ranked by **match score**.
* Clear all filters to return to the full candidate list.