> ## Documentation Index
> Fetch the complete documentation index at: https://docs.spott.io/llms.txt
> Use this file to discover all available pages before exploring further.
# CVs & Client Documents
> Generate a formatted CV, a candidate report, or a shortlist in your own Word template.
Before a candidate goes to a client, Spott can write the document for you, in your own
Word template rather than whatever the candidate happened to send you. There are three
of them:
| Document | What it is | Where you start it |
| -------------------- | ---------------------------------------------------- | --------------------- |
| **Formatted CV** | The candidate's CV rebuilt in your template | The candidate profile |
| **Candidate report** | A written introduction of one candidate for a client | The Present dialog |
| **Shortlist** | One document covering several candidates for a role | The Candidates table |
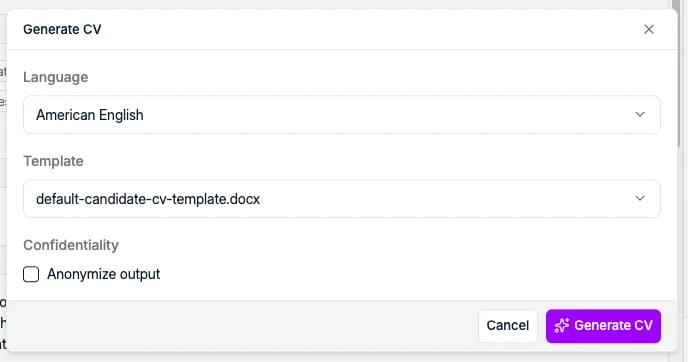
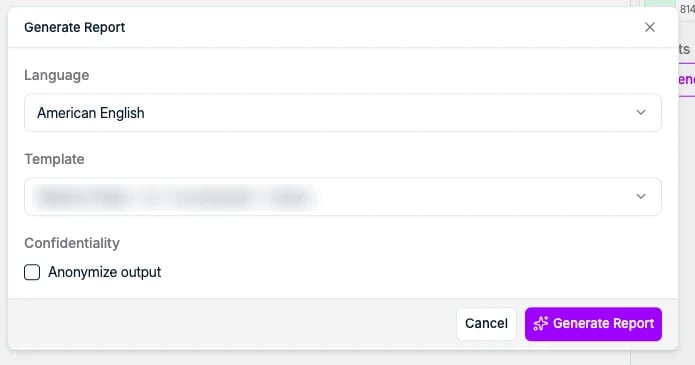
All three ask you the same three things before they run:
* **Language**, for example American English or French, so the same profile can go to
one client in English and another in French.
* **Template**, the Word template to build the document with. These are configured for
your workspace. See
[CV and report templates](/docs/settings/templates#cv-and-report-templates) for how to
get your own in.
* **Anonymize output**, to leave the candidate's identity out of the document, for when
you share a profile before terms are agreed.
## Formatted CV
A **formatted CV** is the candidate's own CV rebuilt in your layout, so every CV you
send a client looks the same regardless of what the candidate uploaded.
Start it in either place on the candidate profile. **Generate CV** sits with the other
buttons at the top of the [Experience subtab](/docs/candidates/managing-candidates):
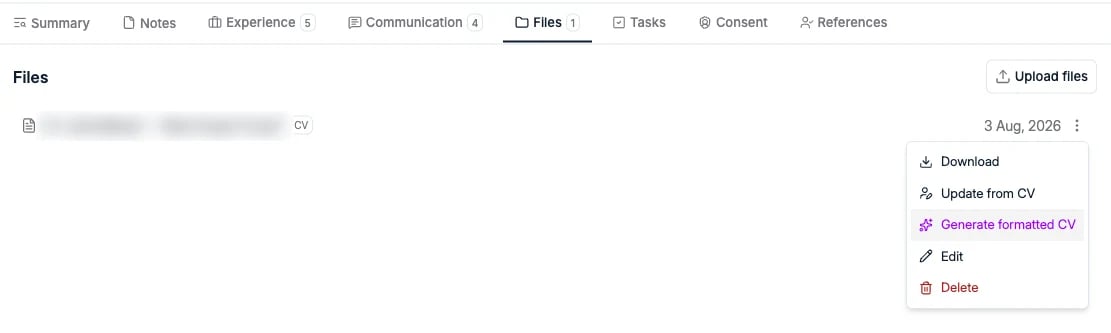
 Or open the three dots next to a CV in the **Files** subtab and choose **Generate
formatted CV**, which is the one to use when a candidate has several CVs on file and
you want a specific one as the source:
Or open the three dots next to a CV in the **Files** subtab and choose **Generate
formatted CV**, which is the one to use when a candidate has several CVs on file and
you want a specific one as the source:
 Either way you land in the same dialog:
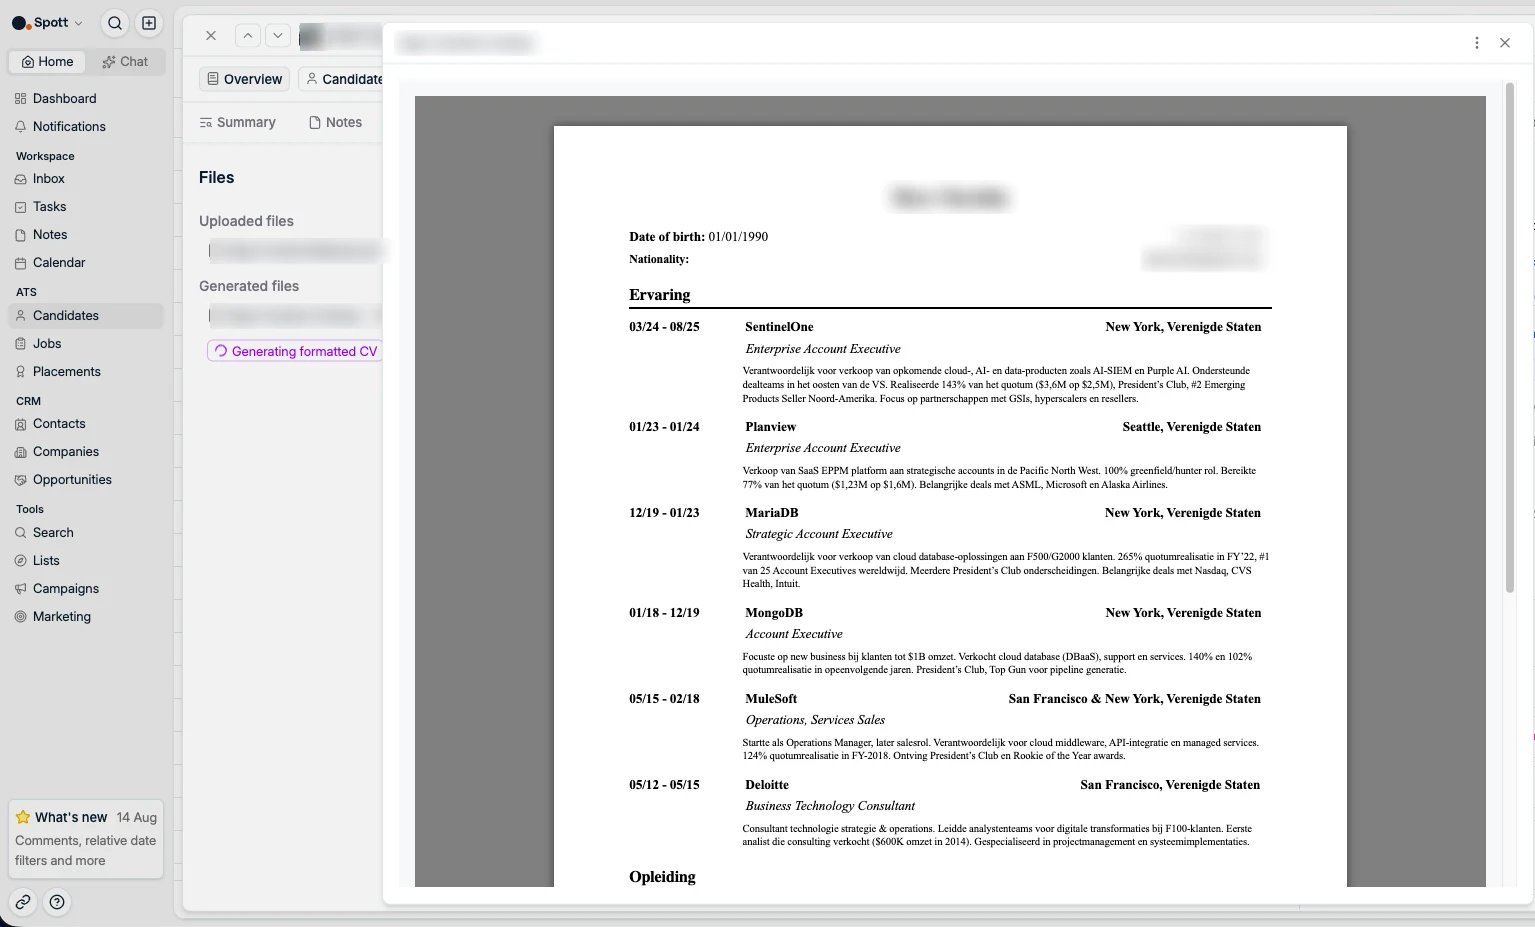
 Generation runs in the background. The **Files** subtab splits into **Uploaded files**
and **Generated files**, with a **Generating formatted CV** marker while it works, and
the finished `.docx` appears under Generated files. Click it to preview the document
without downloading it.
Generation runs in the background. The **Files** subtab splits into **Uploaded files**
and **Generated files**, with a **Generating formatted CV** marker while it works, and
the finished `.docx` appears under Generated files. Click it to preview the document
without downloading it.
 Generate the CV once the profile is complete. It is written from the data on the
record, not from the uploaded file, so a missing employer or a half-filled education
line shows up in the document. See
[updating a profile from a CV](/docs/candidates/update-profile-from-cv).
## Candidate report
A **candidate report** introduces one candidate to a client. Where the formatted CV is
the candidate's own history in your layout, the report is the write-up around it:
personal information, their current position (title, company, team), and contract
details such as salary and notice period.
You generate it while [presenting a candidate](/docs/candidates/presenting-candidates).
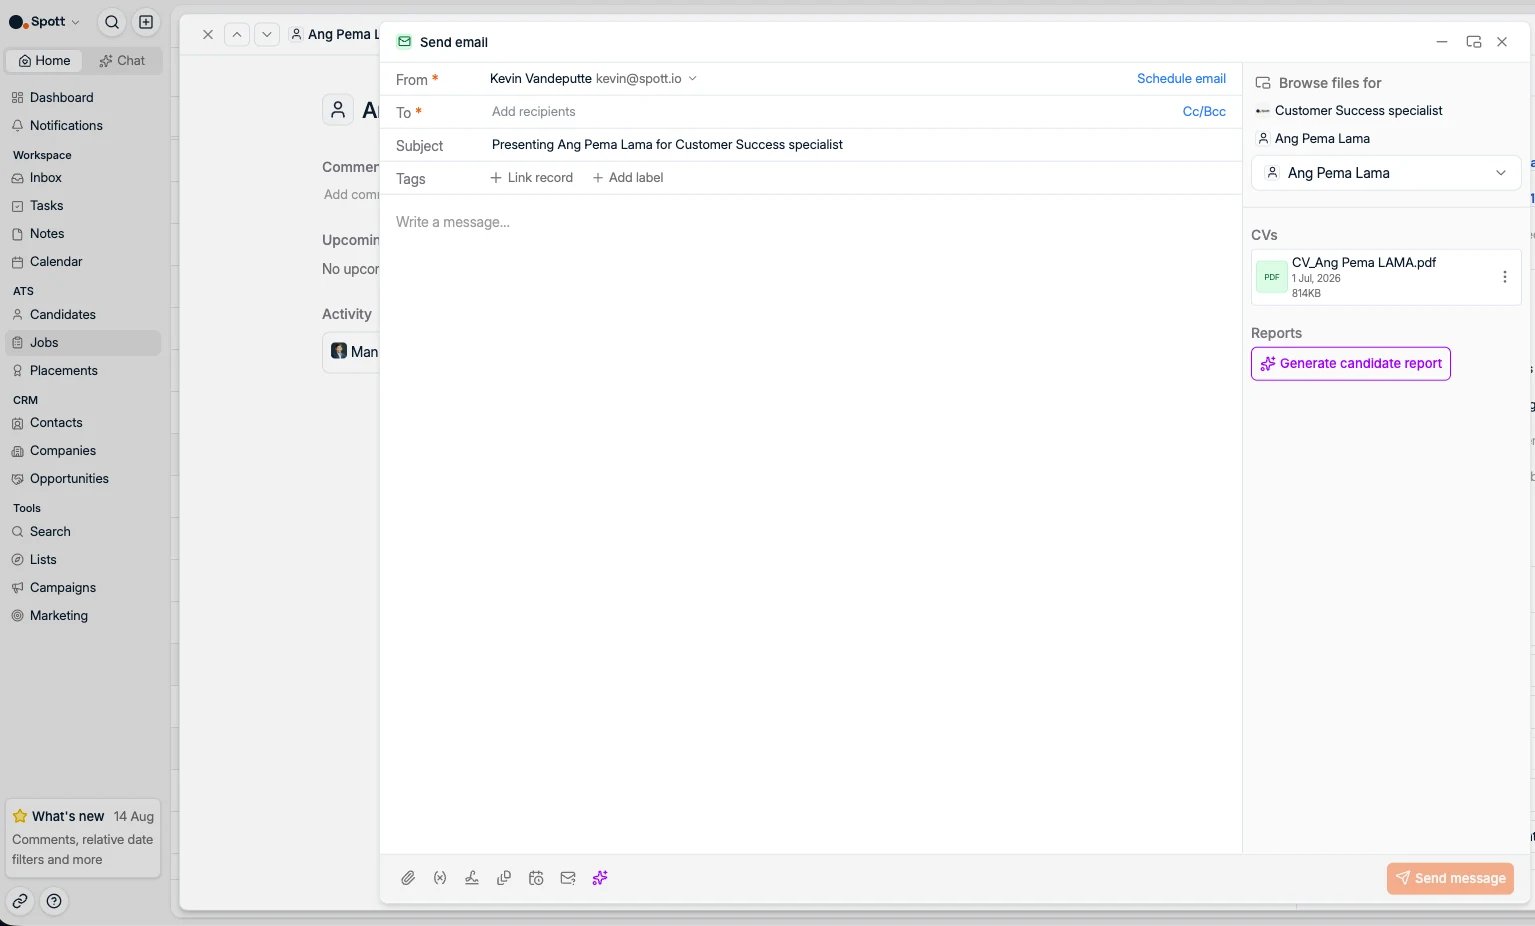
In the attachments panel on the right, under **Reports**, click **Generate candidate
report**:
Generate the CV once the profile is complete. It is written from the data on the
record, not from the uploaded file, so a missing employer or a half-filled education
line shows up in the document. See
[updating a profile from a CV](/docs/candidates/update-profile-from-cv).
## Candidate report
A **candidate report** introduces one candidate to a client. Where the formatted CV is
the candidate's own history in your layout, the report is the write-up around it:
personal information, their current position (title, company, team), and contract
details such as salary and notice period.
You generate it while [presenting a candidate](/docs/candidates/presenting-candidates).
In the attachments panel on the right, under **Reports**, click **Generate candidate
report**:
 The dialog matches the CV one, with its own set of report templates:
 Finished reports stay under **Reports** in that panel, so you can attach one you made
earlier instead of generating it again.
## Shortlist
When you want to send a client several candidates in one document instead of one
presentation per person, generate a **shortlist**. Select the candidates in the
Candidates table, open **Candidate Actions** in the bar at the bottom, and choose
**Generate Shortlist**.
Finished reports stay under **Reports** in that panel, so you can attach one you made
earlier instead of generating it again.
## Shortlist
When you want to send a client several candidates in one document instead of one
presentation per person, generate a **shortlist**. Select the candidates in the
Candidates table, open **Candidate Actions** in the bar at the bottom, and choose
**Generate Shortlist**.
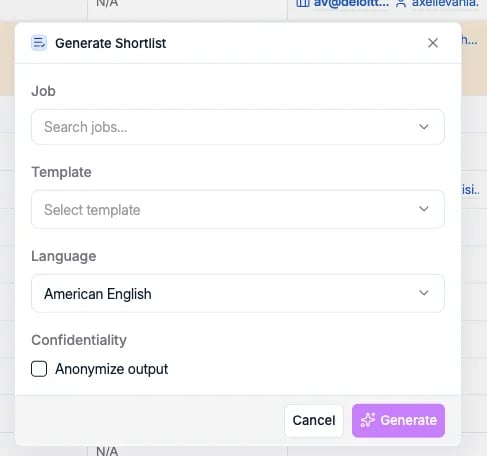 Alongside the language, template, and anonymize choices, a shortlist also asks for the
**Job** it is for, which appears on the cover page.
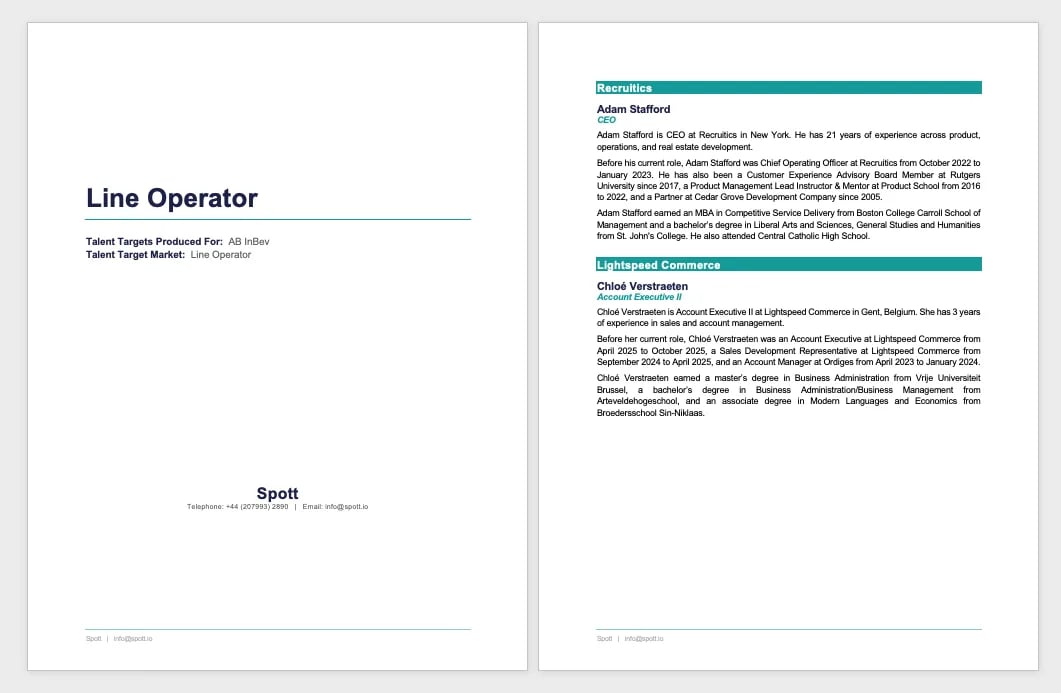
Click **Generate**. Spott writes a **Word document** with a cover page for the client
and role, then a written profile per candidate: their current position, career history,
and education, grouped by company.
Alongside the language, template, and anonymize choices, a shortlist also asks for the
**Job** it is for, which appears on the cover page.
Click **Generate**. Spott writes a **Word document** with a cover page for the client
and role, then a written profile per candidate: their current position, career history,
and education, grouped by company.
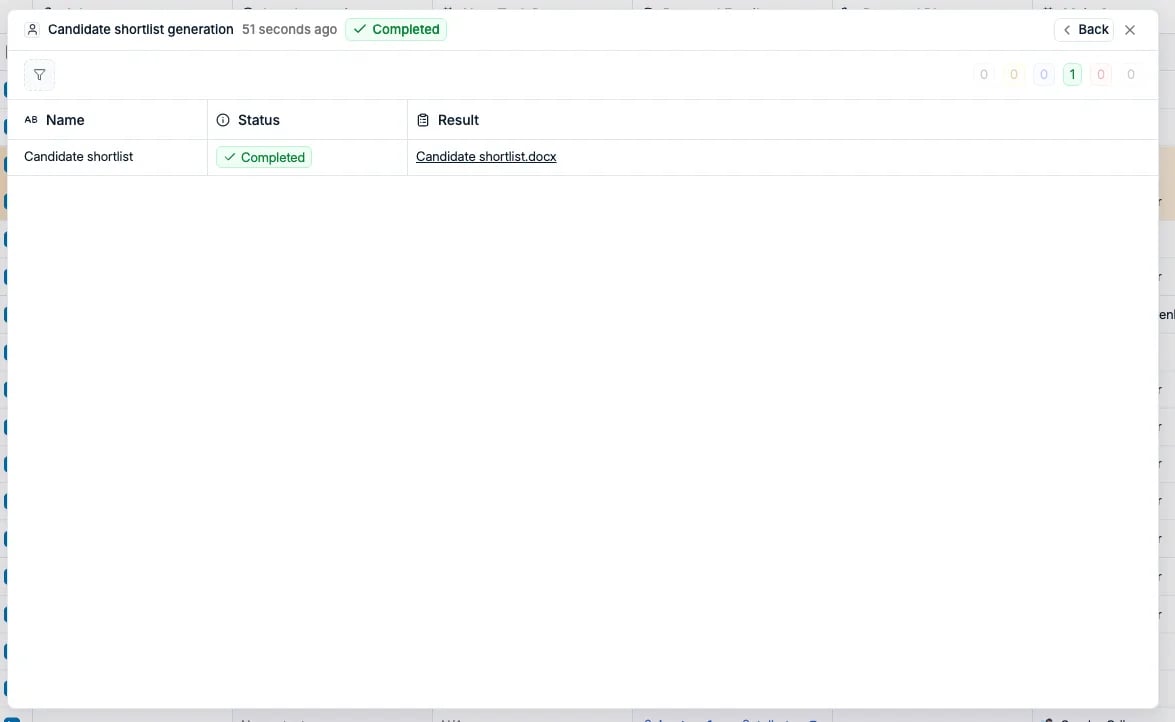
 Follow the run in **Background Actions**: the entry moves from **Queued** to
**Completed**, and the finished `.docx` appears under **Result** to download.
Follow the run in **Background Actions**: the entry moves from **Queued** to
**Completed**, and the finished `.docx` appears under **Result** to download.
 ## When the document does not look right
The layout, the section order, and the wording all come from your workspace template,
not from the individual document, so a formatting problem you see on one candidate
applies to all of them. Two things to check before reporting it:
* **Is the data on the record correct?** Sections are written from the profile, so a
wrong job title in the document is usually a wrong job title on the record.
* **Is the section in your template?** Every section in the template is always rendered
and nothing is added beyond it, so a missing block means it is missing from the
template.
If the template itself needs to change, email
[support@spott.io](mailto:support@spott.io) with the exact candidate you tested on. See
[CV and report templates](/docs/settings/templates#cv-and-report-templates).
## When the document does not look right
The layout, the section order, and the wording all come from your workspace template,
not from the individual document, so a formatting problem you see on one candidate
applies to all of them. Two things to check before reporting it:
* **Is the data on the record correct?** Sections are written from the profile, so a
wrong job title in the document is usually a wrong job title on the record.
* **Is the section in your template?** Every section in the template is always rendered
and nothing is added beyond it, so a missing block means it is missing from the
template.
If the template itself needs to change, email
[support@spott.io](mailto:support@spott.io) with the exact candidate you tested on. See
[CV and report templates](/docs/settings/templates#cv-and-report-templates).